Welcome to Padlet for Schools for administrators! (for padlet.com accounts)
Thank you for choosing Padlet for Schools! This will be the go-to resource for all of your Admin needs.
Teachers can access the Welcome to Padlet for Schools for Teachers guide and Students can read over the Getting started with Padlet - Student Edition. These will be the go-to resources for the other members of your school!
Access your account
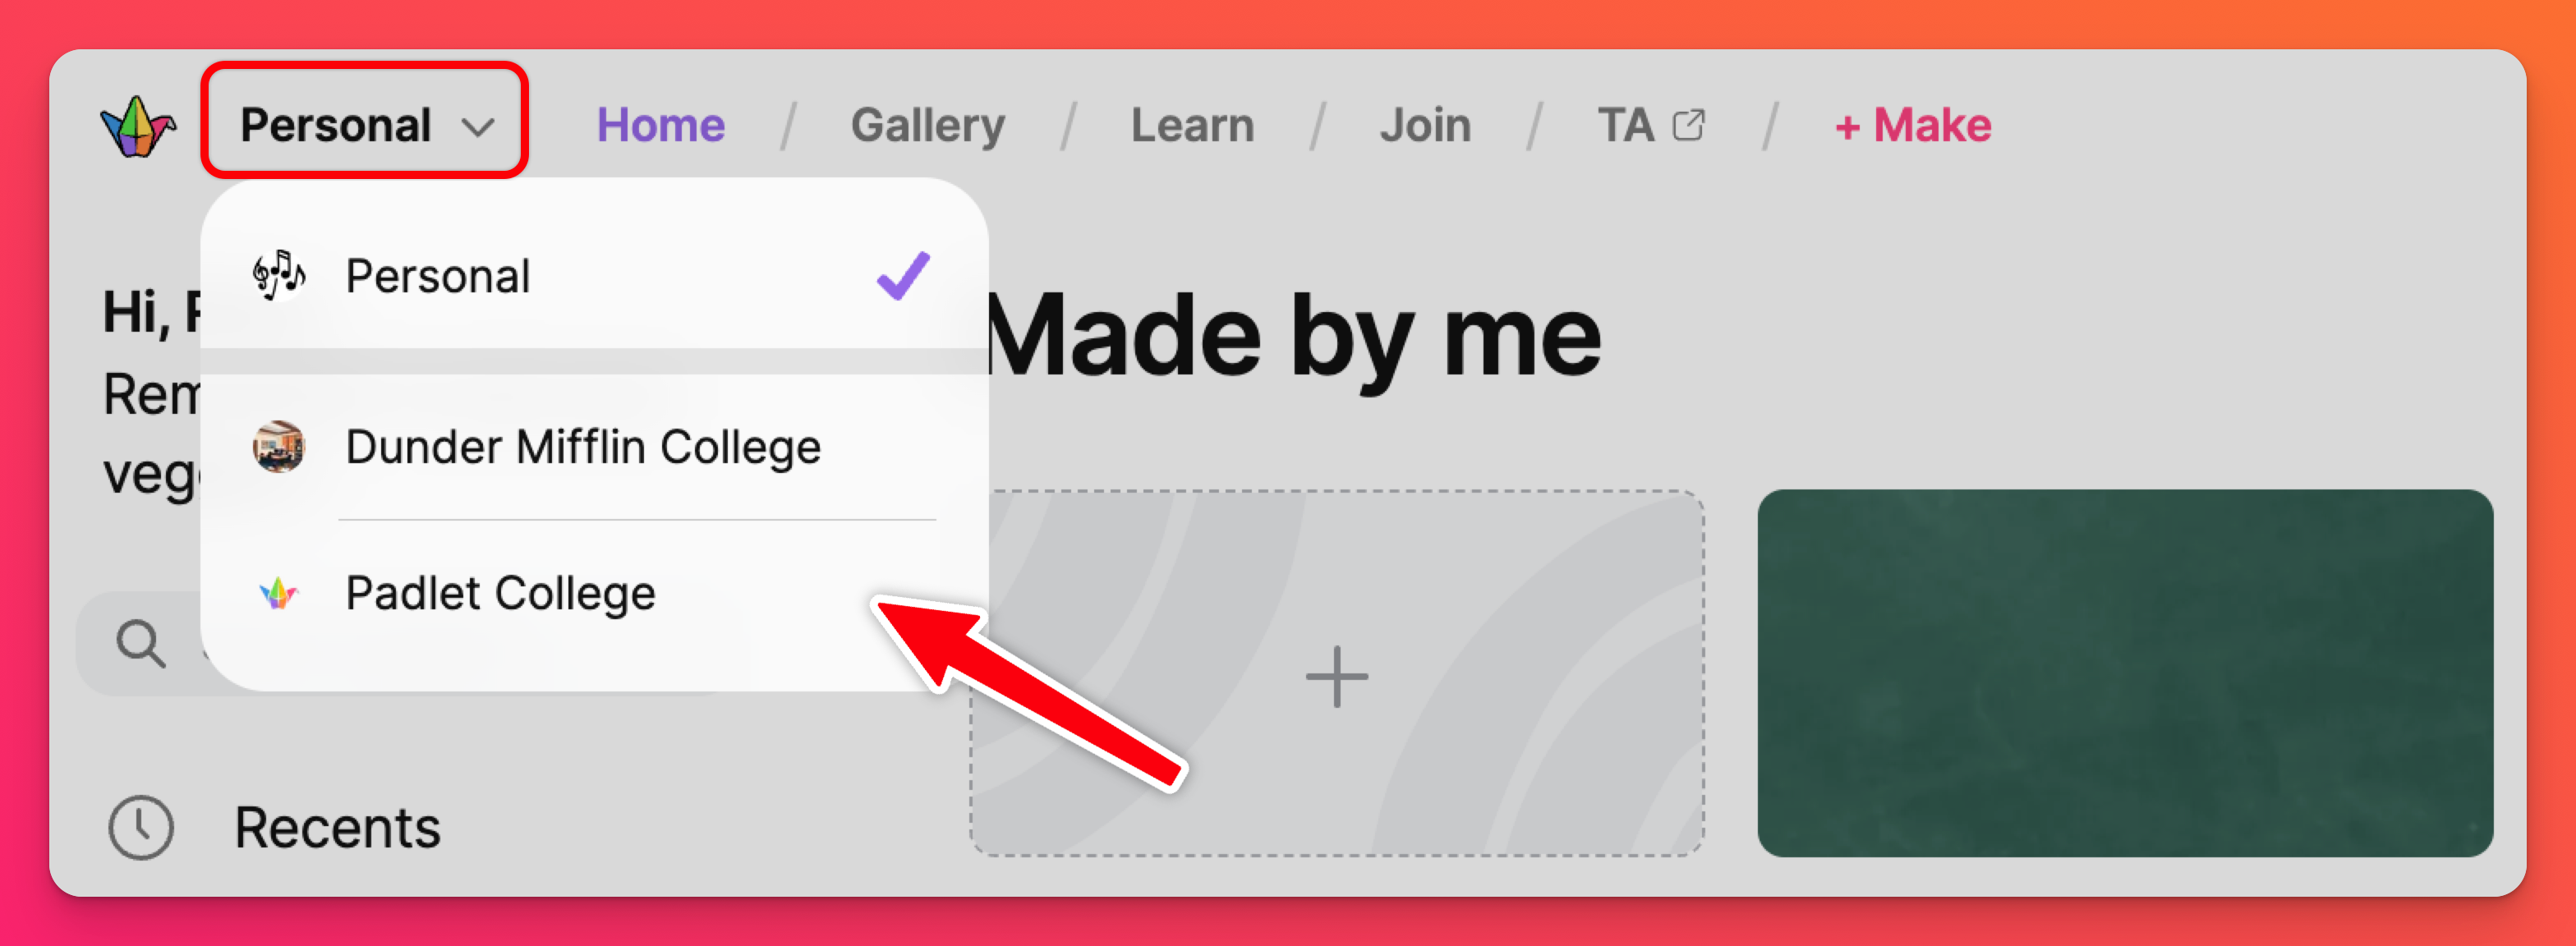
Once you are signed into your account at padlet.com, be sure you are viewing your Padlet for Schools workspace by looking at your account menu (at the top-left of your dashboard). If you don't see your school's account displayed, click the drop-down and select it!
Read more about navigating between accounts here.
Transfer your padlets
If you used the same email address for your personal account and your Padlet for Schools account, you can easily move your padlets from your dashboard.
If you choose to transfer your padlets later, just follow these steps!
- Click on your account menu in the upper-left side of your dashboard and select your Personal workspace.
- Then, click on your Made by me folder on the left-hand side of your dashboard.
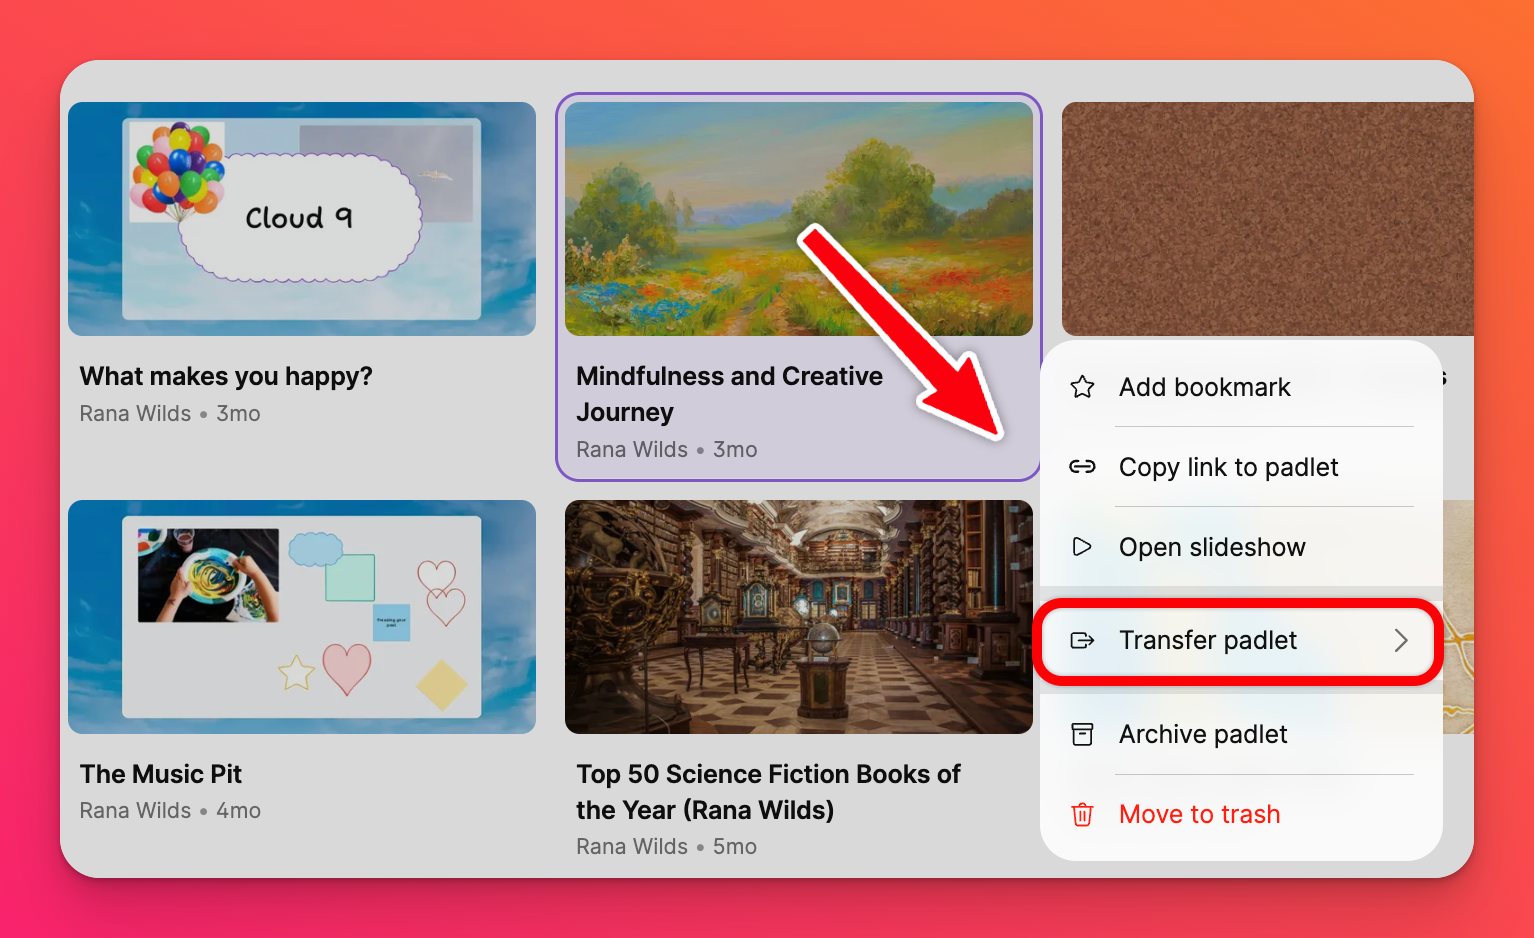
- Click the vertical three-dot ellipsis button (...) on the padlet's thumbnail and select Transfer padlet.
- Choose your School workspace from the list and the padlet will automatically transfer.
Manage settings
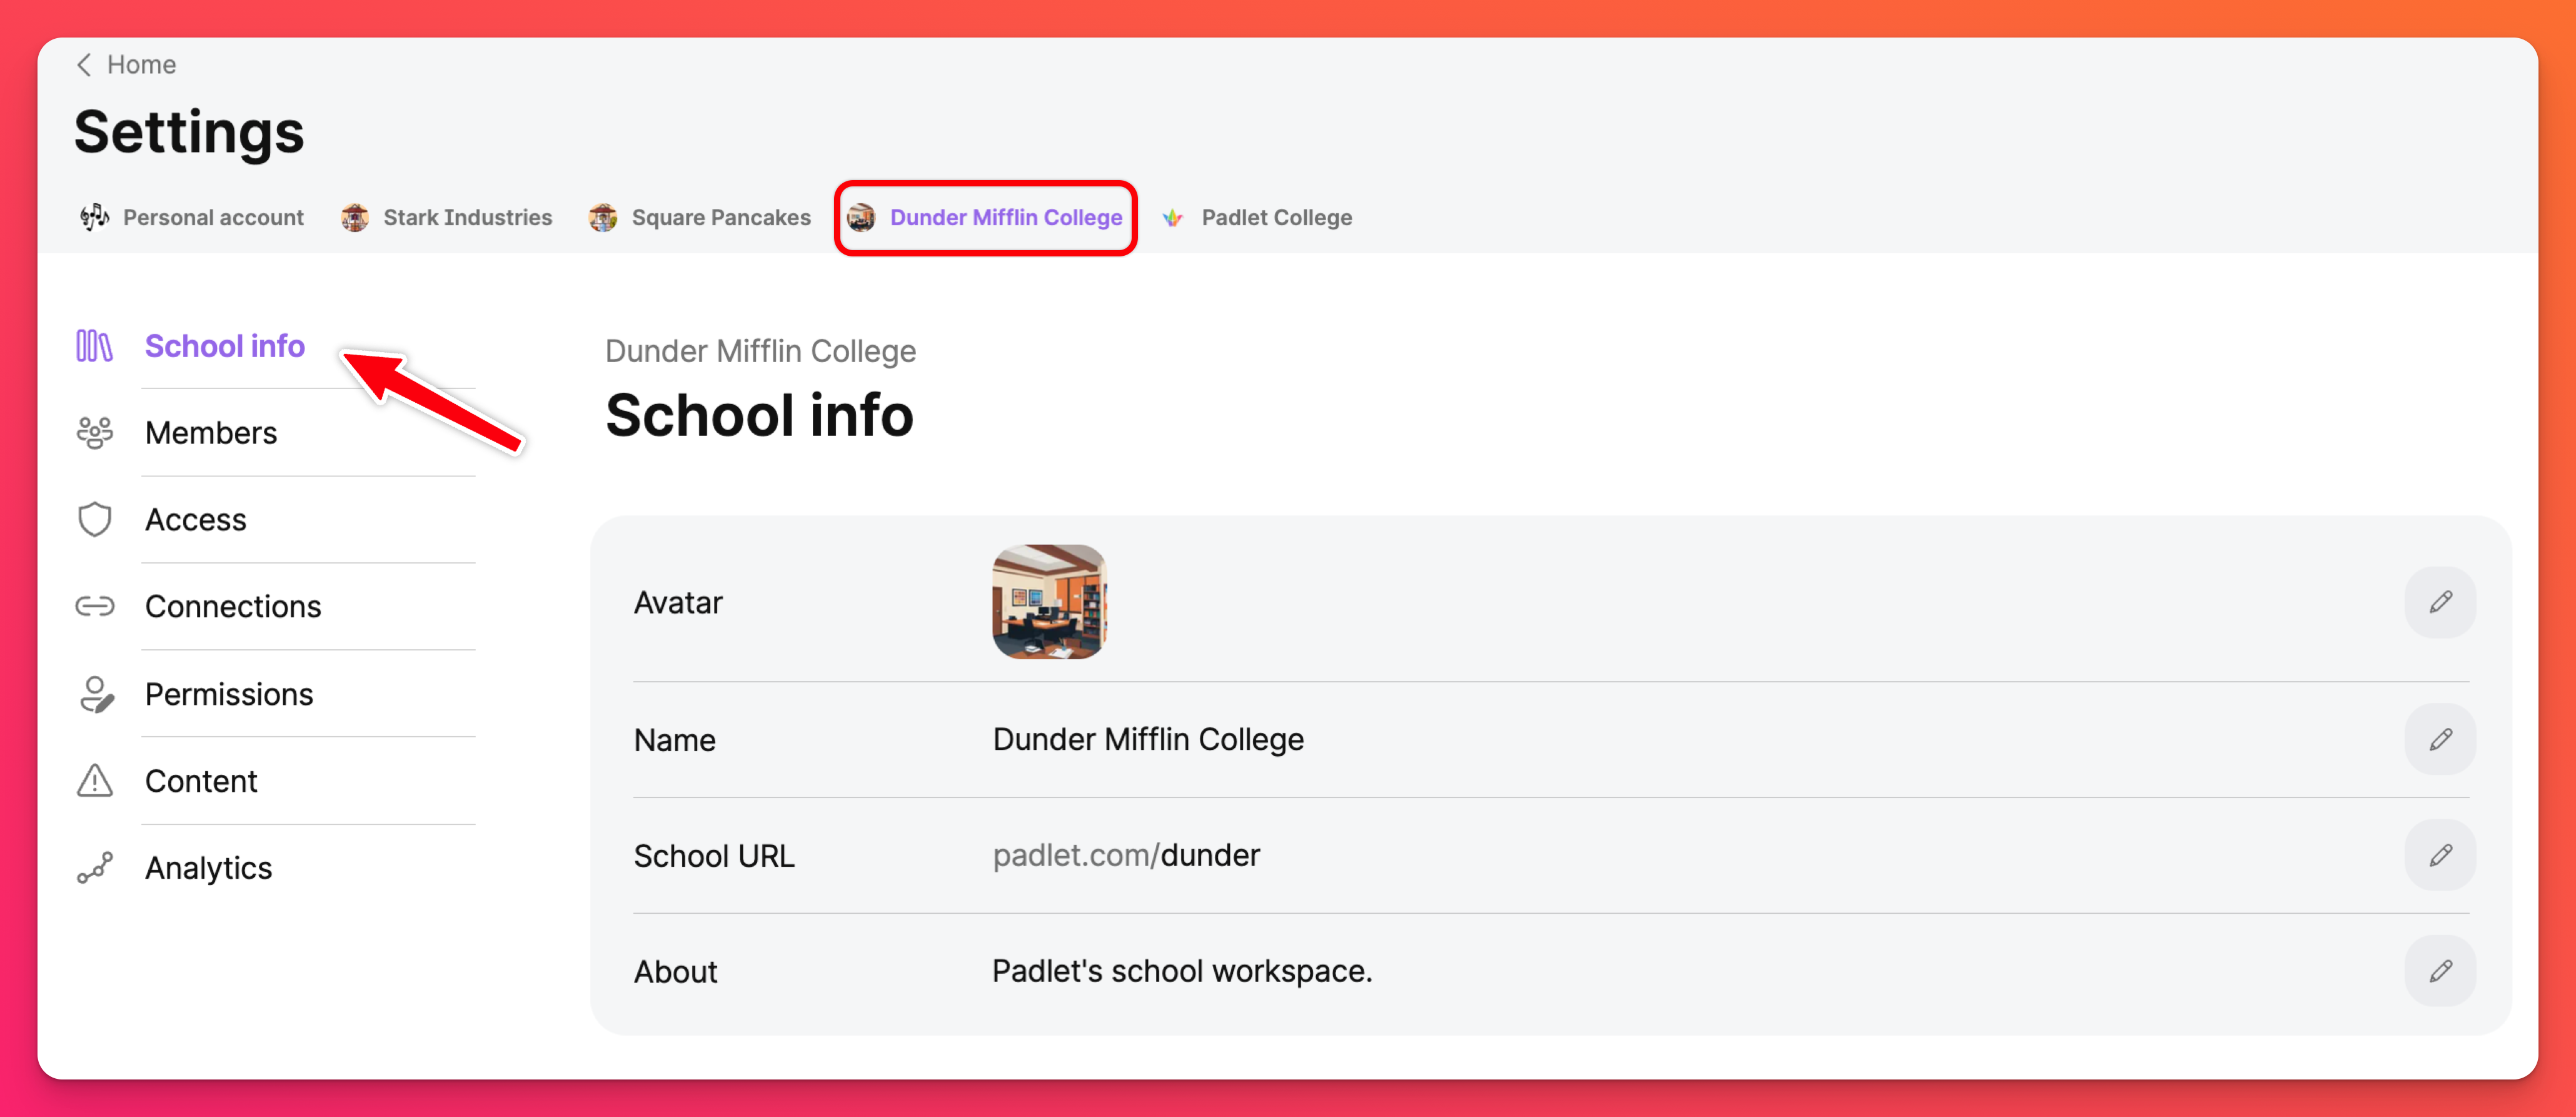
The owner and all account admins (yes, you can have more than one) share similar access to your account settings. To access your settings, click on the Settings cog icon in the top-right corner of your dashboard. Then, select your school's workspace at the top.
School info
In the panel on the left side of the Settings page, click School info. This is where you can change your avatar/logo, the name of your account and your LTI connector (if you wish to use one).
You can integrate Padlet with your school’s Learning Management System (LMS) platform using our LTI connectors free of charge! This allows teachers to easily add padlets as assignments to the LMS. An account is automatically created for students if they do not have one when they access the assignment from the LMS. Check out the instructions below for the LMS you are interested in.
Members
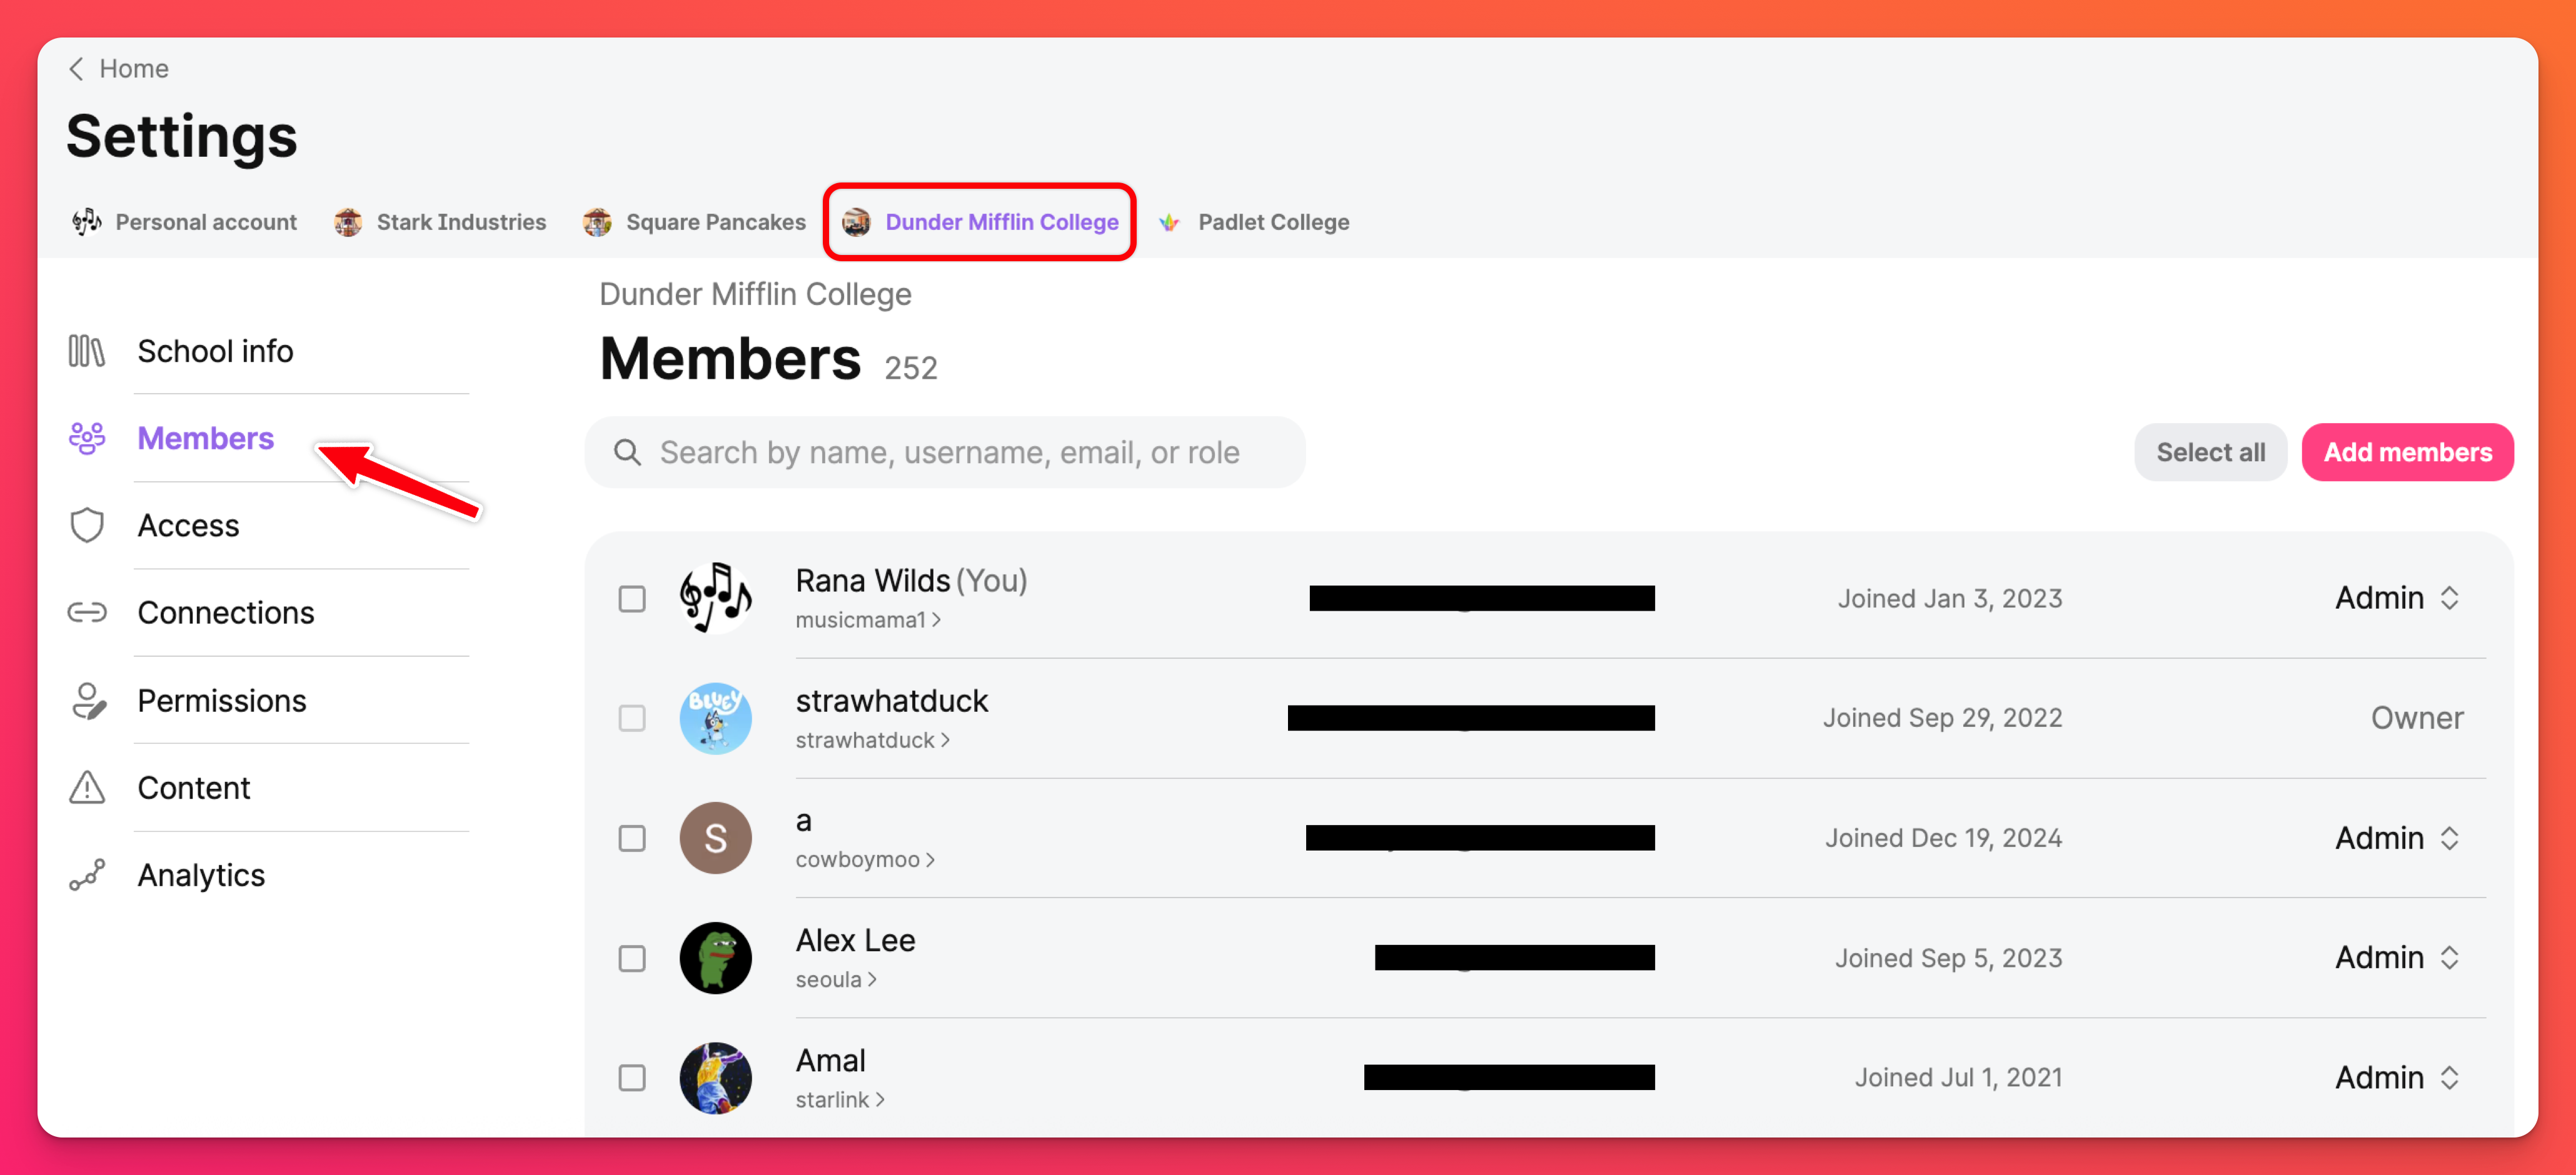
Add, edit and remove members from your Padlet for Schools account under the Members tab.
Add users
Choose between uploading your members using Invite links, adding emails or uploading a CSV file.
- Invite links: Click the Add members button > Invite links > Enable and Copy the role you're inviting members to > paste the link where you wish to share this with your users.
- Add emails: Click the Add members button > Add emails > add the email of the user you wish to invite > select their role. Once you've added all of them, click Add. If the invited users already have a Padlet account with this email, they will automatically be added to the Padlet for Schools account. If not, they will be sent an invitation to join.
- Upload CSV: Fill out the sample CSV form and add it by selecting Upload. If the invited users already have a Padlet account with this email, they will automatically be added to the Padlet for Schools account. If not, they will be sent an invitation to join.
Google for Education App // Clever // ClassLink // OneRoster
Edit user information
From the Members page, check the box next to the user's name. At the top, click View info.
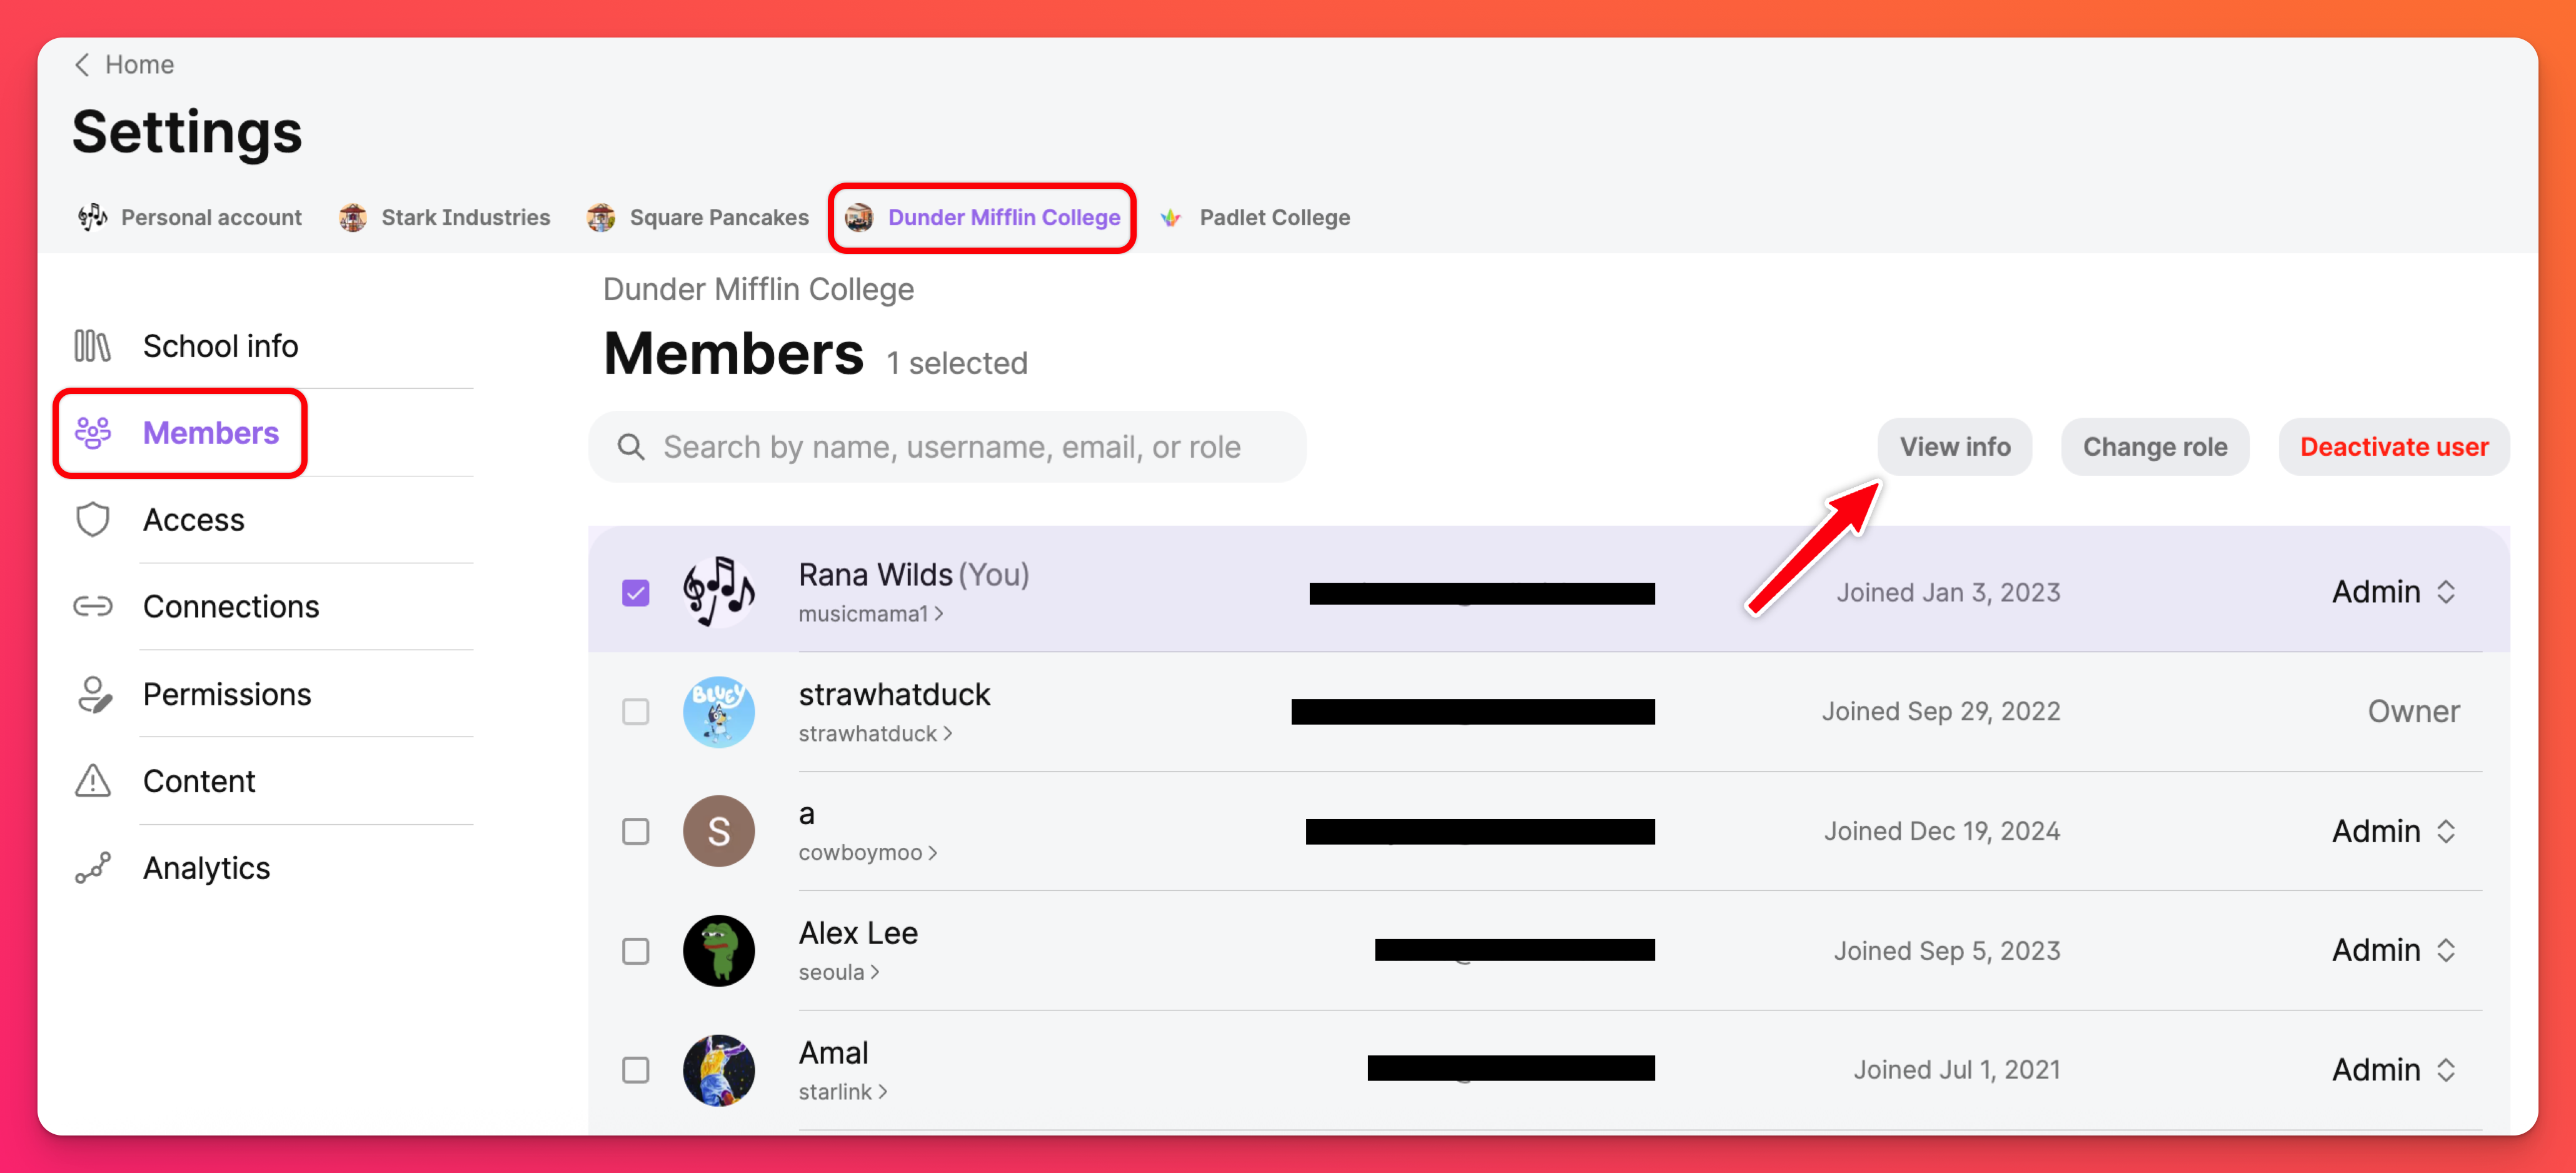
Update the user's name, avatar, username, etc. and click Save!
Edit roles and deactivate users
To edit a single user's role or deactivate them, click on the drop-down menu next to the user's name on the Members page. Then, choose the appropriate role or select Deactivate.
To edit user roles or deactivate users in bulk, click on the checkbox next to each user and choose Change roles or Deactivate users at the top of the page.
Read more about the different ways you can add, edit and remove users here!
Access
Choose the available log in options for your account from your Access tab.
Allow members of your account to log in with their email and password or choose from one of the single sign on (SSO) options! If choosing to log in with SSO, toggle it ON and check to ensure the appropriate email domain is shown under 'Approved domains.'
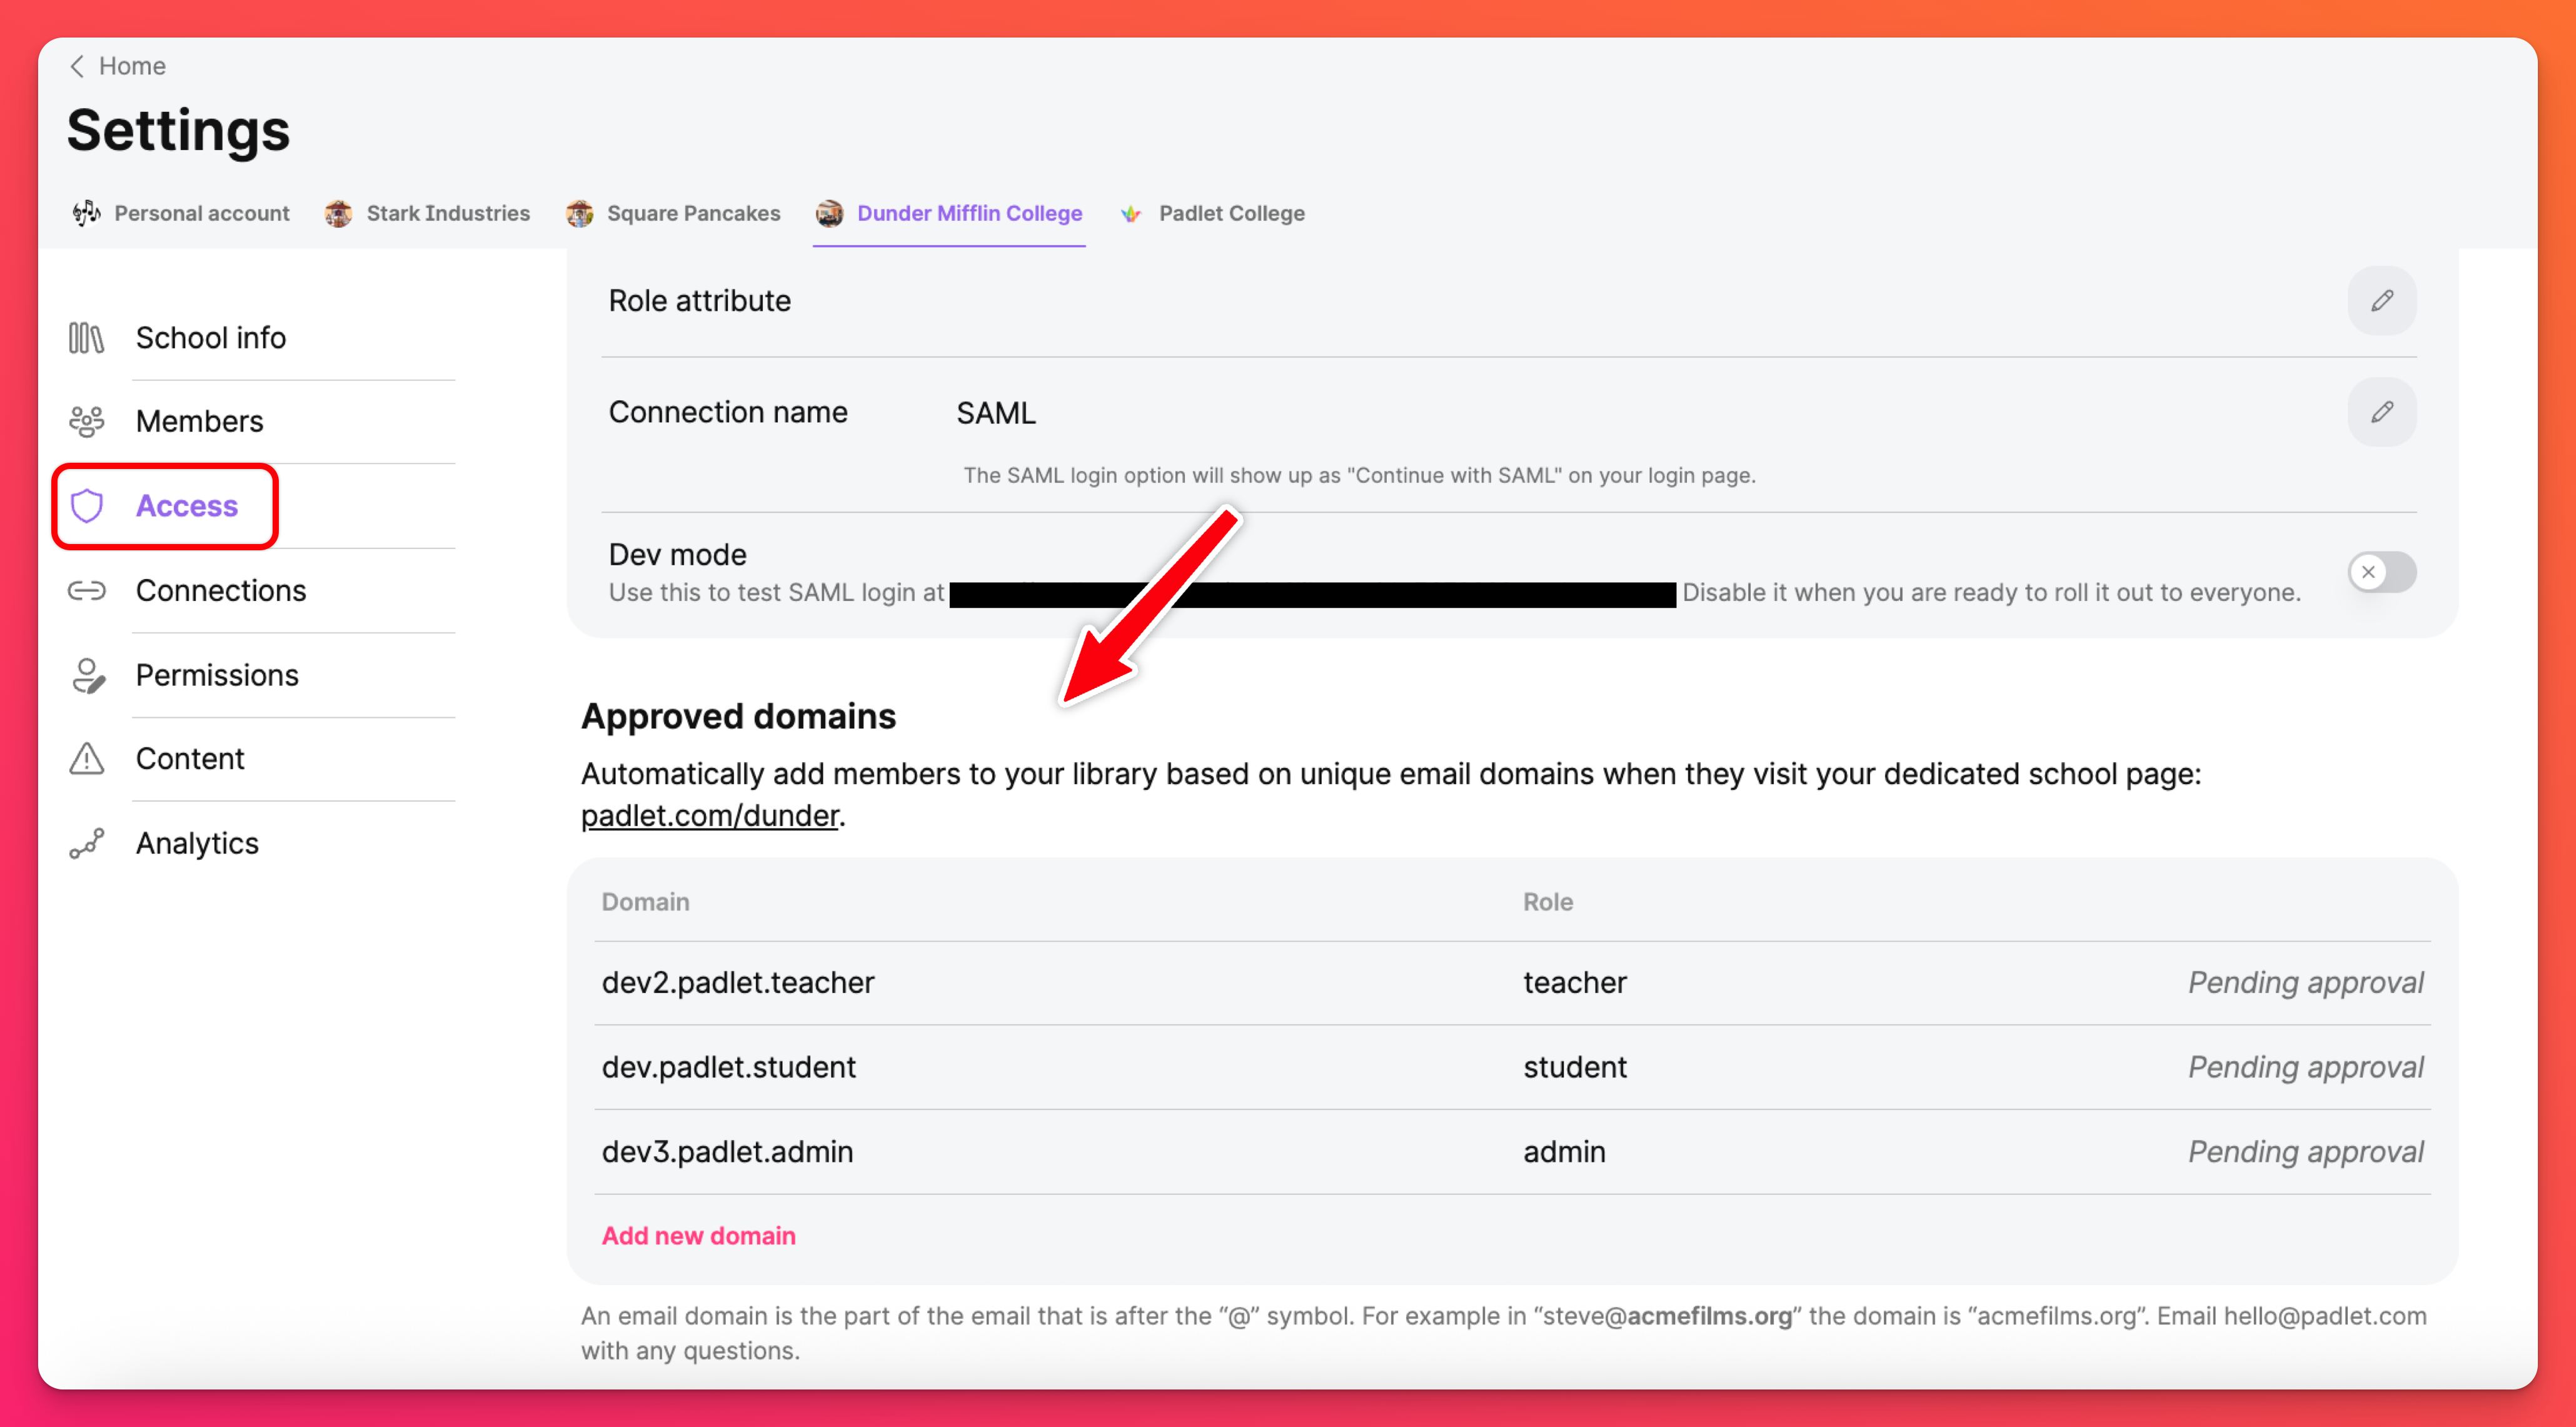
If you would like to allow access into your account for an entire email domain group, click on Add new domain to submit your request. We will review your submission and approve/deny your request as quickly as possible. Once approved, when members go to your account URL or visit a padlet associated with the account, they will be prompted to log in (if they are not already) and will be provisioned an account automatically.
Connections
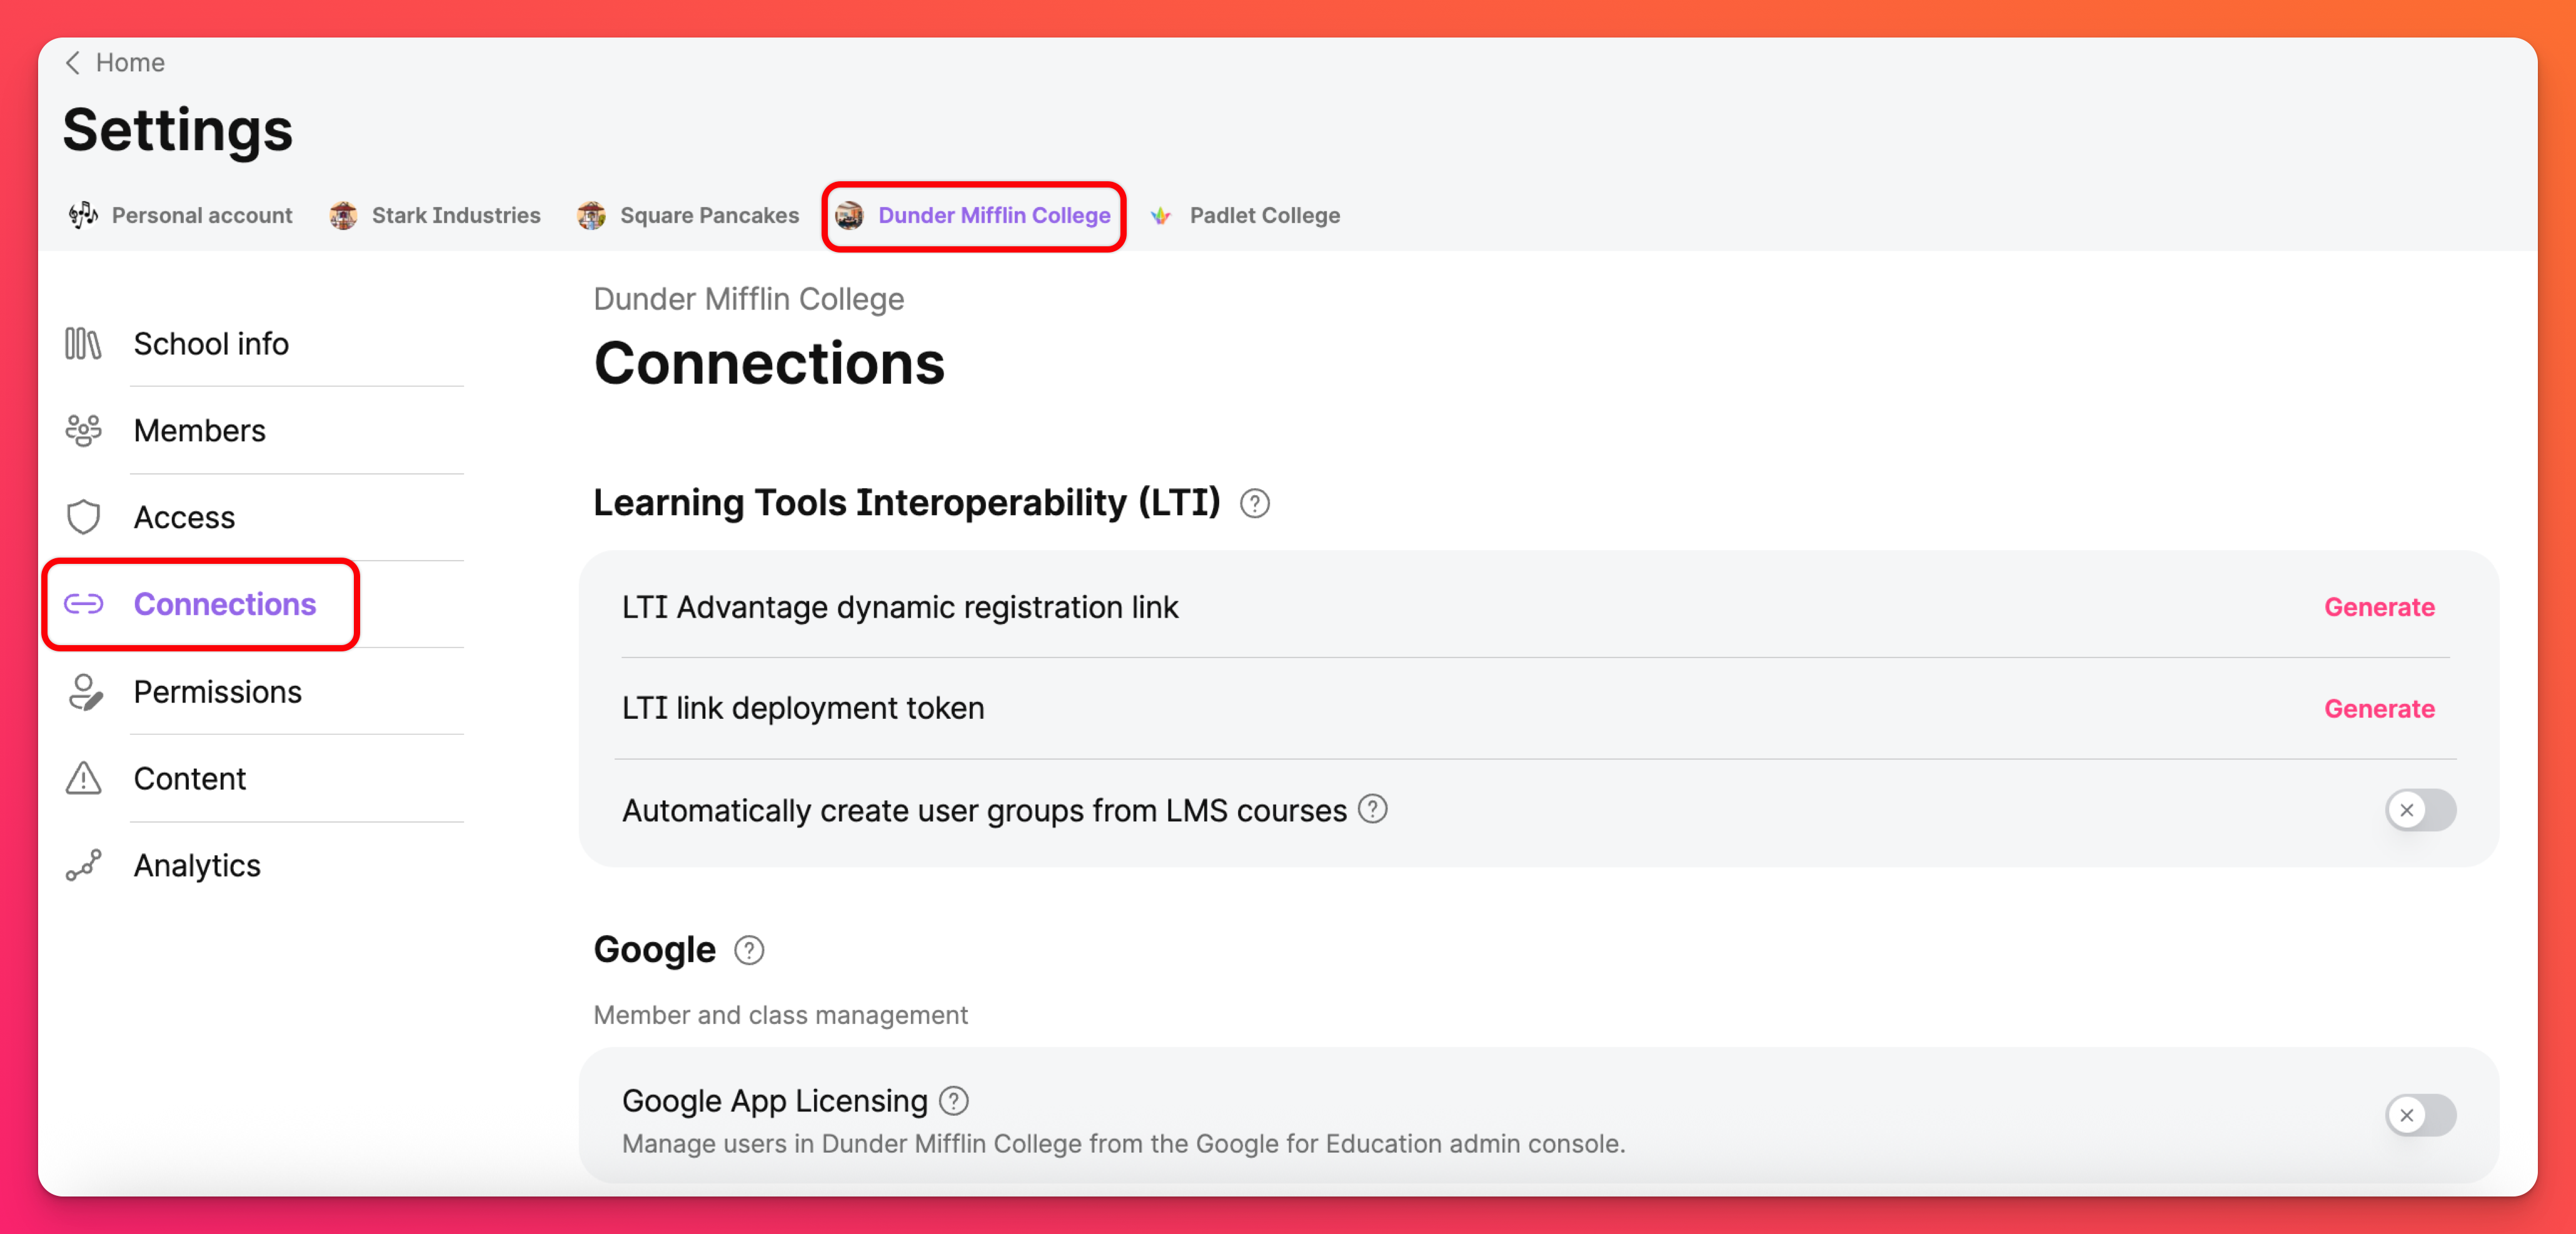
On the Connections page, manage your LTI integrations, Google Workspaces, rostering and other available connections.
Permissions
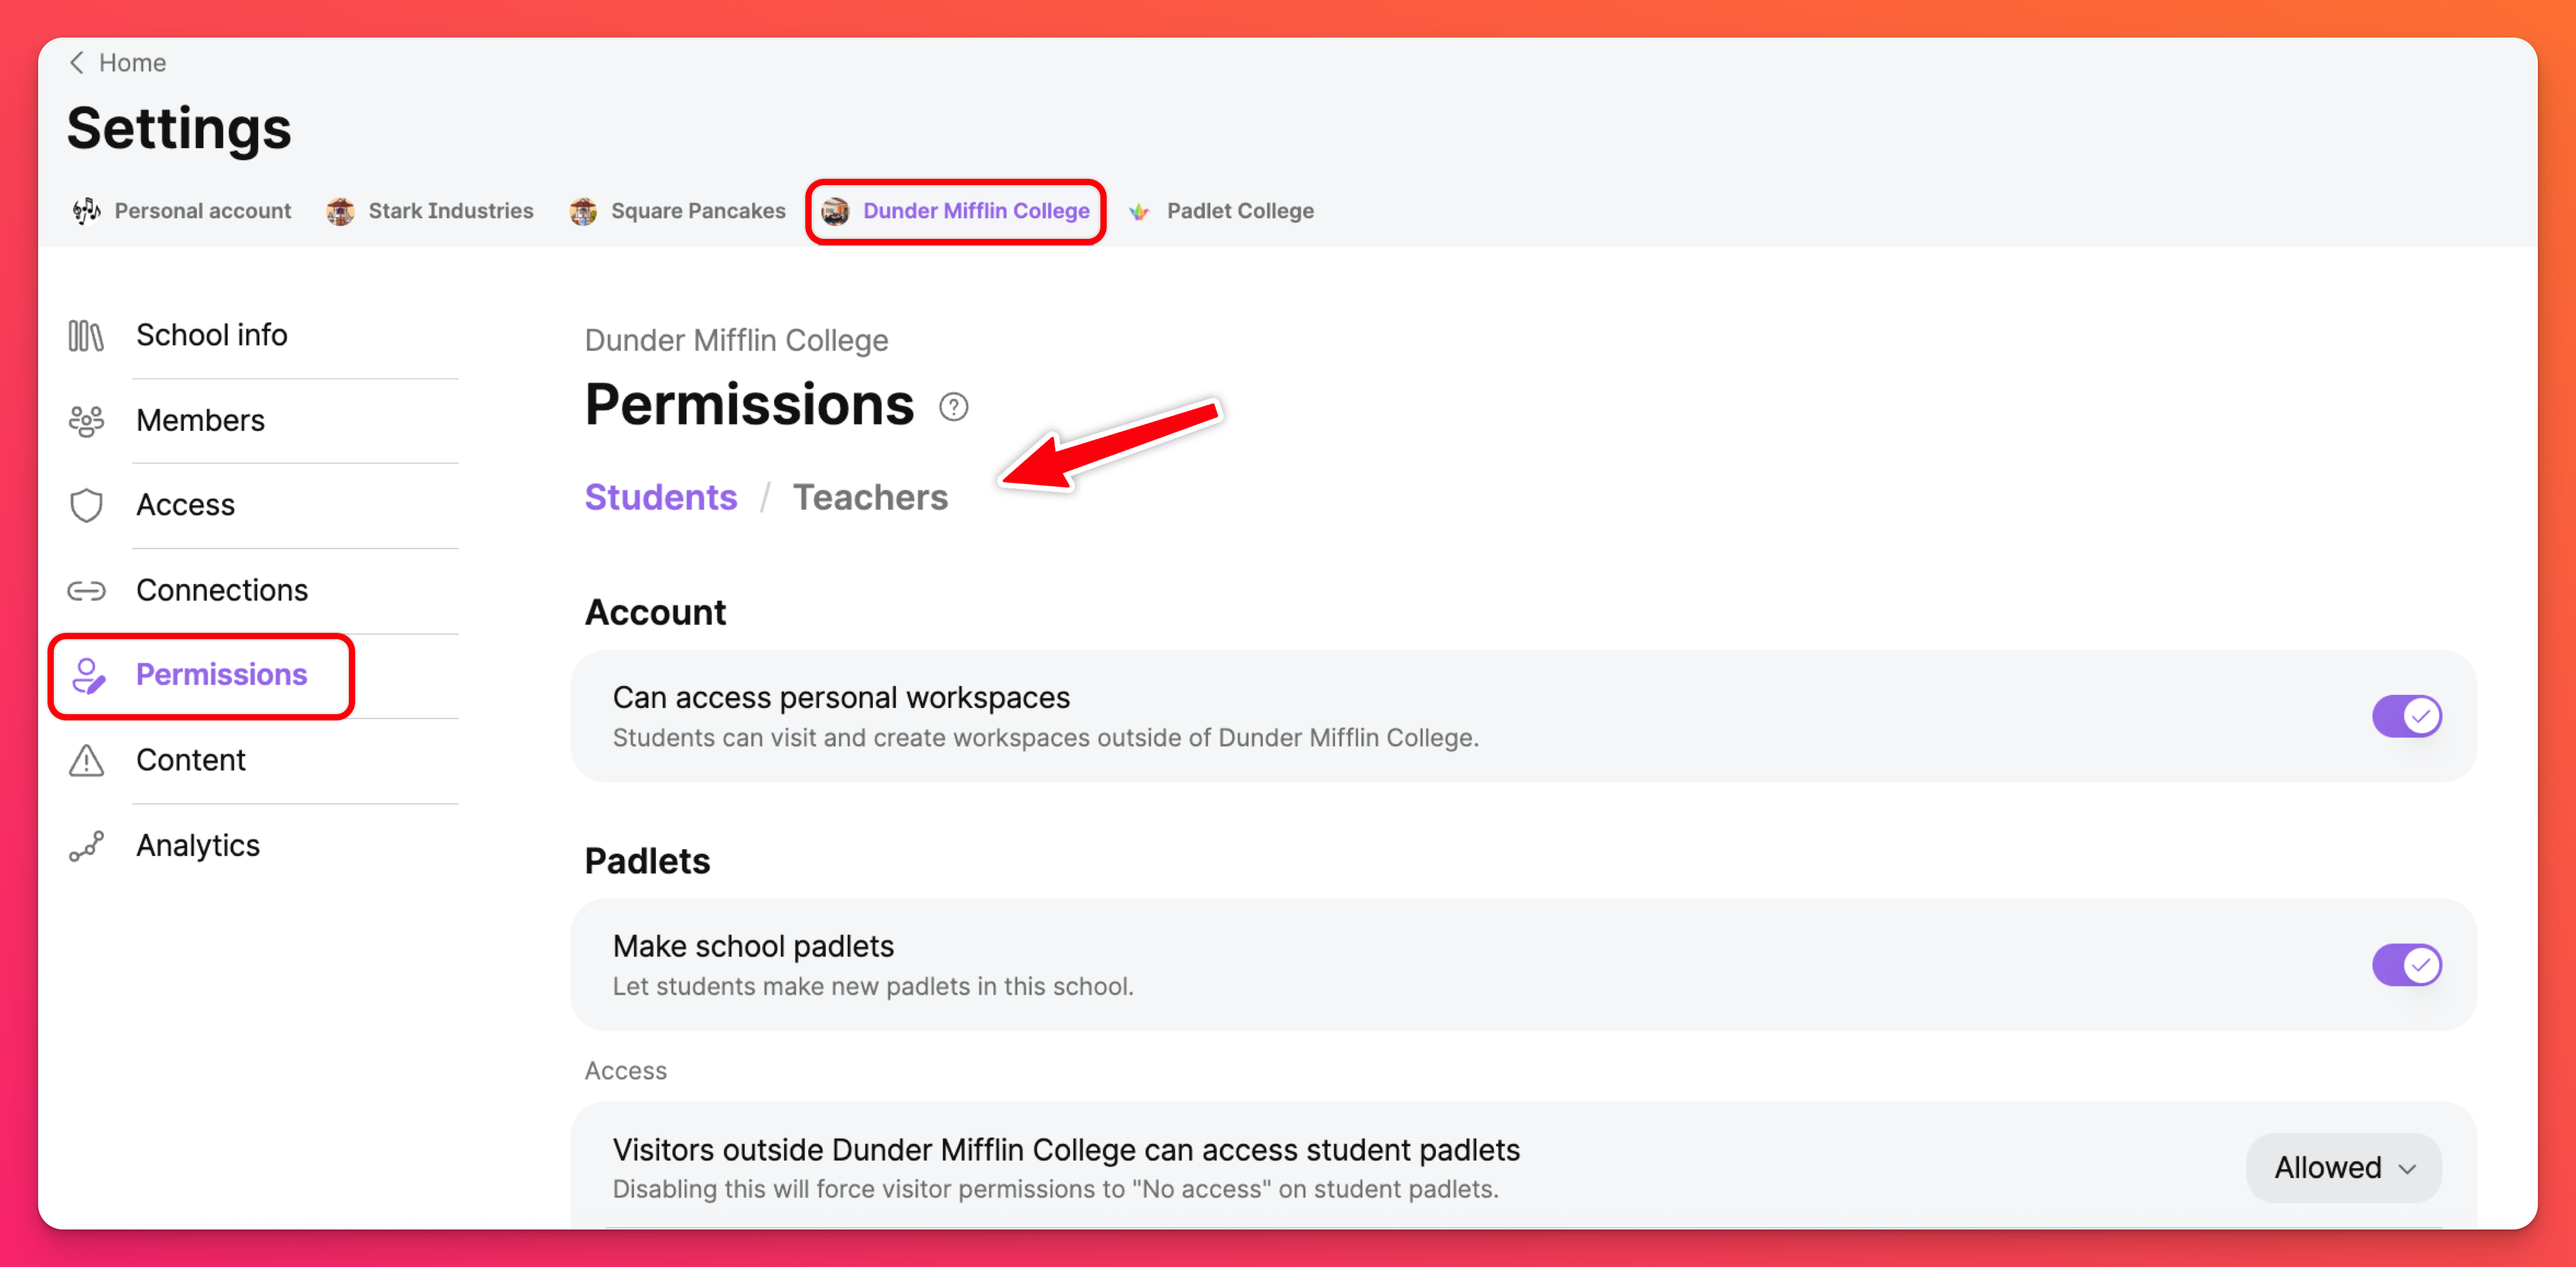
From your Permissions page, you can customize the permissions for teachers and students in your account. By default, we have set your permissions to ensure your account is secure. If you want to edit them, you can change them by following the steps here: Padlet for Schools permission settings
Content
Moderation
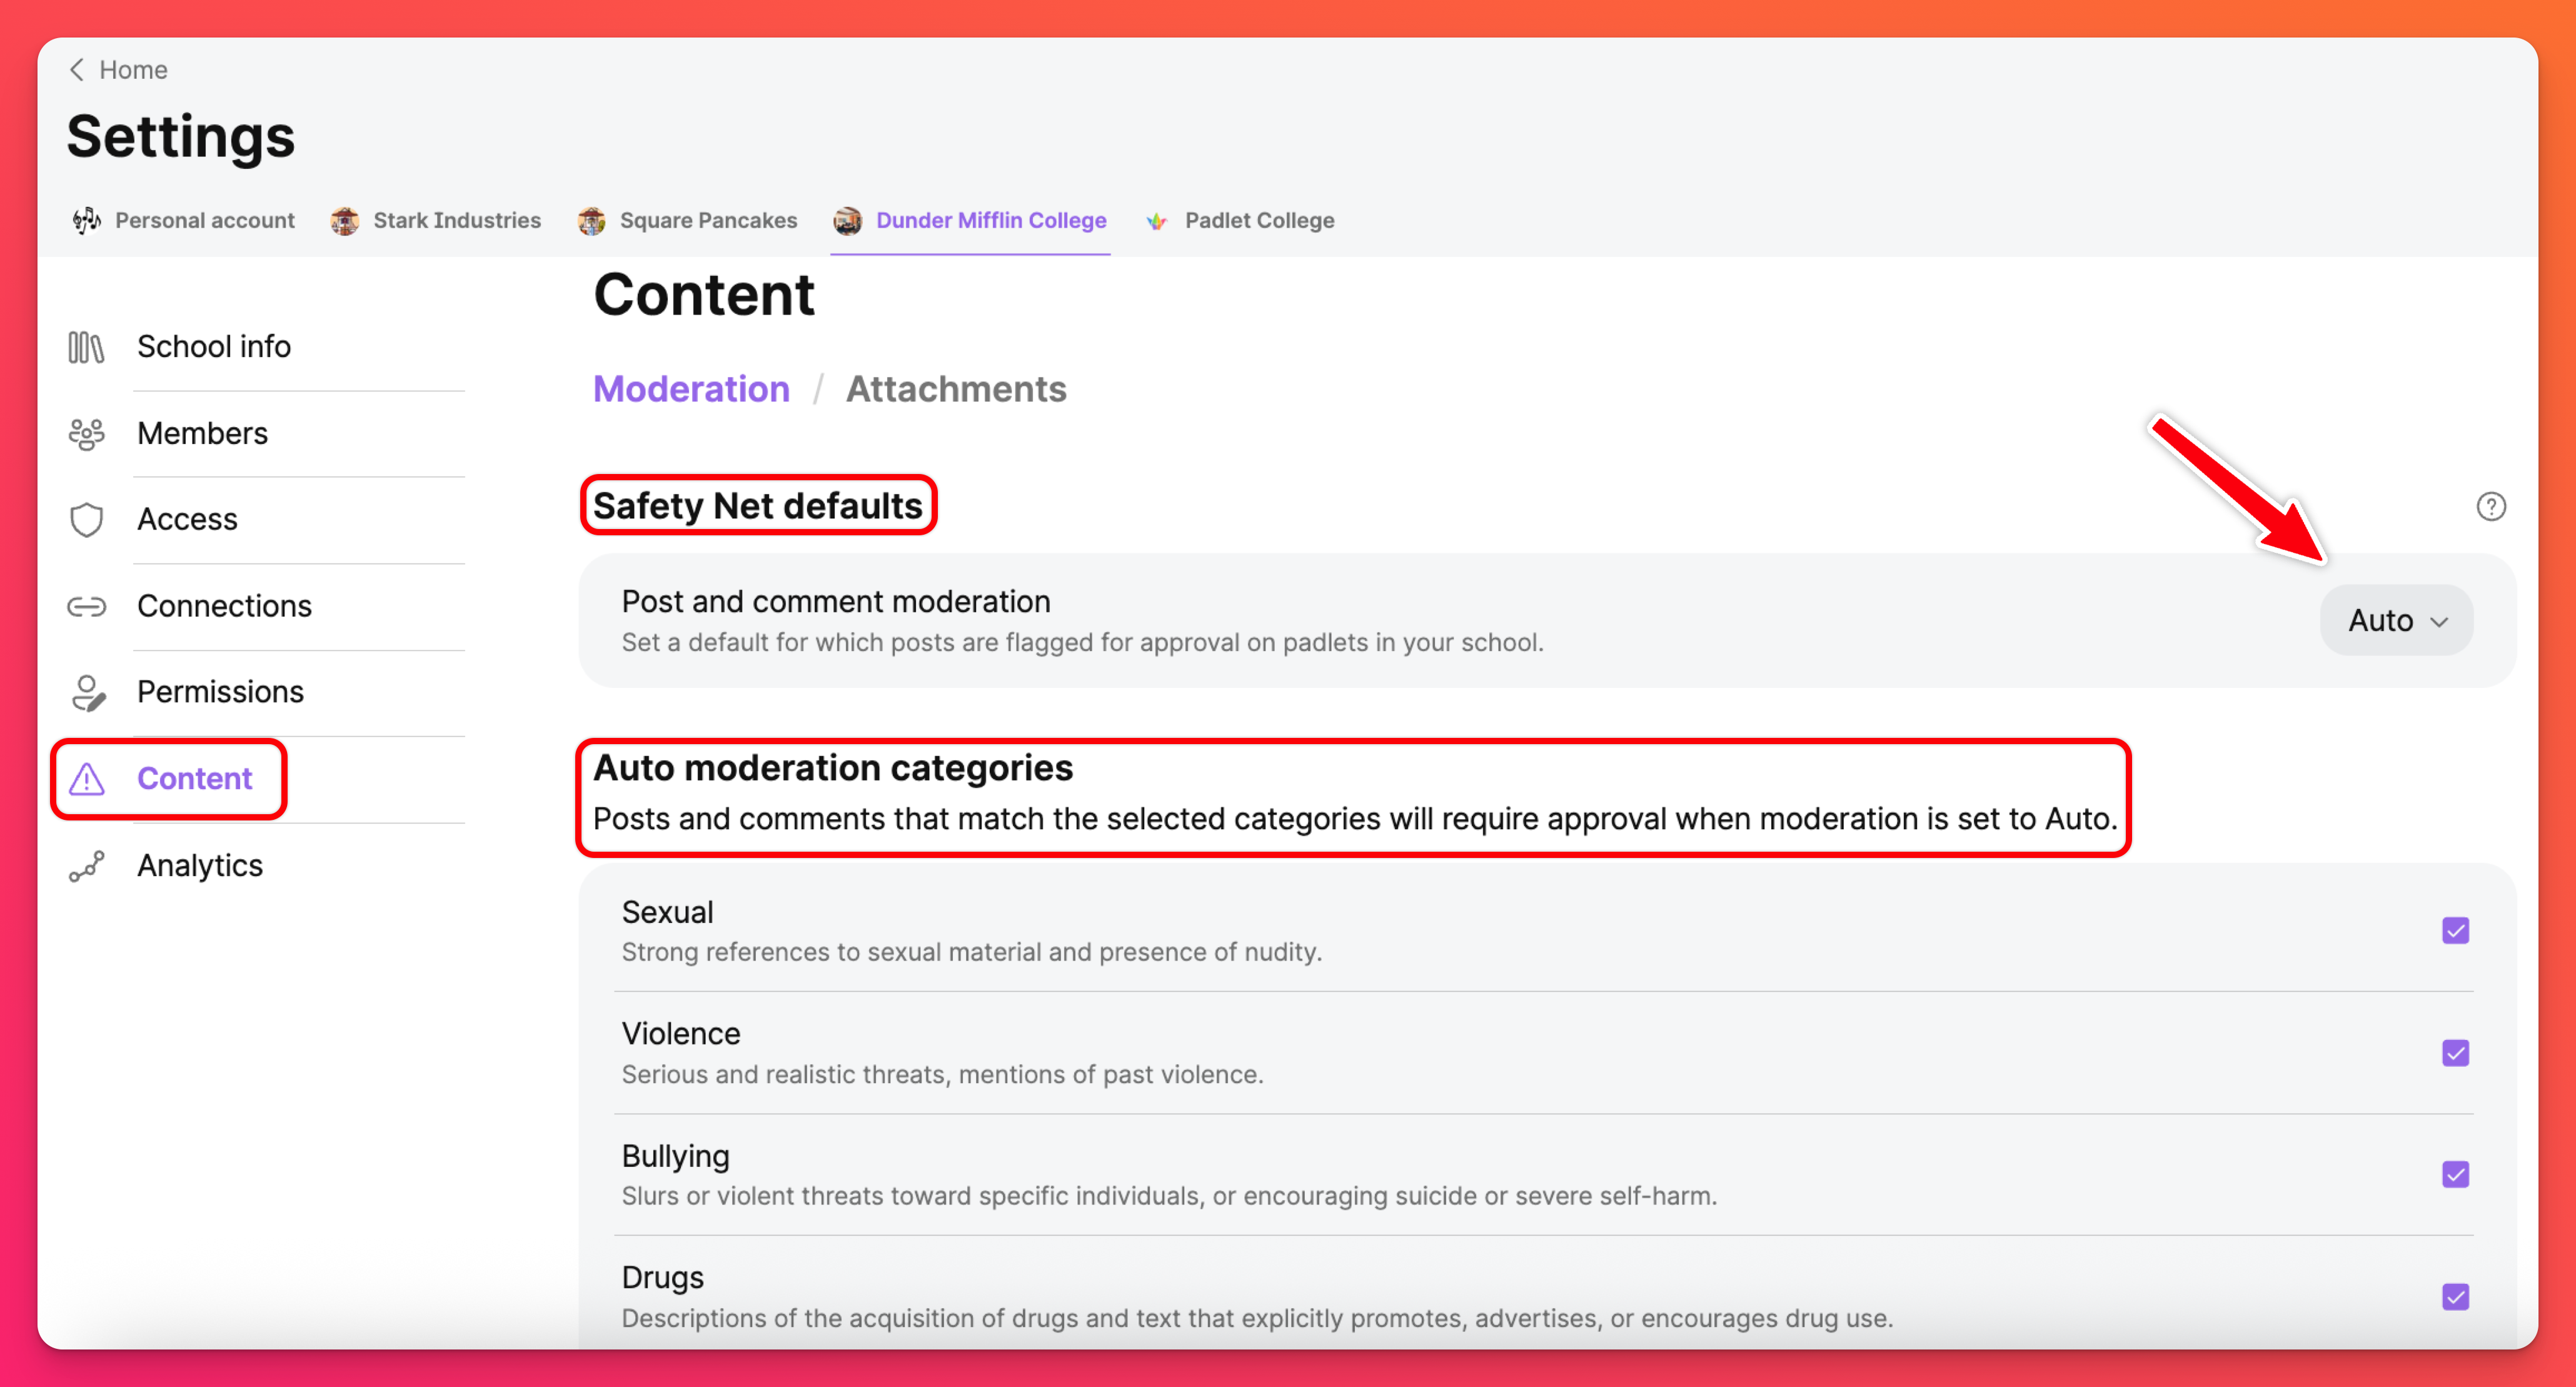
Another very important feature for Padlet for Schools admins is having the ability to customize which categories of content are moderated by Safety Net. Safety Net is the program we use to filter between safe and unsafe content on a padlet. Read how to turn on specific settings here!
Attachments
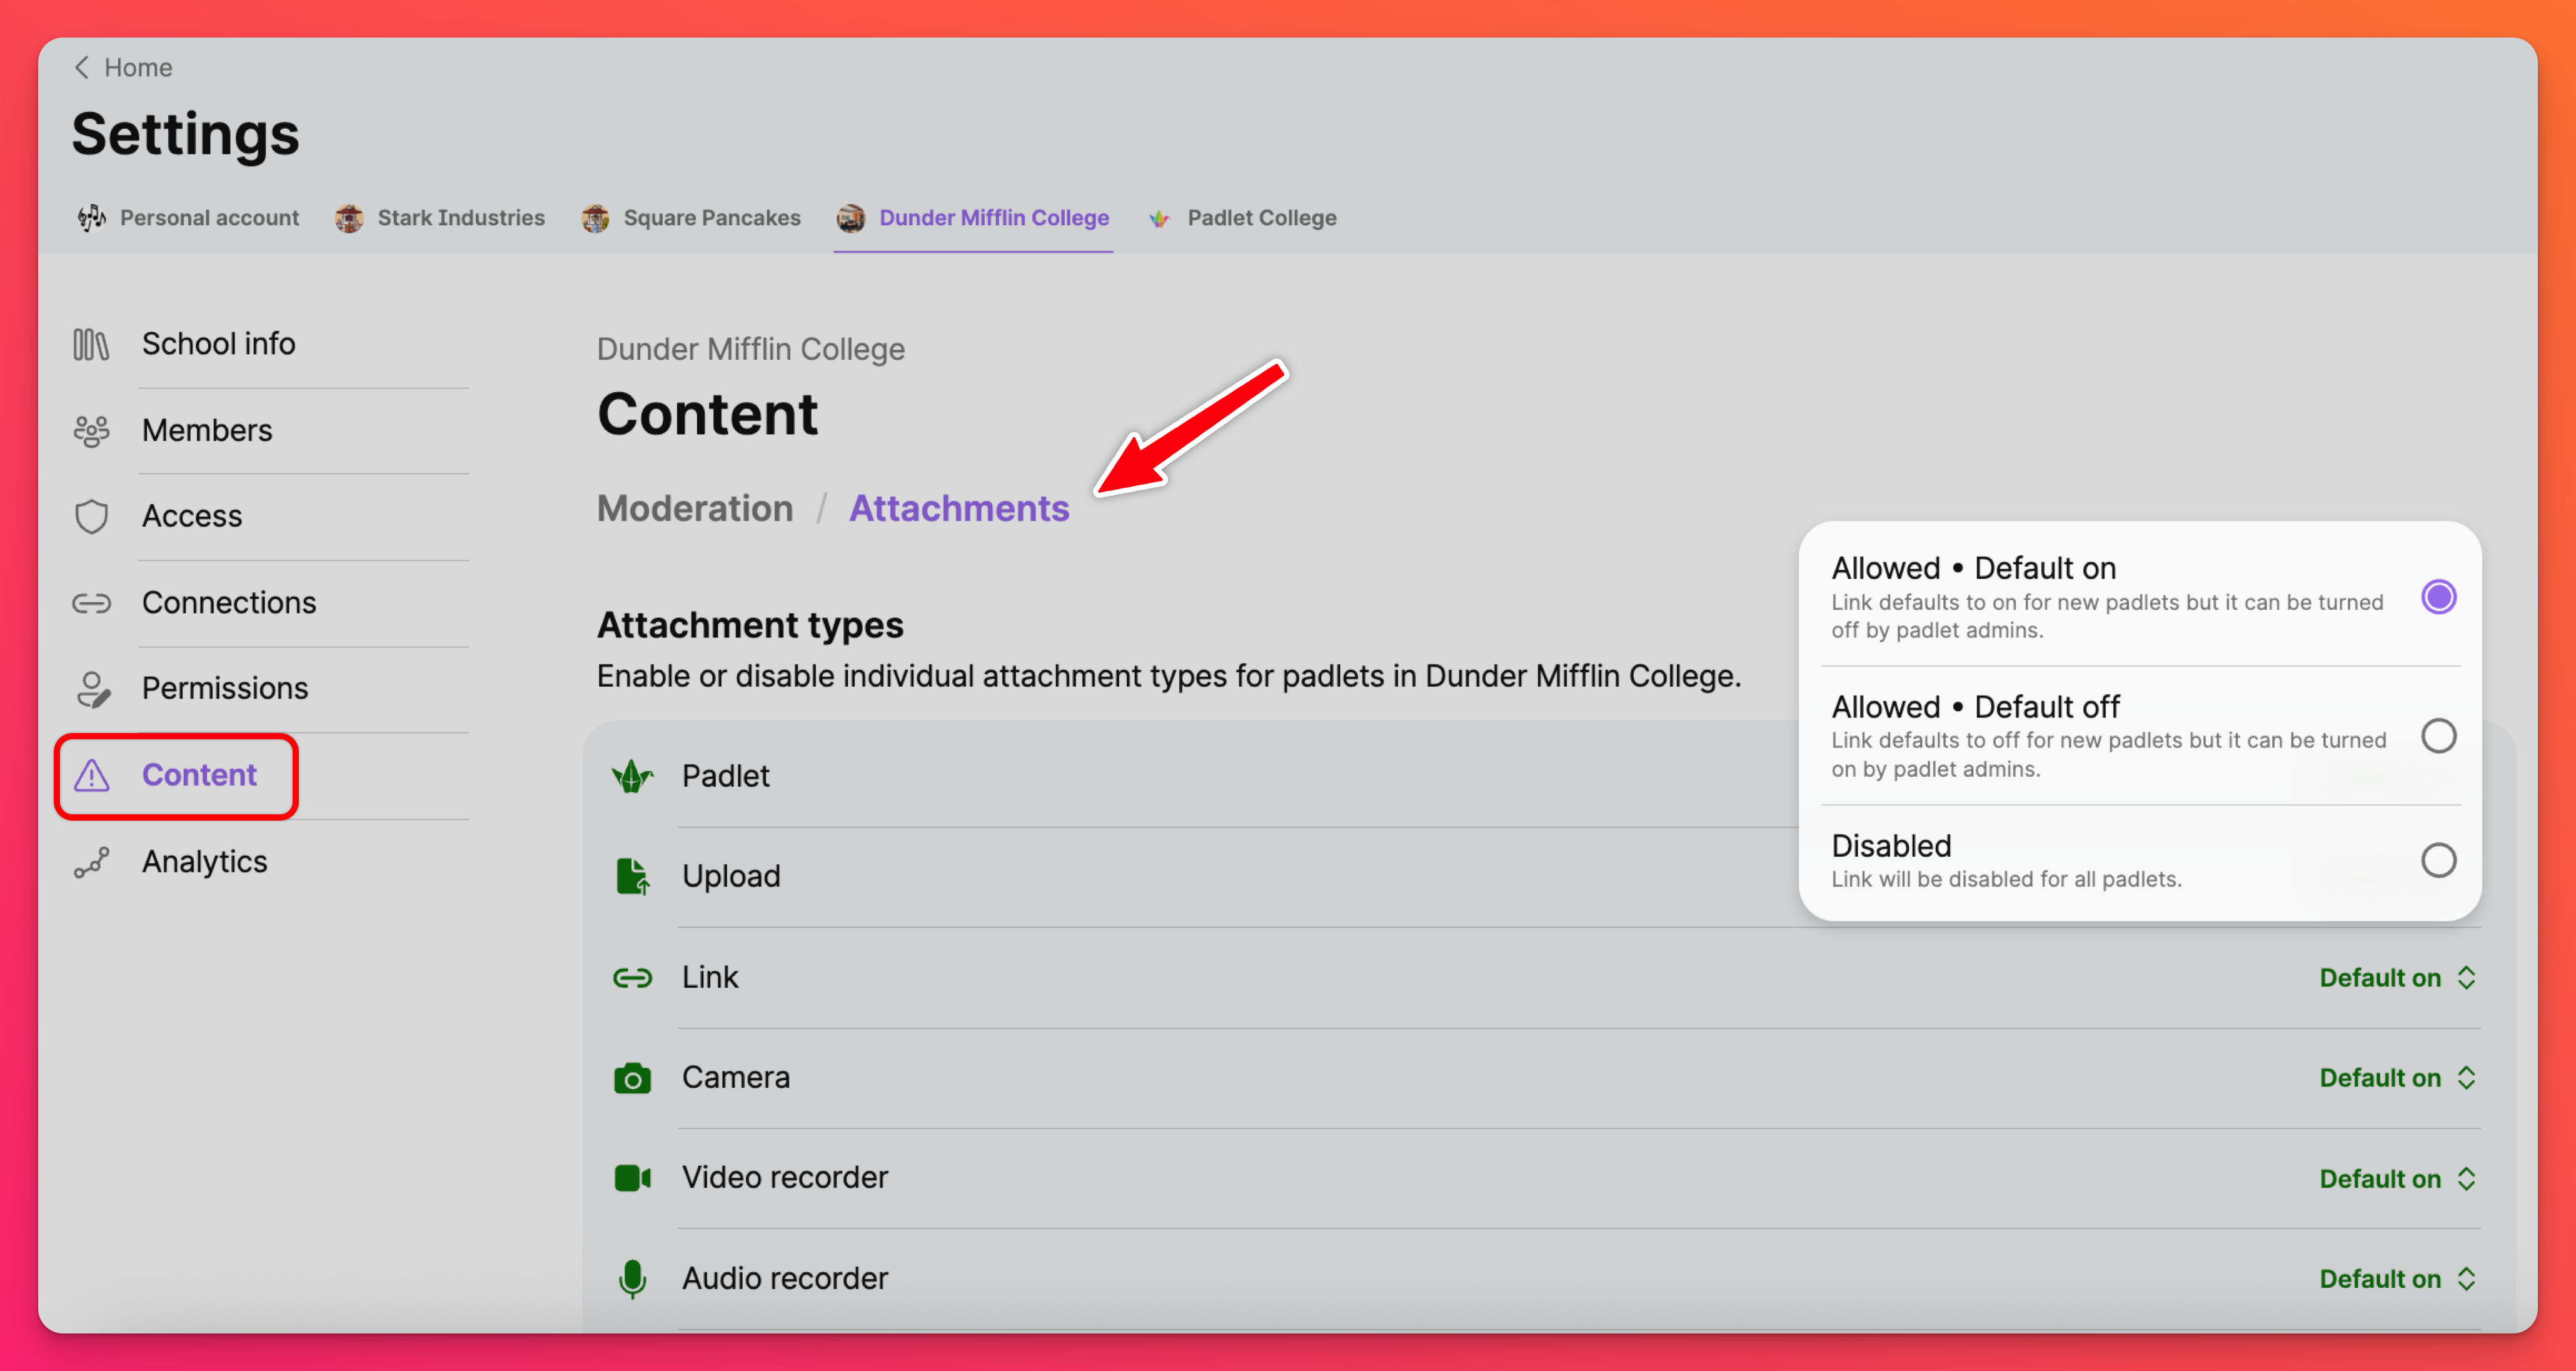
Click Attachments at the top of the Content settings page to choose which attachment types are available to your users. Just click on Default on next to the attachment type.
Analytics
Access analytics for your account (such as the number of active users, number of padlets created and an alphabetical list of your users) within the Analytics tab. Read more about these features and how they can be utilized here: Padlet for Schools Analytics
FAQs
How do my teachers transfer their padlets into the school account?
* If both accounts are under the same email address: To transfer a padlet from a personal account, log into your account and click on the account menu the upper-left corner of the dashboard. Select your Personal workspace from the menu. Then, click on your Made by me folder on the left-hand side of your dashboard. Select the vertical three-dot ellipsis button (...) on the padlet's thumbnail and choose Transfer padlet. Click on your Padlet for Schools account from the list and the padlet will automatically transfer.
* If both accounts are under different email addresses: Have the user reach out to us at [email protected] with their request to transfer their padlets. Make sure they write to us from the email associated with the account that the padlets are being transferred out of. We can transfer the padlets into the school account for them.

