Welcome to Padlet for Schools for administrators! (for padlet.org accounts)
Thank you for choosing Padlet for Schools. This will be the go-to resource for all of your admin needs.
Access your account
You will access your Padlet for Schools account through your organization's unique link ending in padlet.org (not padlet.com). This link will be in the format of <yourschoolsubdomain>.padlet.org. For instance, if you teach at the School of Rock, you might log in at schoolofrock.padlet.org.
Transfer your padlets
If you have an existing individual account, you can import your content into the Padlet for Schools account.
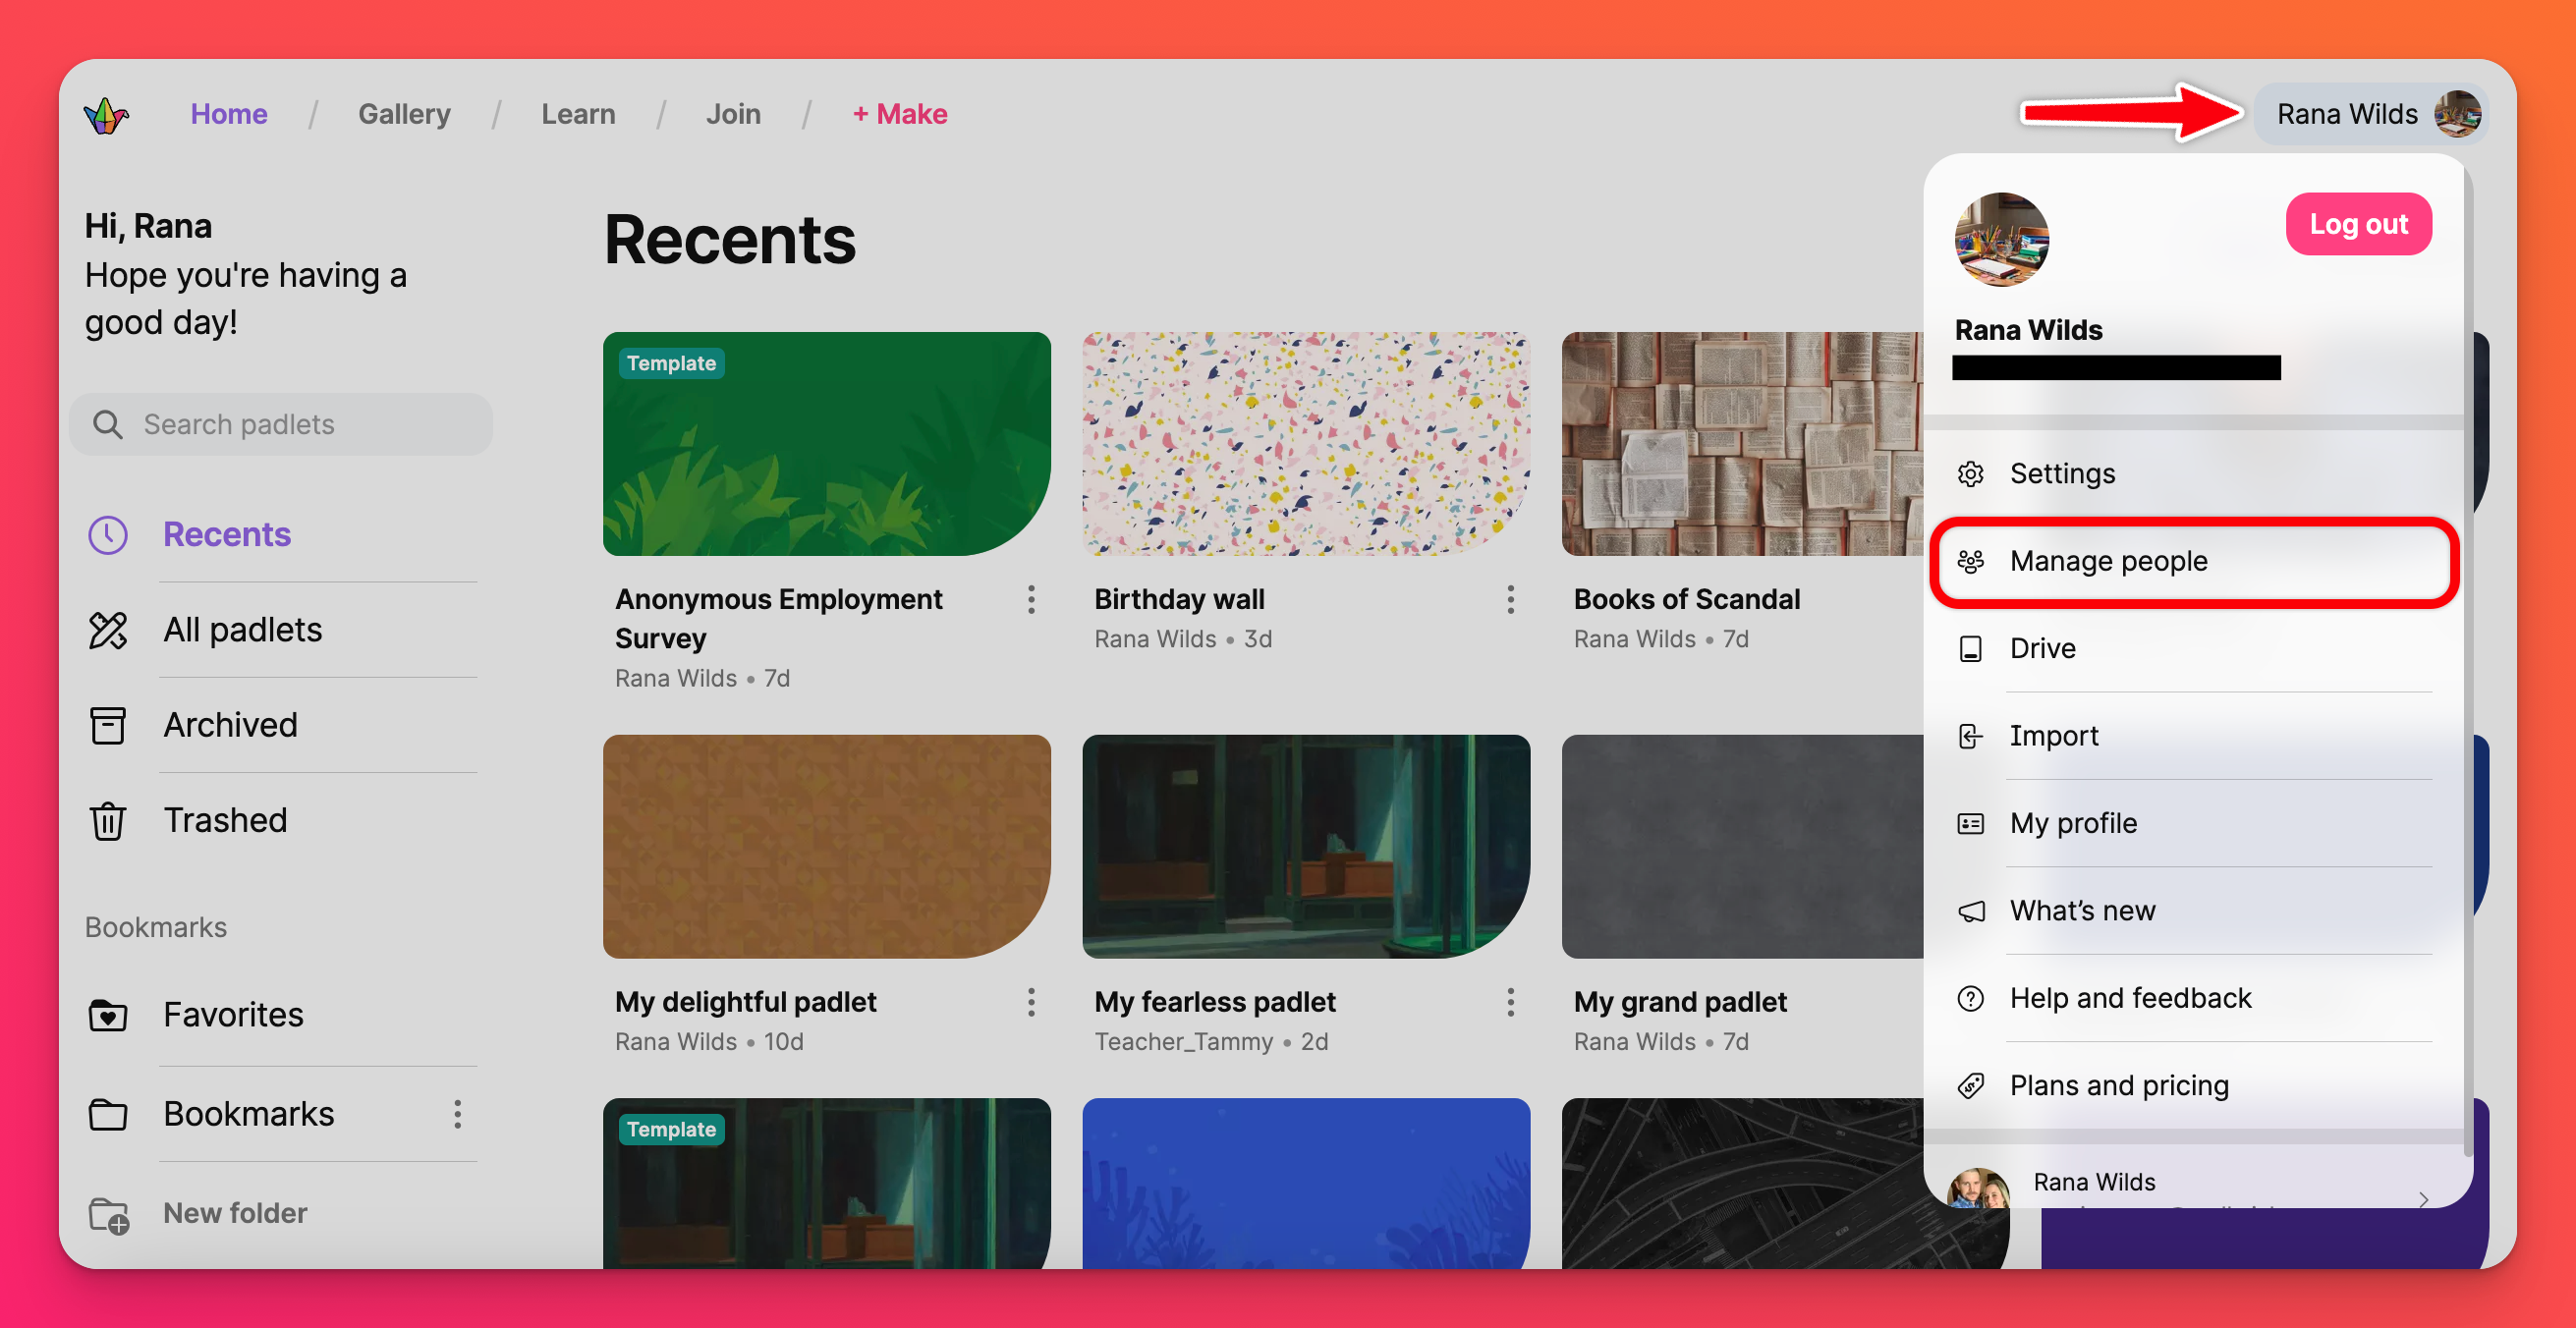
To import your padlets, click on your account name in the top-right corner of the dashboard and select Import. You will be prompted to log in to your individual account by entering your padlet.com credentials.
*Note: Email addresses do not need to match for this to work.
Copying your padlets: Your URLs will change! If you have any of these padlets embedded or shared, you will need to embed and share them again. The original links will be broken.
Transferring your padlets: Your original URLs will automatically forward to the new location.
Manage settings
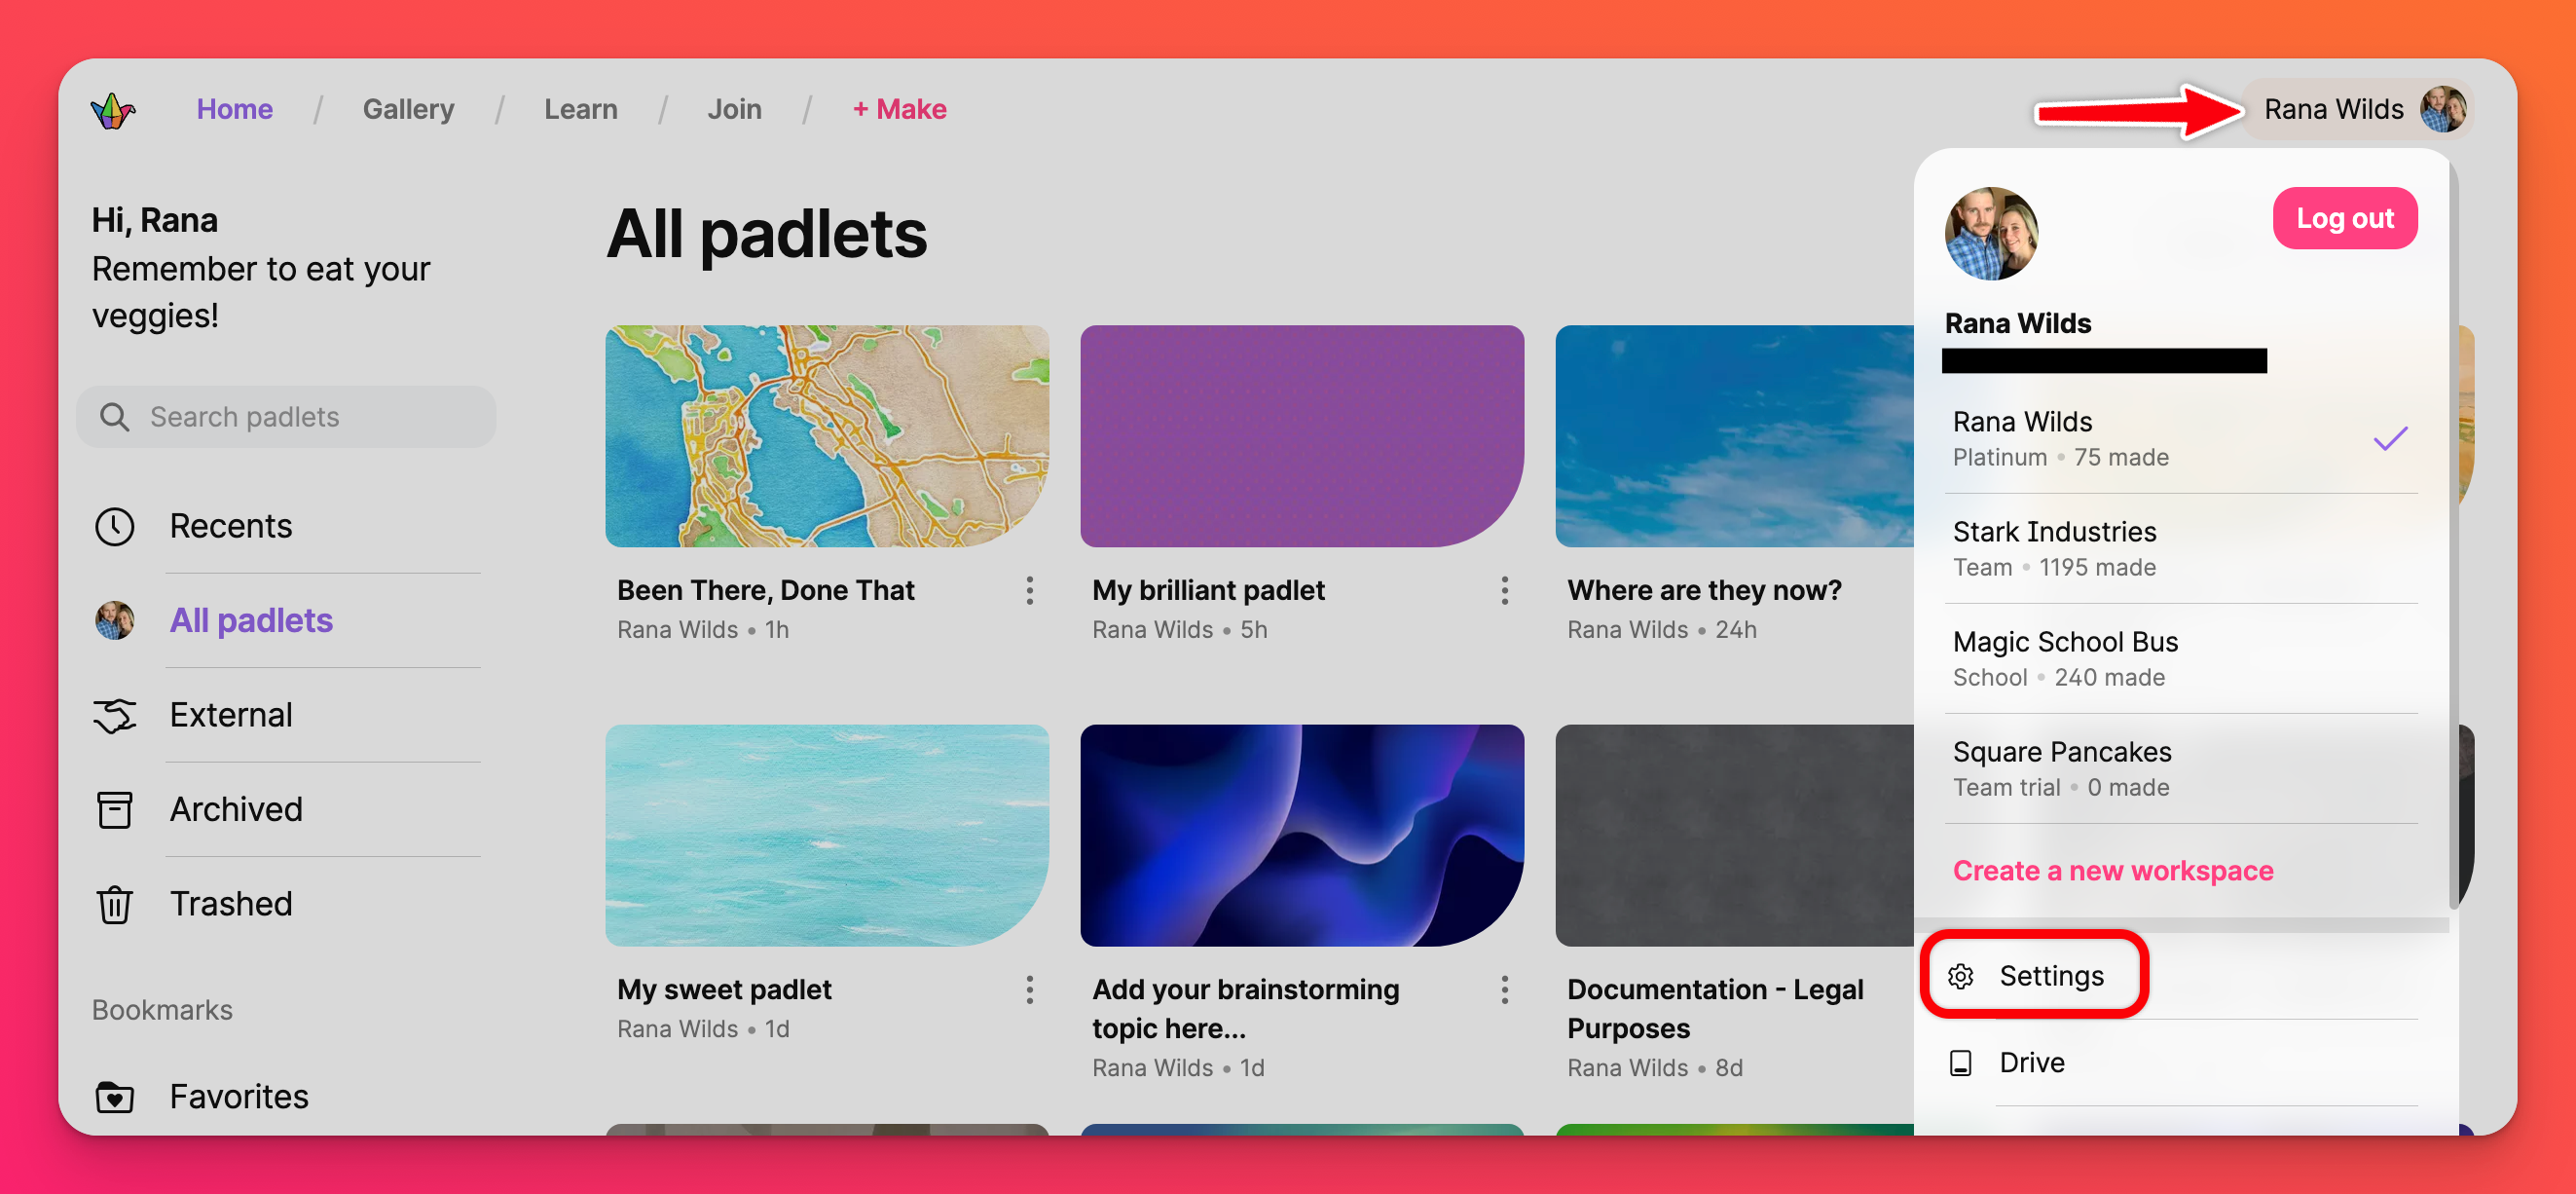
After importing your padlets, you can customize your account settings. The owner and account admins (yes, you can have more than one) share similar access to these settings. Click on your account name in the top-right corner of your dashboard and go to Settings.
Organization info
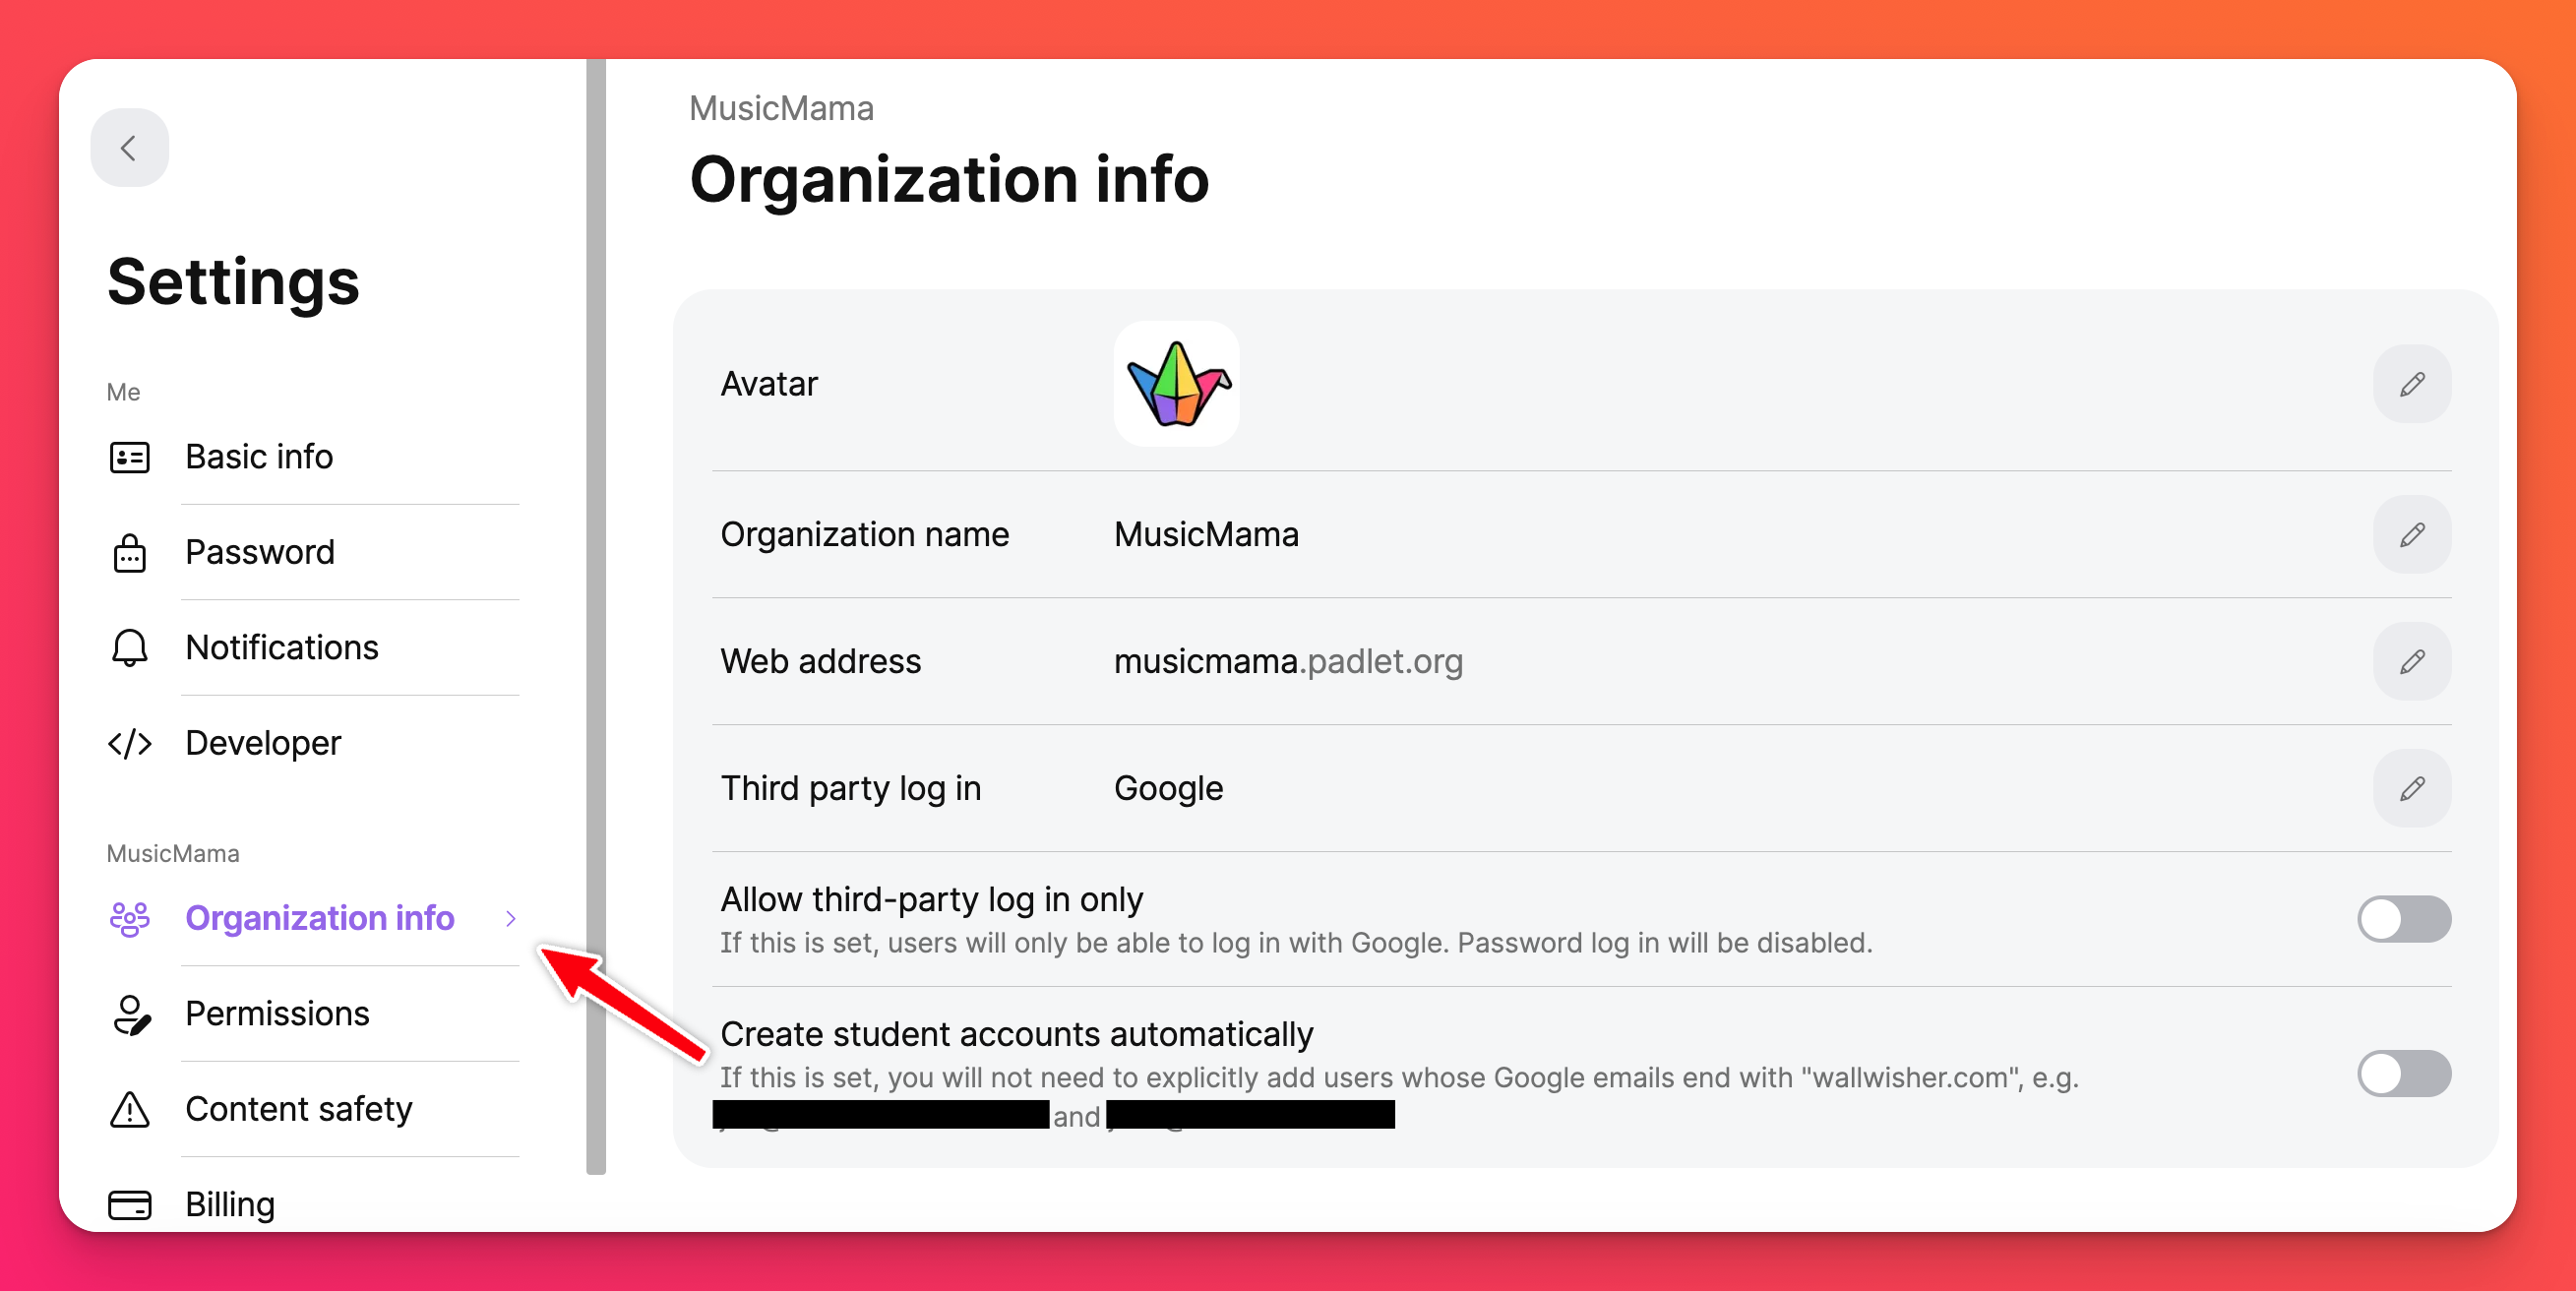
In the panel on the left side of the Settings page, find your organization's account name and choose Organization info. Change your avatar/logo, the name of your account, choose your login preferences and LTI connector (if you wish to use one).
Allow members of your account to log in with their email and password or choose from one of the single sign on (SSO) options!
You can integrate Padlet with your school's Learning Management System (LMS) platform using our LTI connectors free of charge! This allows teachers to easily add padlets as assignments to the LMS. An account is automaticaly created for students if they do not have one when they access the assignment from the LMS. Check out the instructions below for the LMS you are interested in.
Permissions
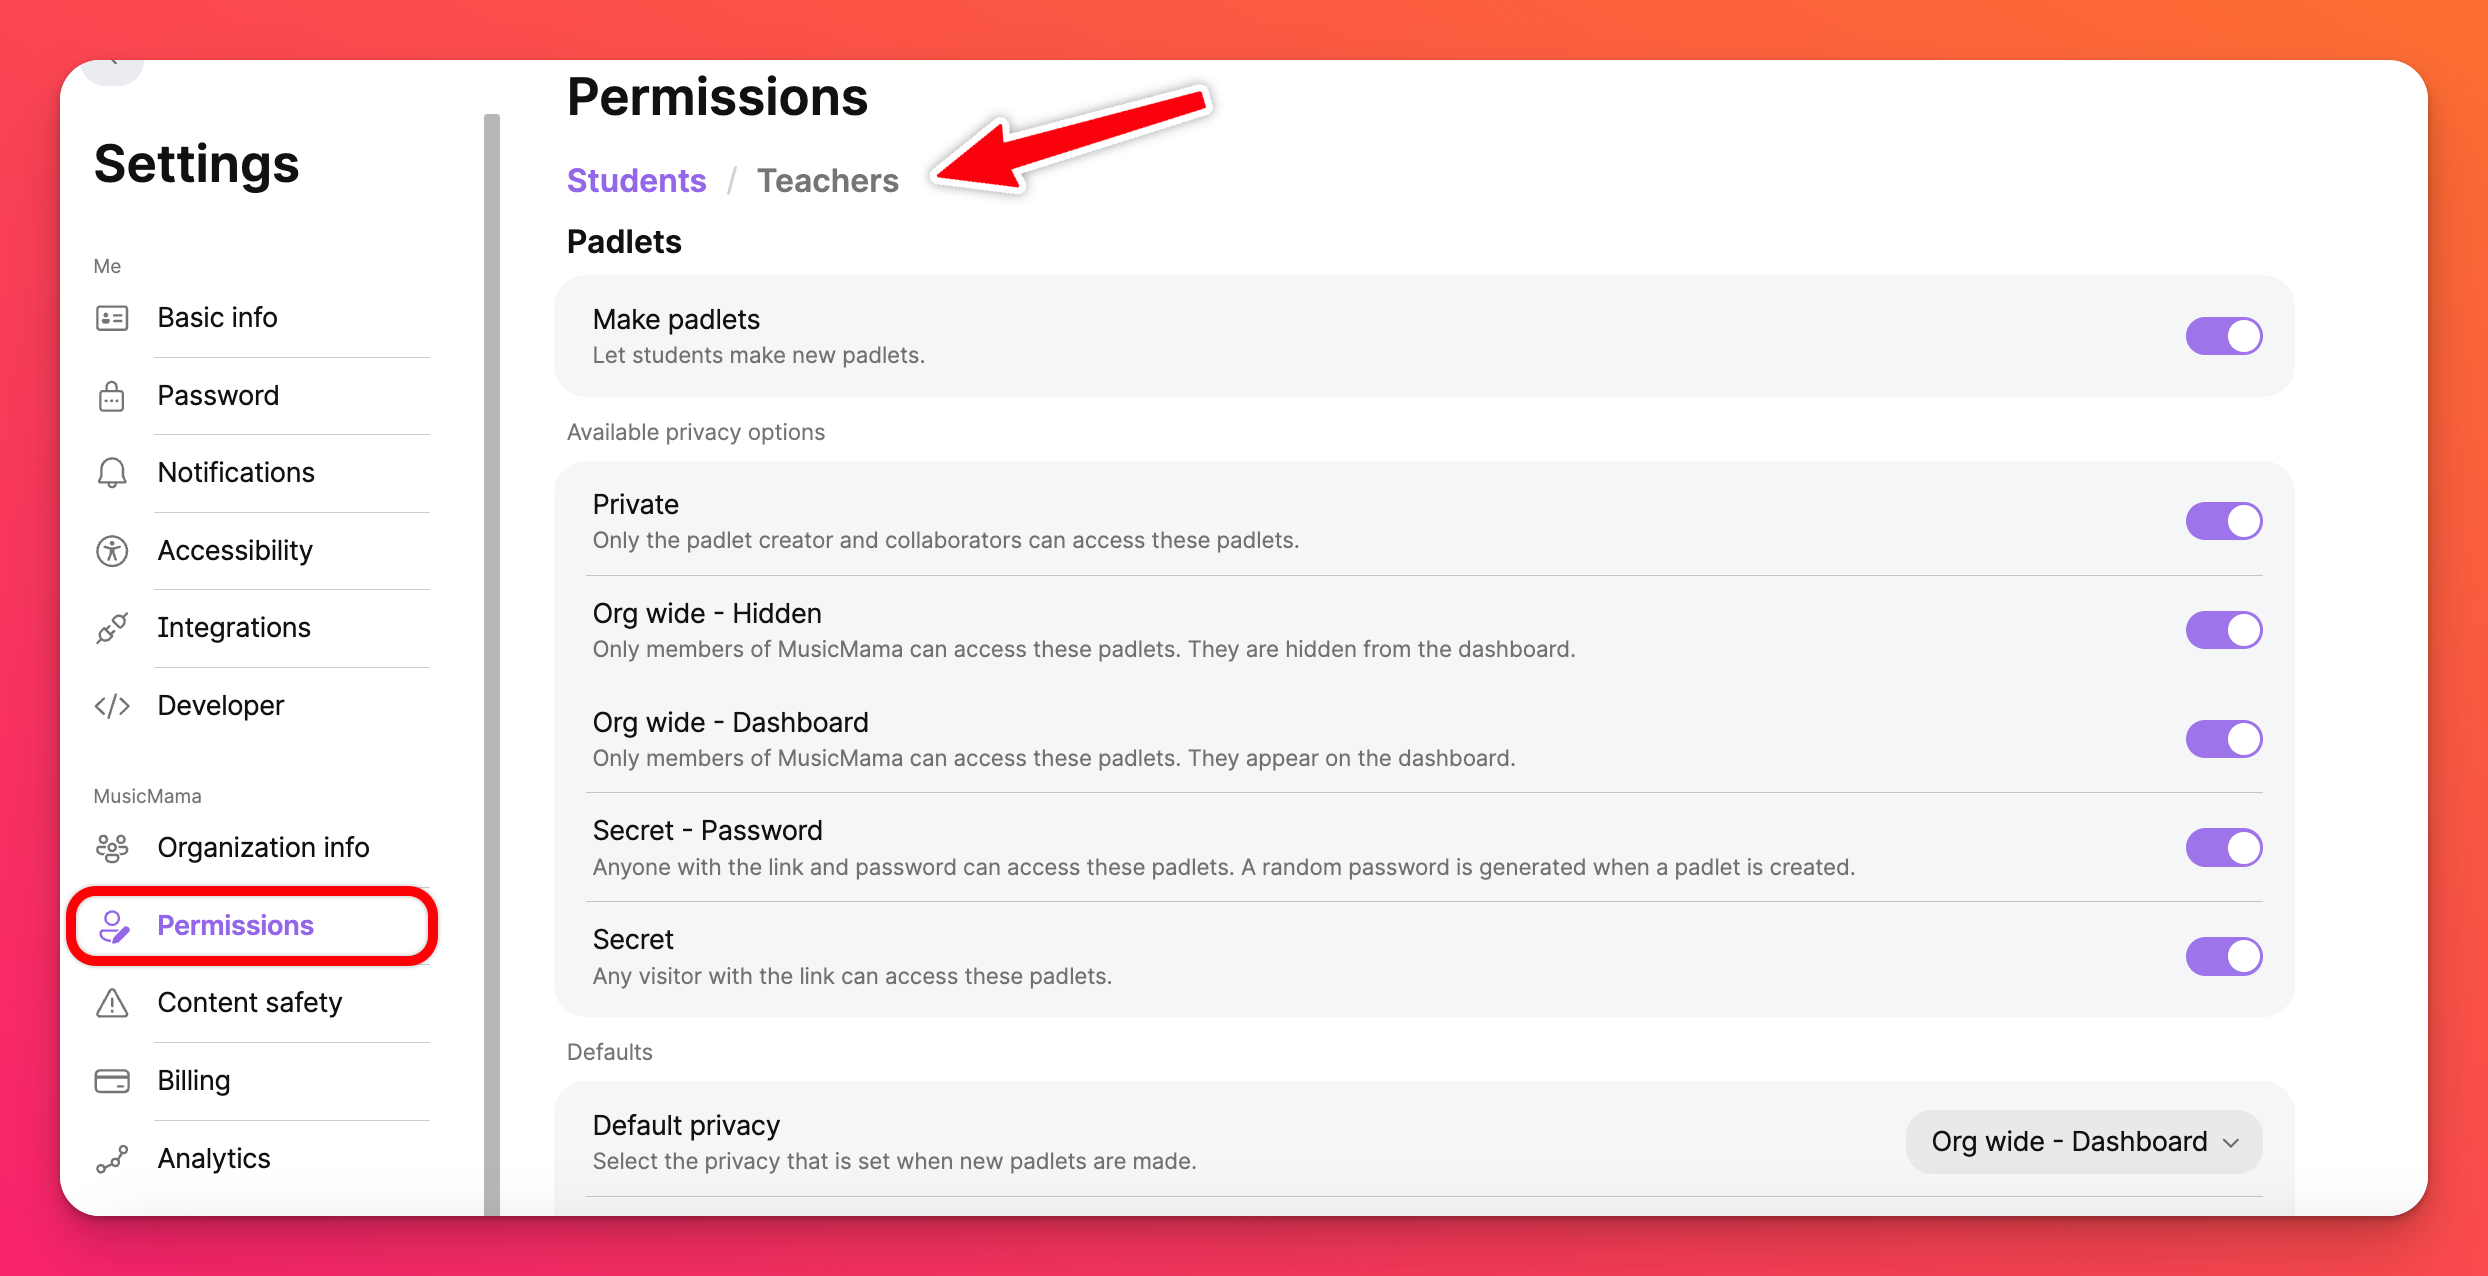
From your Permissions page, you can customize the permissions for teachers and students in your account. By default, we have set your permissions to ensure your account is secure. If you want to edit them, you can change them by following the steps here: Padlet for Schools permission settings
Content
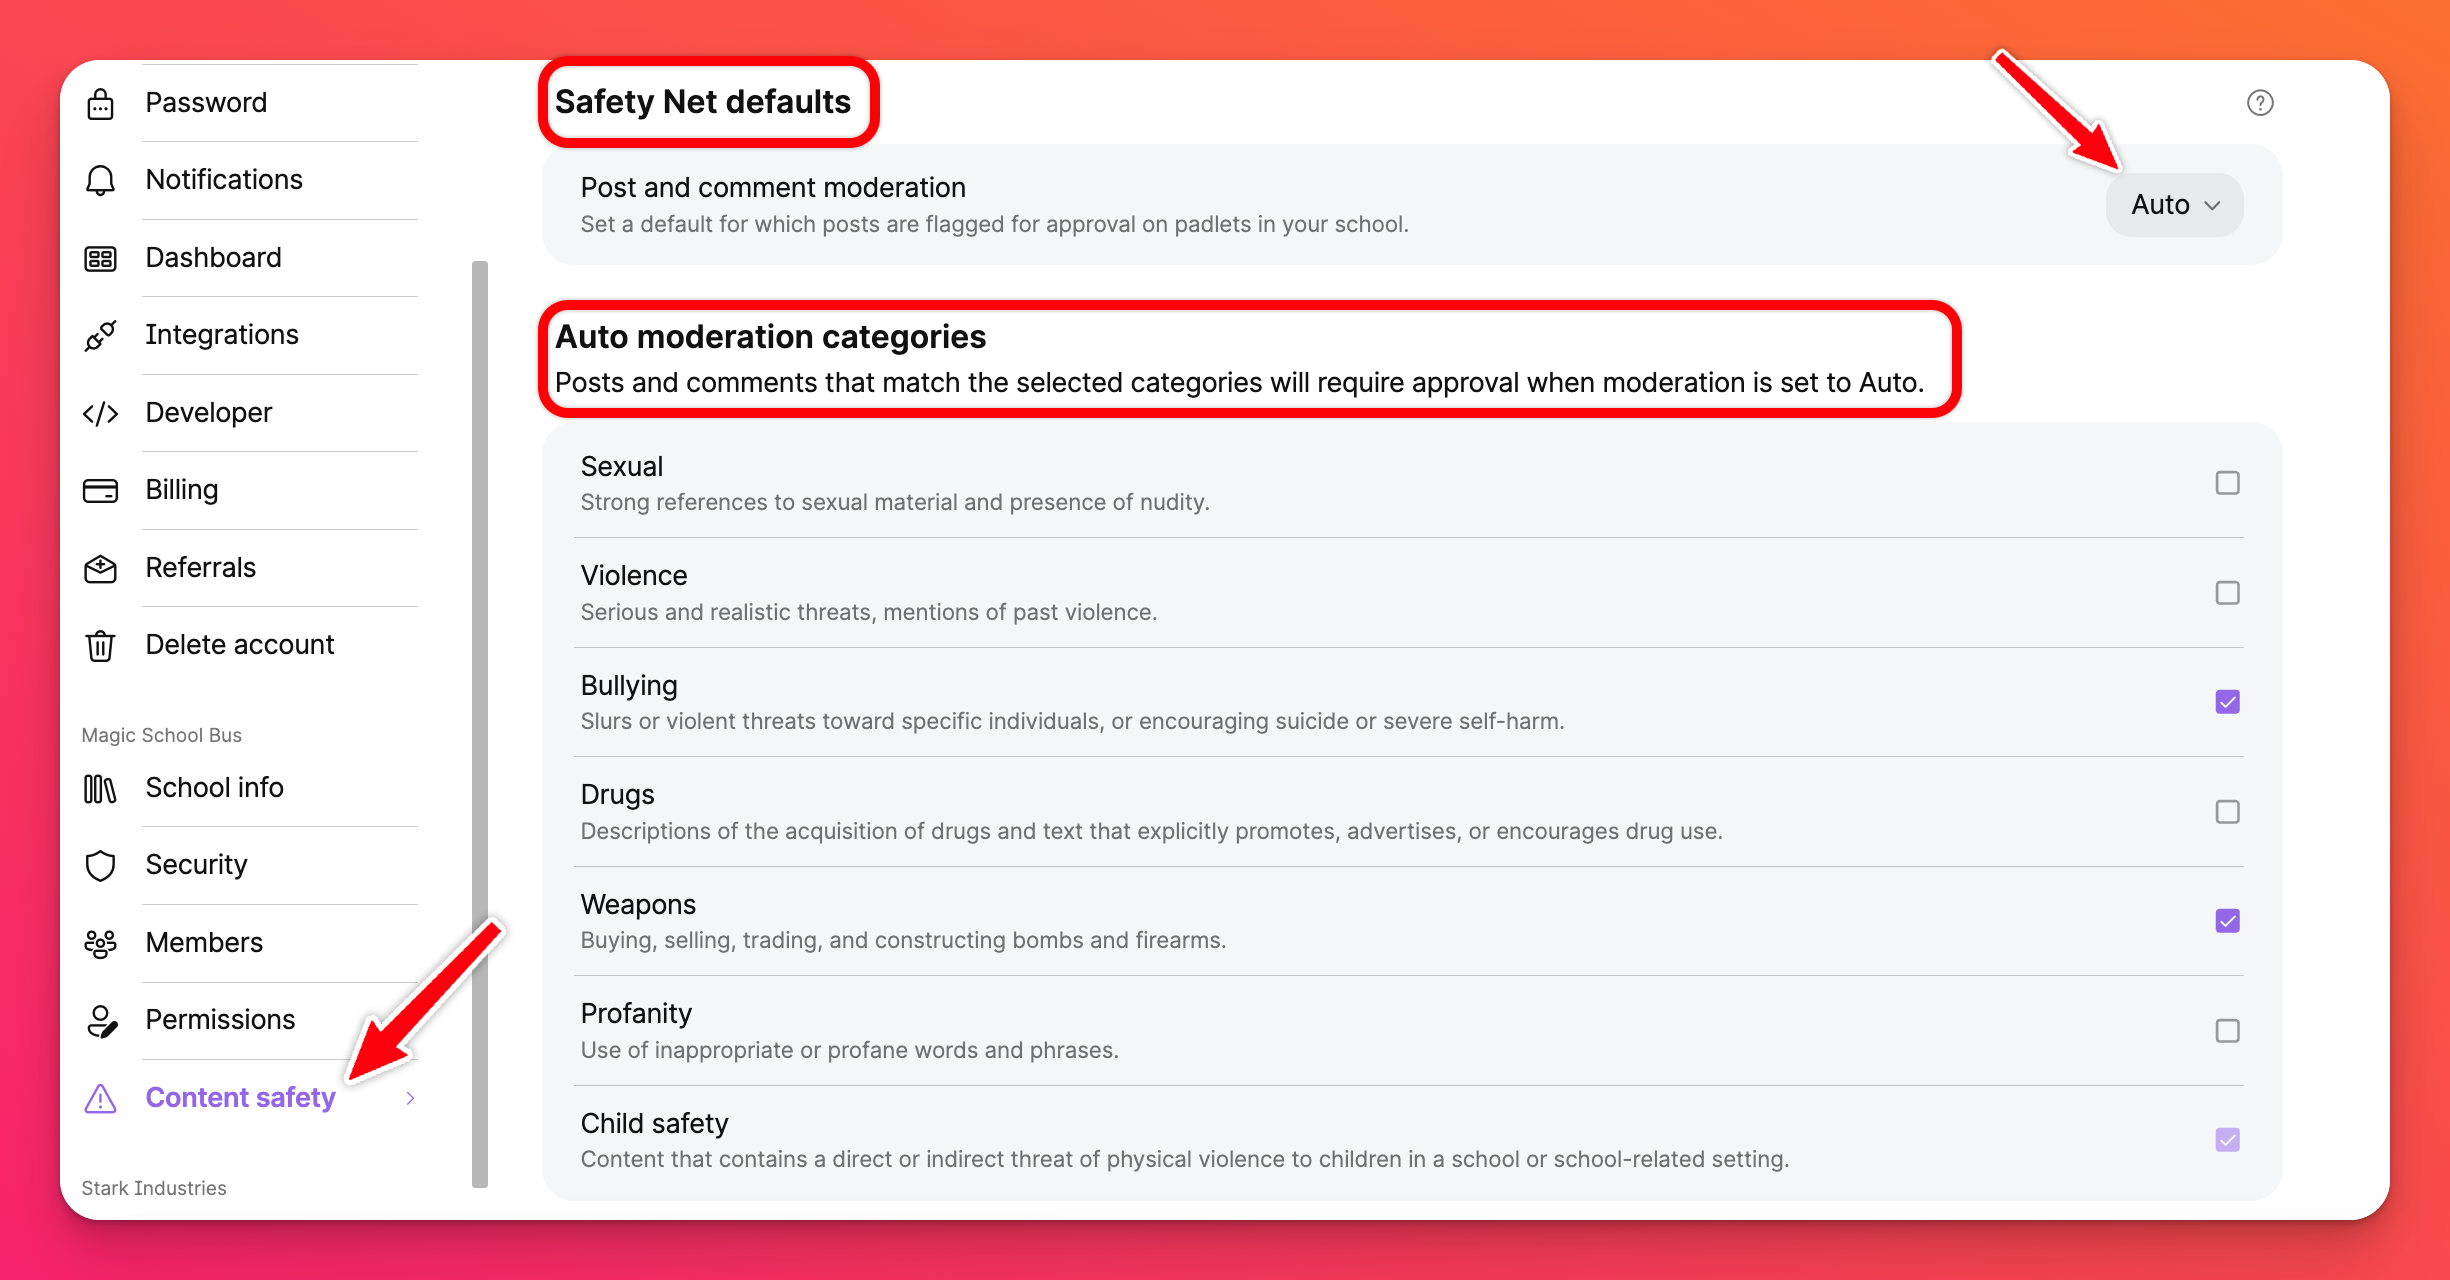
Another very important feature for Padlet for Schools admins is having the ability to customize which categories of content are moderated by Safety Net. Safety Net is the program we use to filter between safe and unsafe content on a padlet. Read how to turn on specific settings here!
Analytics
Access analytics for your account (such as the number of active users, number of padlets created and an alphabetical list of your users) within the Analytics tab. Read more about these features and how they can be utilized here: Padlet for Schools Analytics
Members
Add, edit and remove members from your Padlet for Schools account on your Manage people page.
To navigate to the Manage people dashboard, click on your account name in the top-right corner of the main dashboard and then click Manage people.
Add users
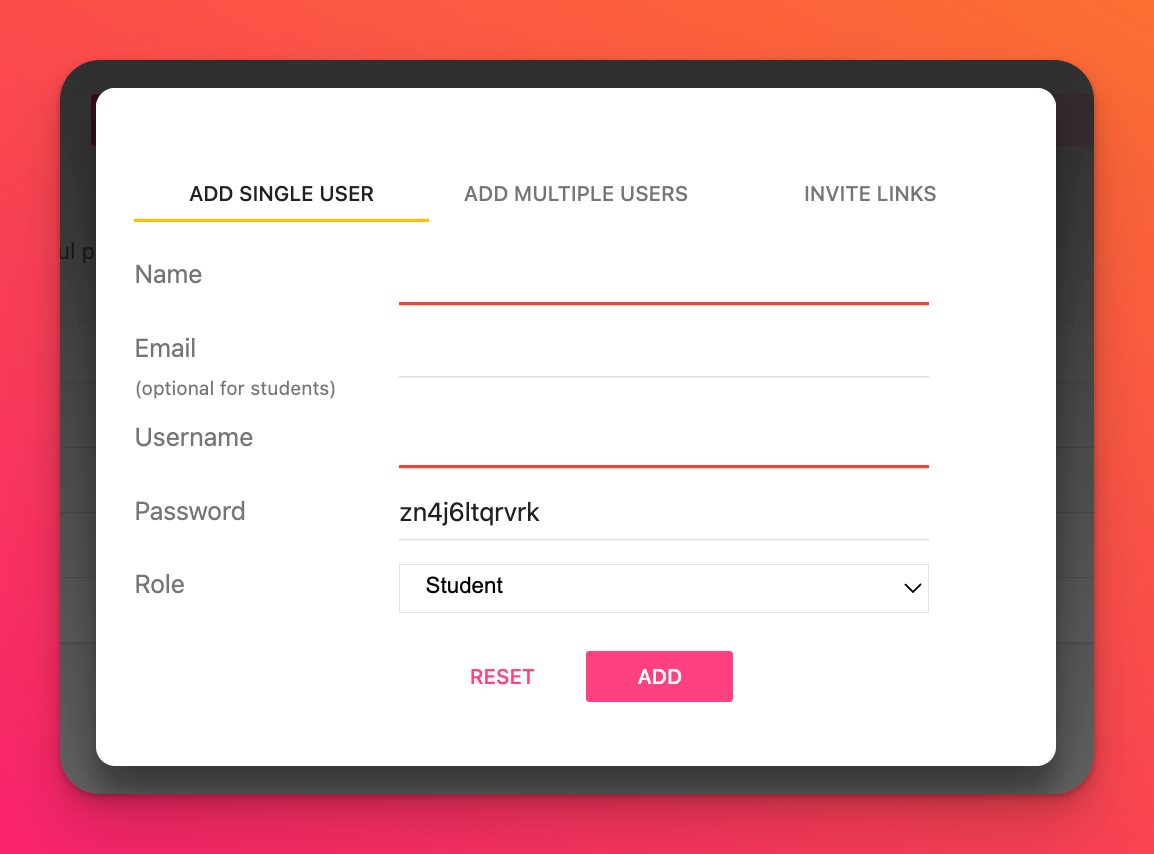
Choose between adding a single user, adding multiple users at the same time or using Invite links. Click the Add new user button to get started.
- Add single user: Choose Add single user > add the appropriate information and select the Role > click Add. The user will be sent an email (if one was entered) informing them they have been added to the account.
- Add multiple users: Choose Add multiple users > input the appropriate information following the instructions (one user per line) > Review > if everything looks correct, click Submit.
- Invite links: Choose Invite links > toggle the button ON next to the role you'd like to invite to > click Copy > paste the link in your email (or any other type of communication you use) and invite your users!
Google for Education App // Clever // ClassLink // OneRoster
Edit/suspend/delete users
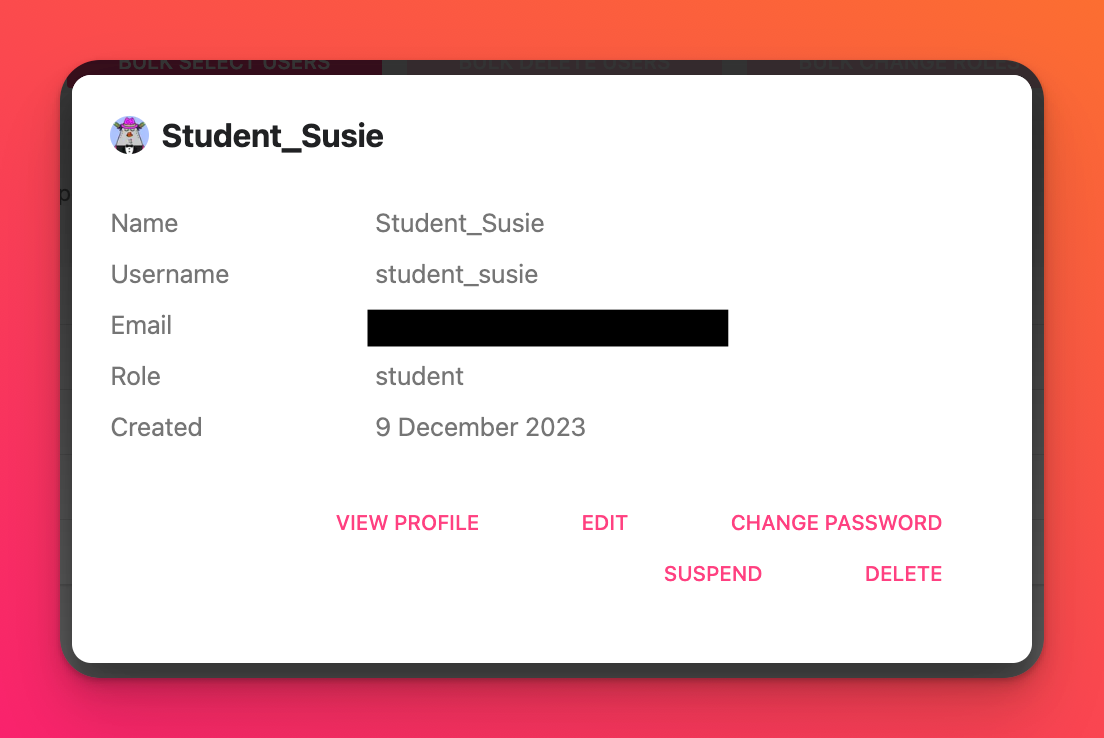
To edit/suspend/delete a single user, click on View next to the user on the Manage people page.
To edit/delete multiple users at the same time, check the box next to each user (or click Bulk select users at the top to enter emails). Then, choose between Bulk delete users or Bulk change roles at the top of the page.
To suspend multiple users, click the Bulk select users button, add the users' emails and click Suspend users.
Deleted users: These users will no longer be able to log into the Padlet for Schools account. All of their work (padlets, posts, etc.) will be permanently deleted from our database.
Share your padlets
Sharing your padlet is simple. Copy and send the link via email, use a QR code, embed it on an outside website, export it to your device, etc. There are several options to choose from. Learn about all of the sharing options here: Share a padlet

