Welcome to Padlet for Schools for teachers!
Welcome teachers! This is your go-to guide for using your Padlet for Schools account.
Think of Padlet for Schools as a closed ecosystem. Your school controls who can be a member and what permissions each member has. Logging into your account grants you access to a private space where padlets can be created and shared.
Now that we have that out of the way, lets get started!
Prefer to jump straight into pricing? Click here to get a quote!
What is Padlet?
Lets start with the basics! Padlet is a software for visual collaboration and creative work in education. Create lesson plans, discussion boards and fun classroom activities. We also have interactive whiteboards where you can create games, story books and so much more!
There are two different types of padlets: Boards and Sandbox!
If you want to see what you can create with one of our beautiful boards or see what a Sandbox entails, click one of the buttons below!
Accessing your Padlet for Schools account
To access your Padlet for Schools account, go to padlet.com and click Log in.
Your administrator will choose the login option that you’ll use. The options include logging in with an email and password or using one of our single sign-on (SSO) options.
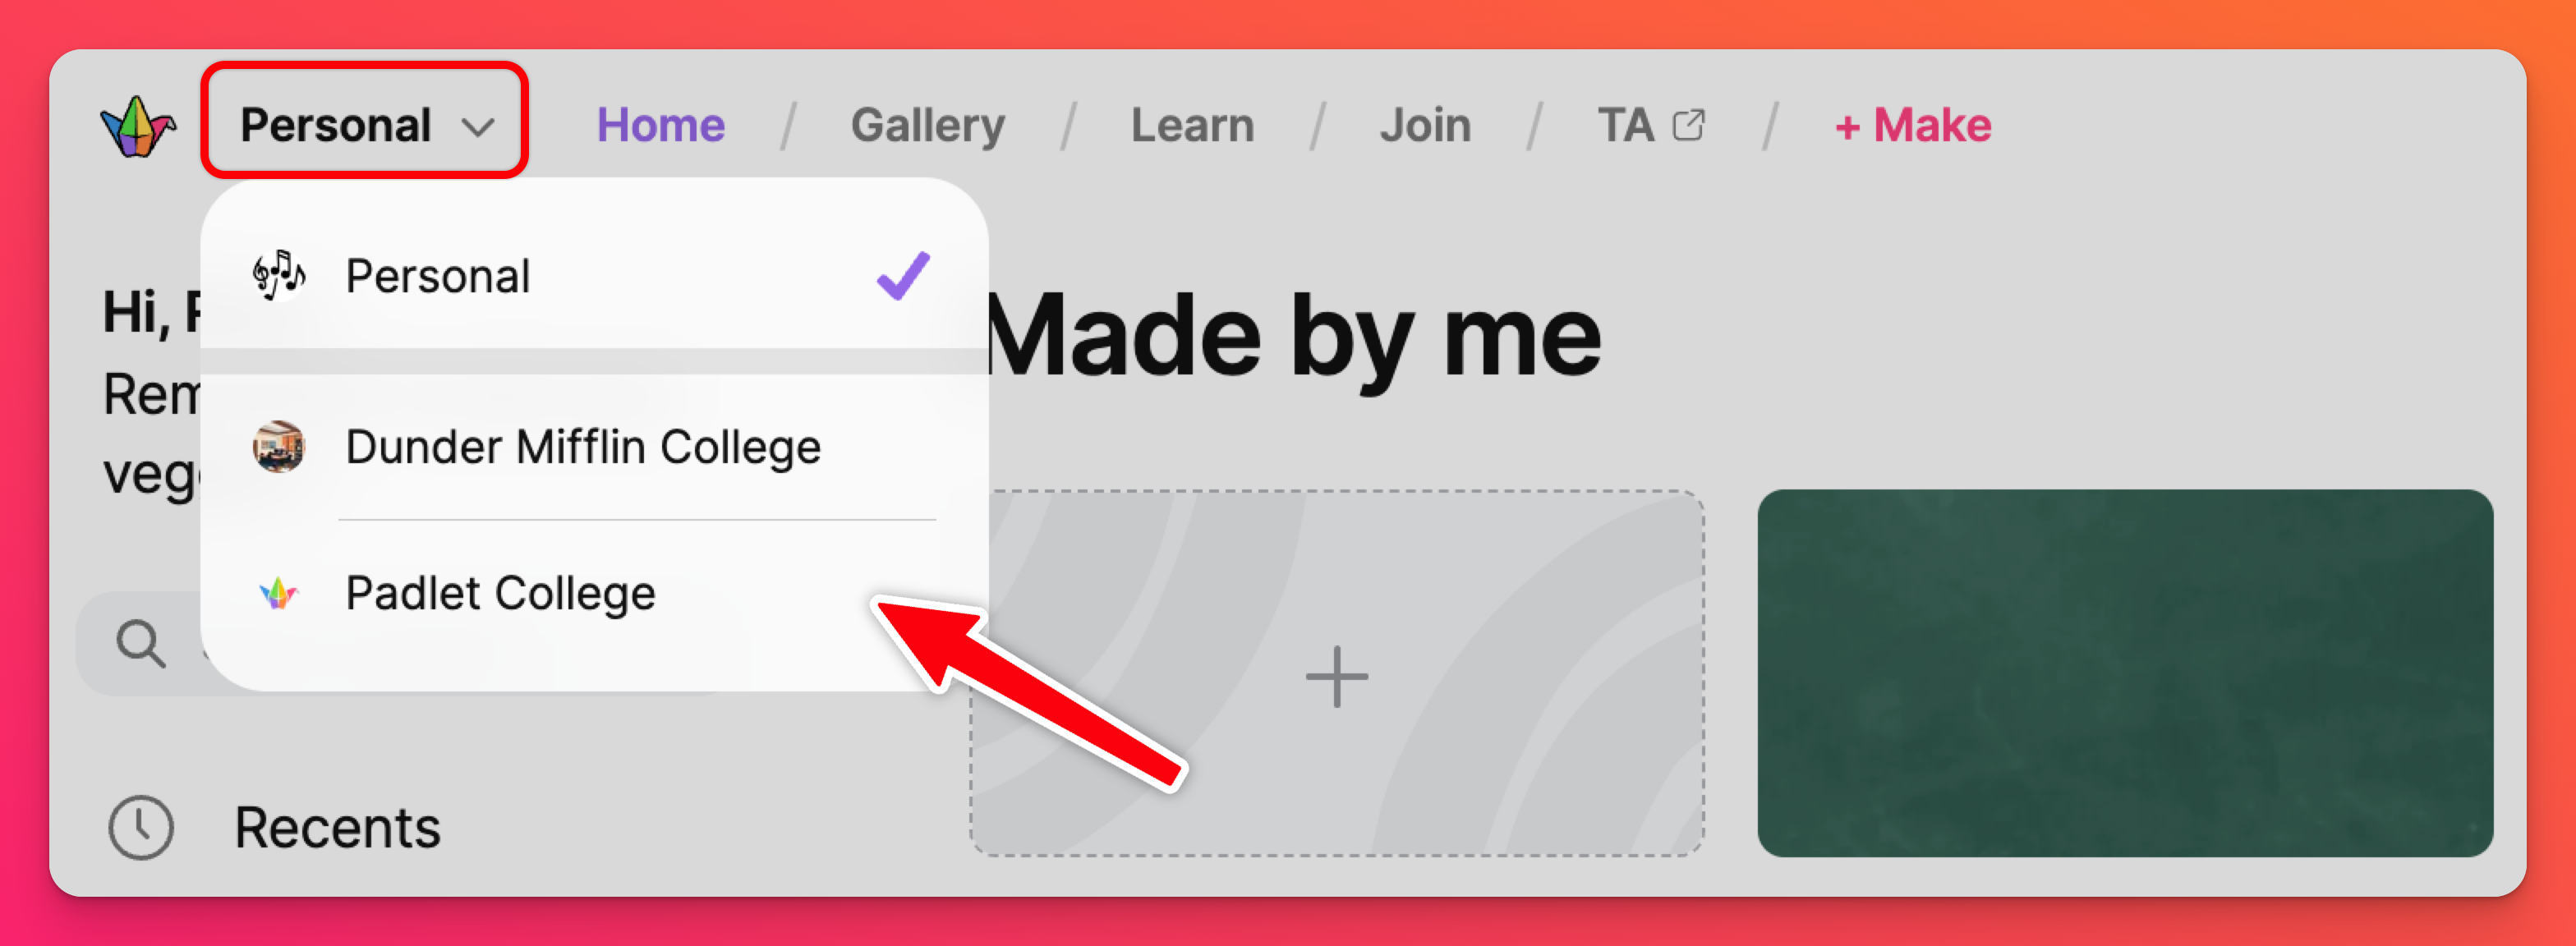
Once you're logged in, you will want to ensure you are viewing your Padlet for Schools account (and not your personal account). To do this, click on your account menu in the upper-left corner of your dashboard. The account with the check mark next to it indicates the account you're currently in.
Transfer your padlets
If you have been added to a Padlet for Schools account with an Admin or Teacher role and have an existing account with the same email address, you will be given the option to transfer your padlets into your school account upon your initial log in. If you choose to do this later, follow the options below:
- To transfer a padlet from your personal account, click on your account menu in the upper-left corner of your dashboard.
- Click on your Personal account from the user menu.
- Find the Made by me folder on the left-hand side of your dashboard and open it.
- Click the vertical three-dot ellipsis (...) button on the padlet's thumbnail and select Transfer padlet.
- Choose your Padlet for Schools account from the list and the padlet will automatically transfer.

Professional development
Get Padlet certified by participating in one of our Professional Development courses. Take part in this self-paced course and earn a certificate of completion when you're finished!
You can also watch our Padlet Sessions training webinars. Click the link to sign up for future interactive webinars or view past sessions for a refresher!
Create a padlet
There are many different ways you can create a padlet. The possibilities are essentially endless! Begin by crafting your creations from these options:
- Board
- Sandbox
- Create with AI (AI recipes)
- Use a Template (Recipes)
Want to dig your toes in a Sandbox? Look at these creations!
Board
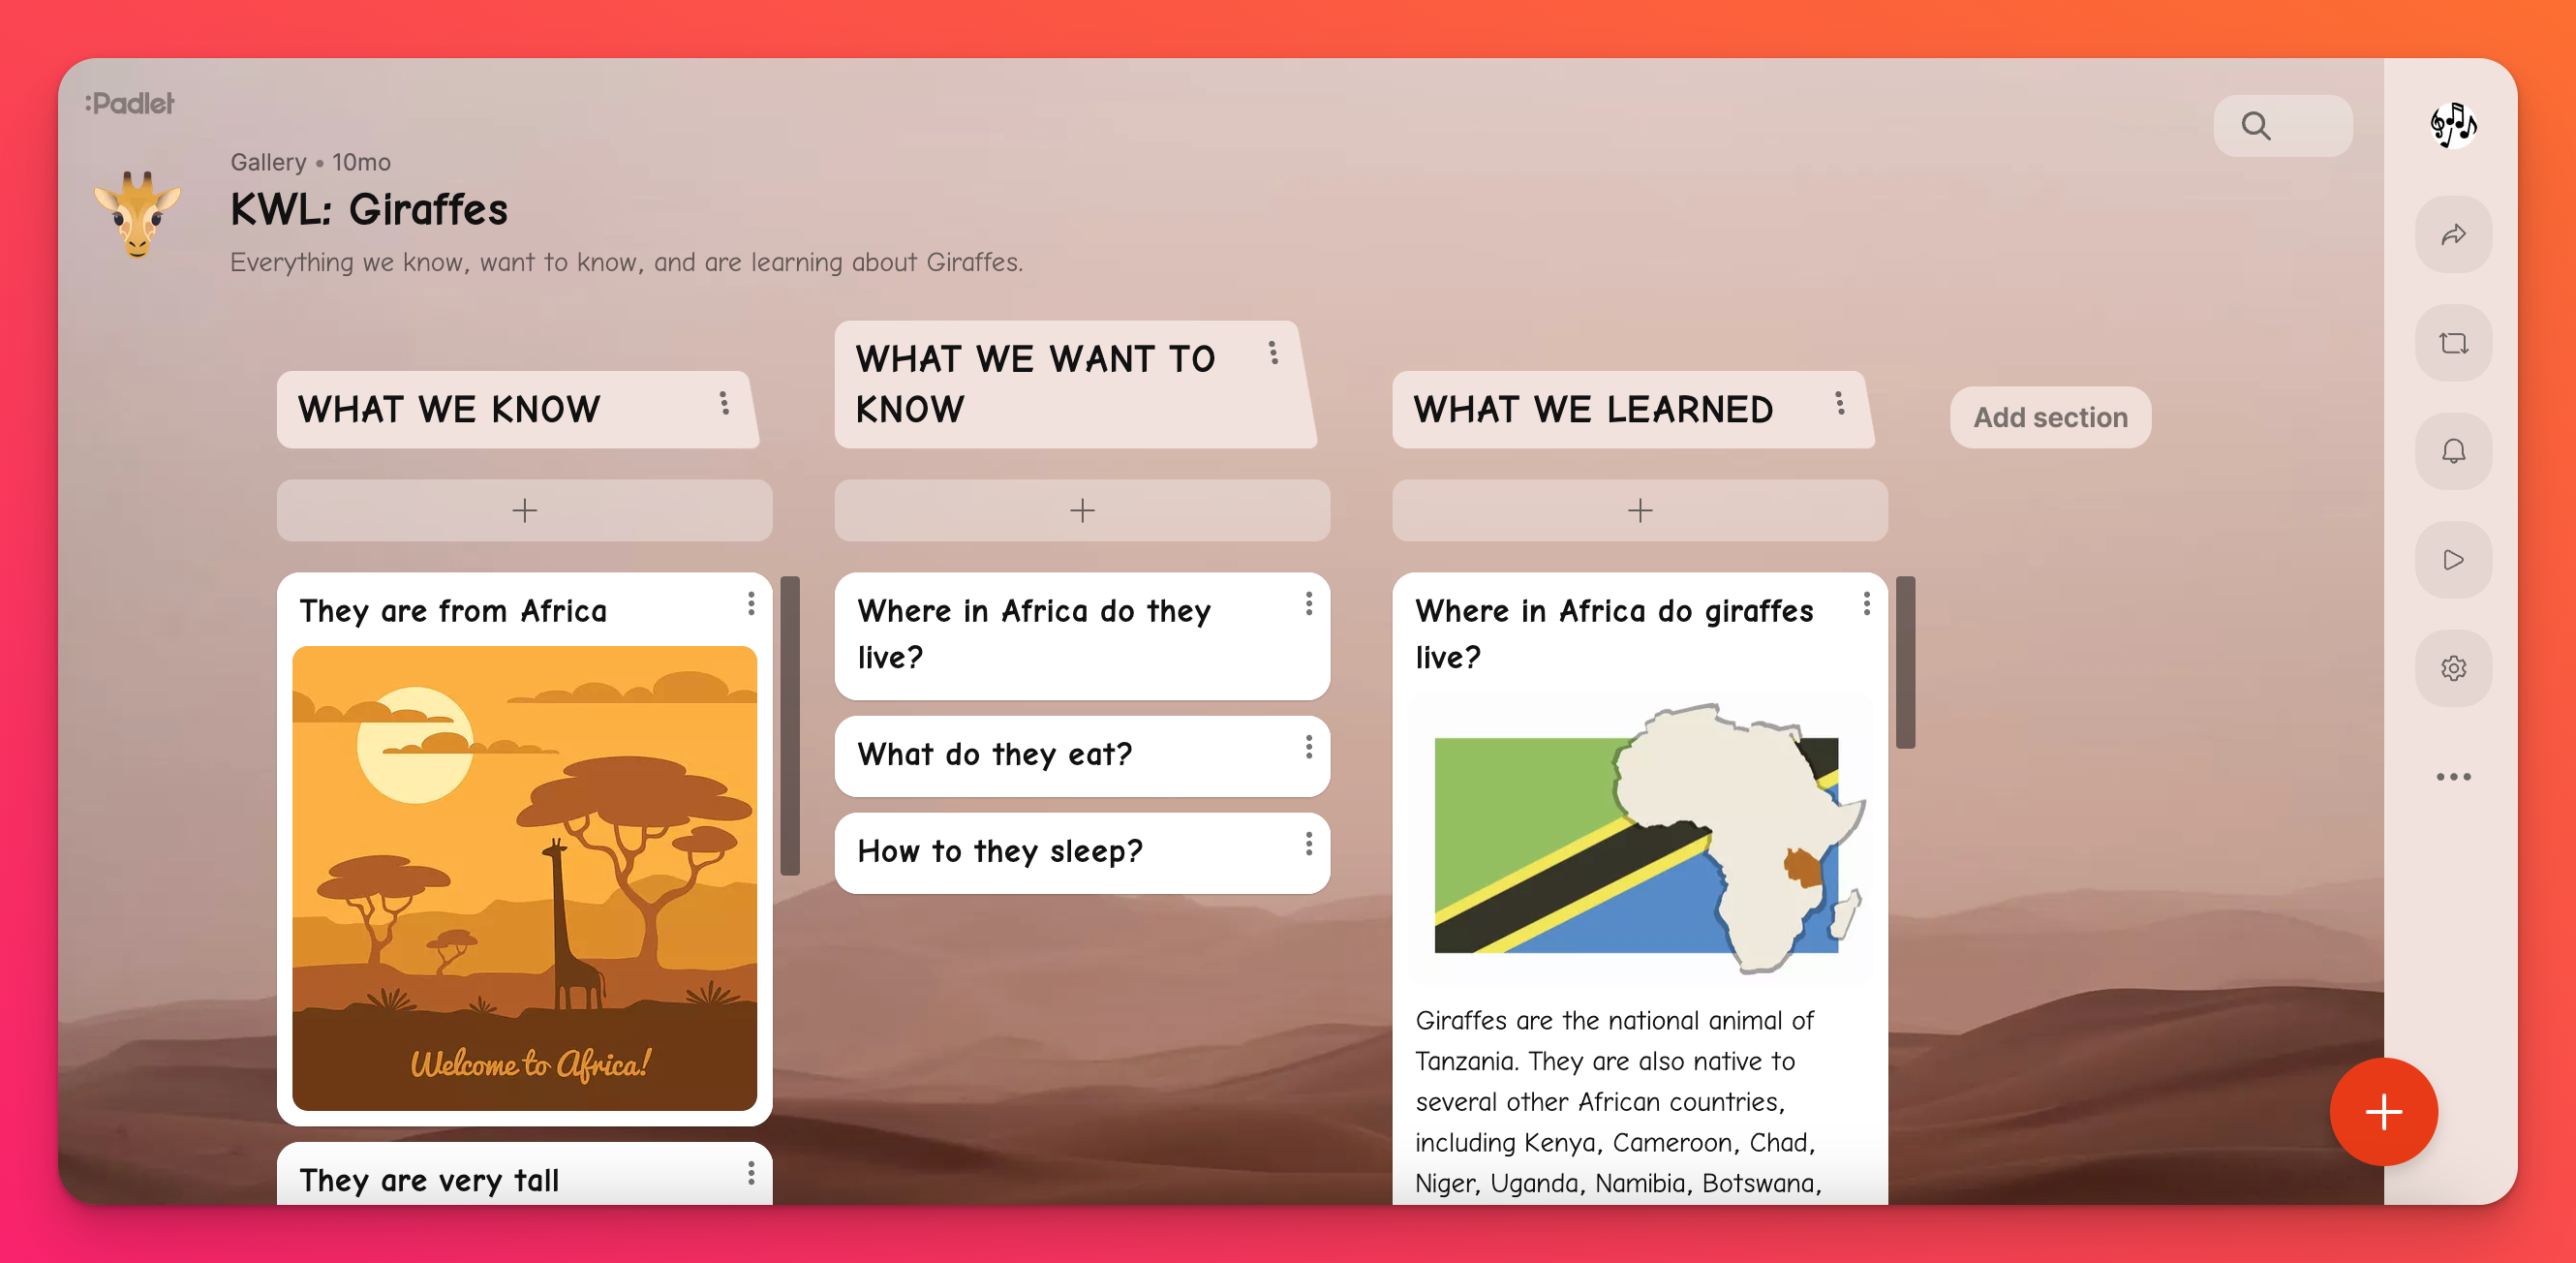
Any padlet you create is a visual space that allows you to share and organize thoughts. Think of a board as a virtual bulletin board for posting content in a creative and easy way!
Sandbox
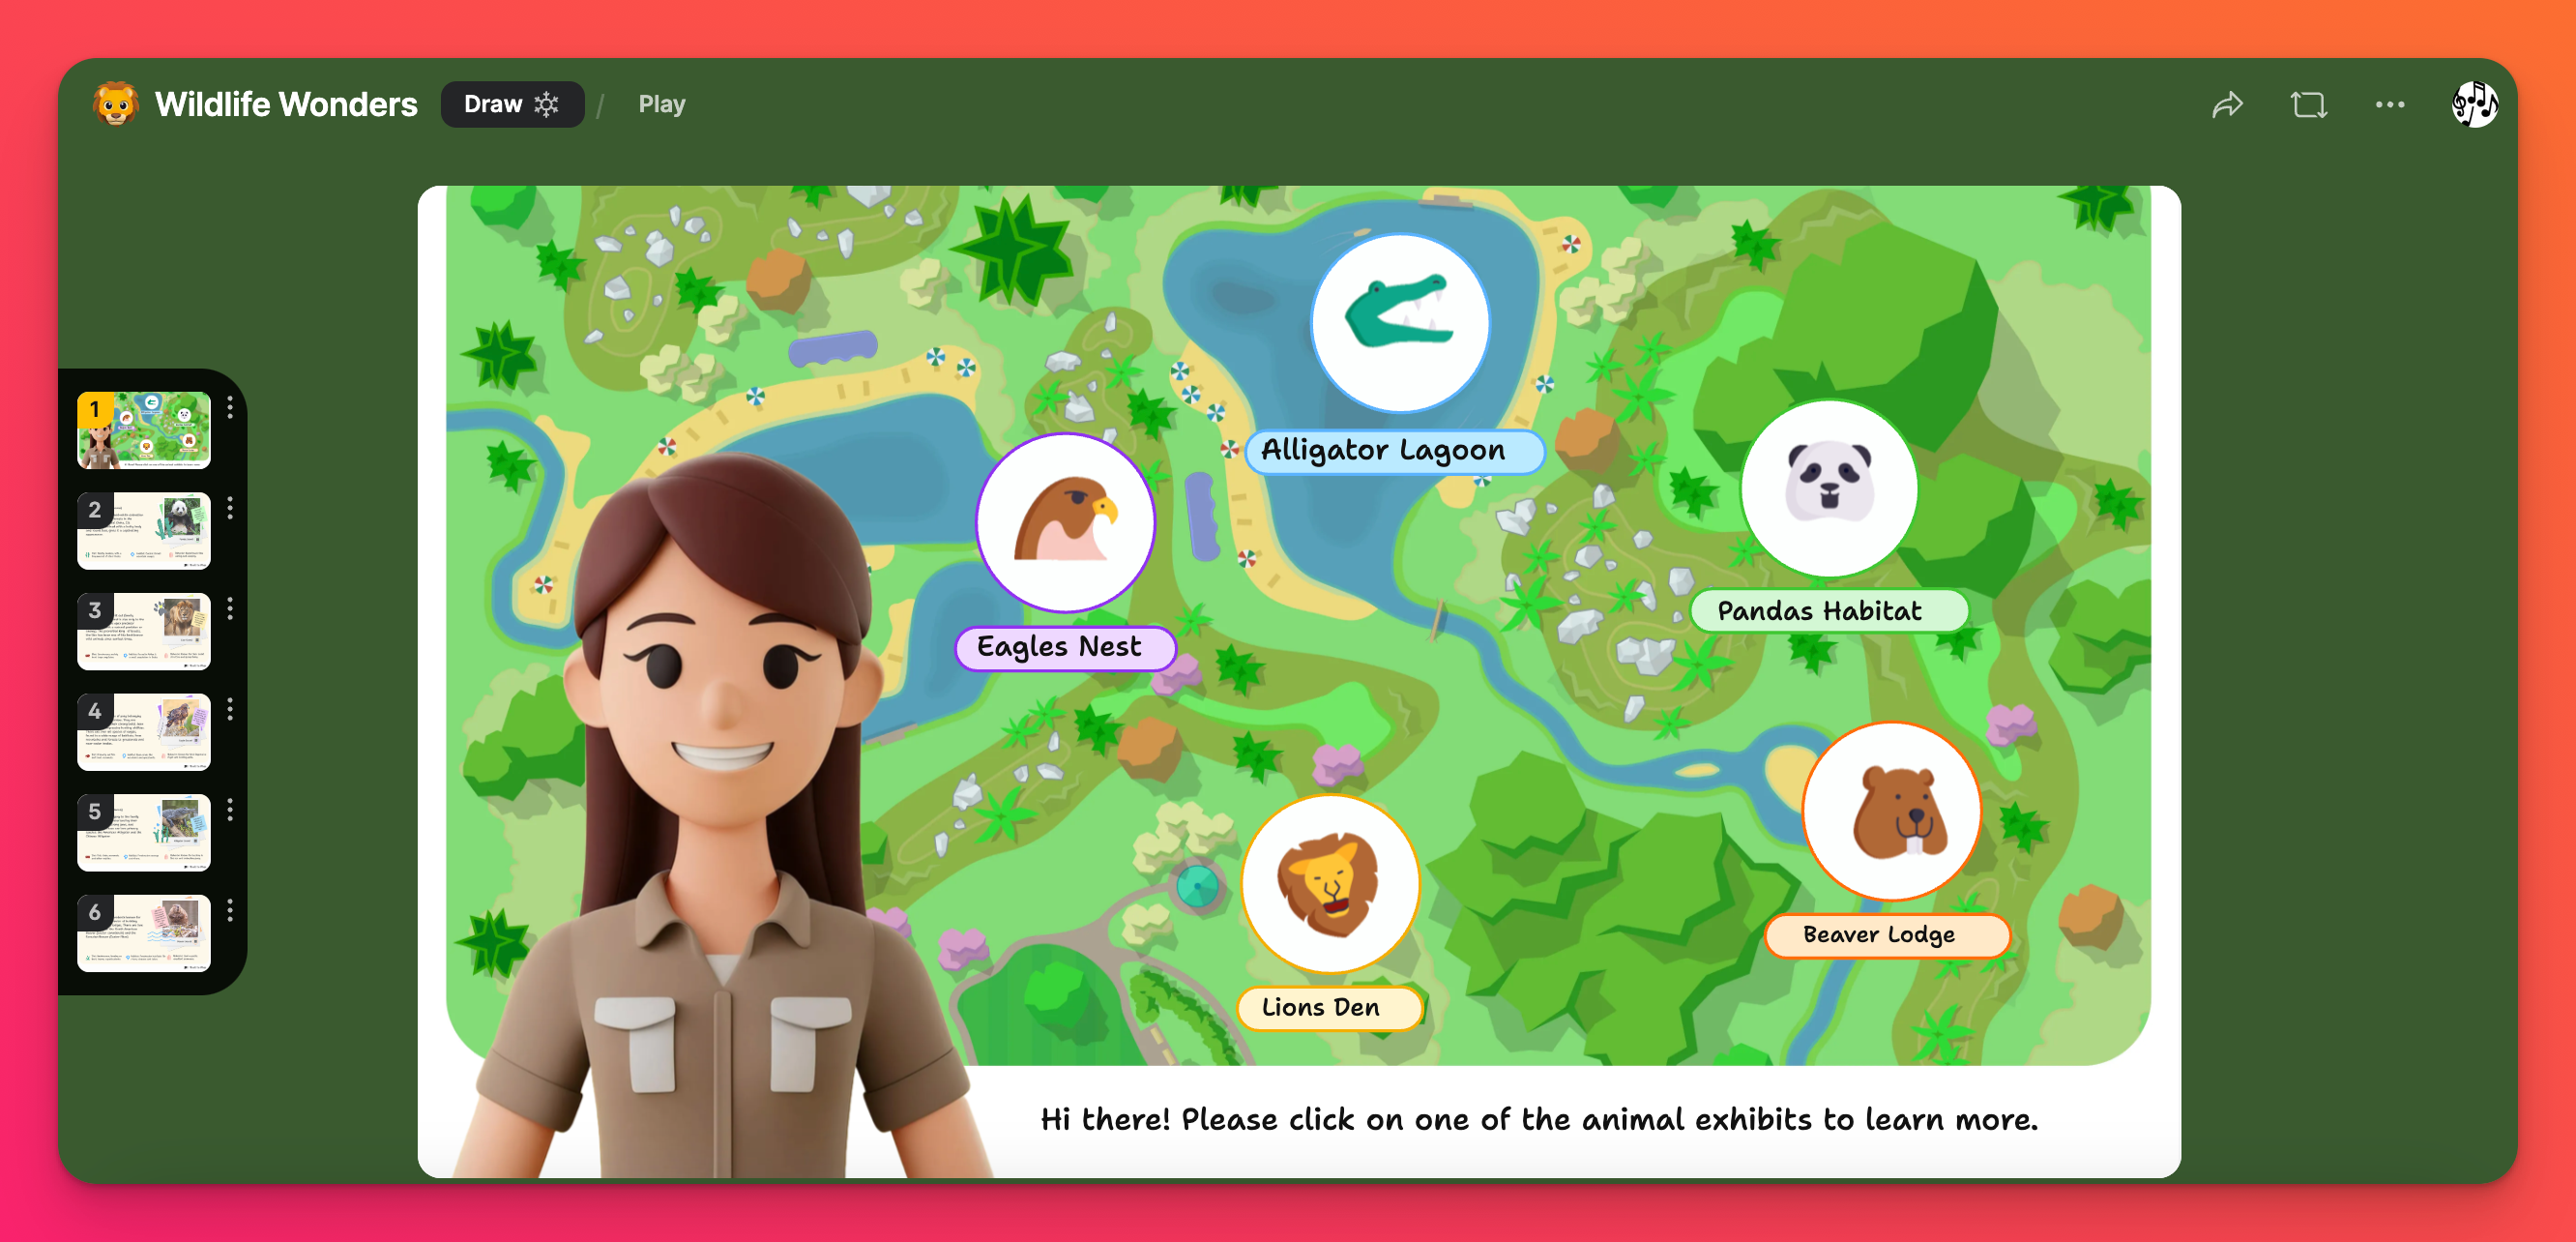
A Sandbox is more of a freeform version of a padlet! Sandbox is a collaborative digital canvas with tools for drawing, learning and playing interactive games!
Create with AI
AI recipes use the power of generative AI to create an entire padlet based on your description. Use our AI recipes to create discussion boards, lesson plans, class activities and more - almost instantly!
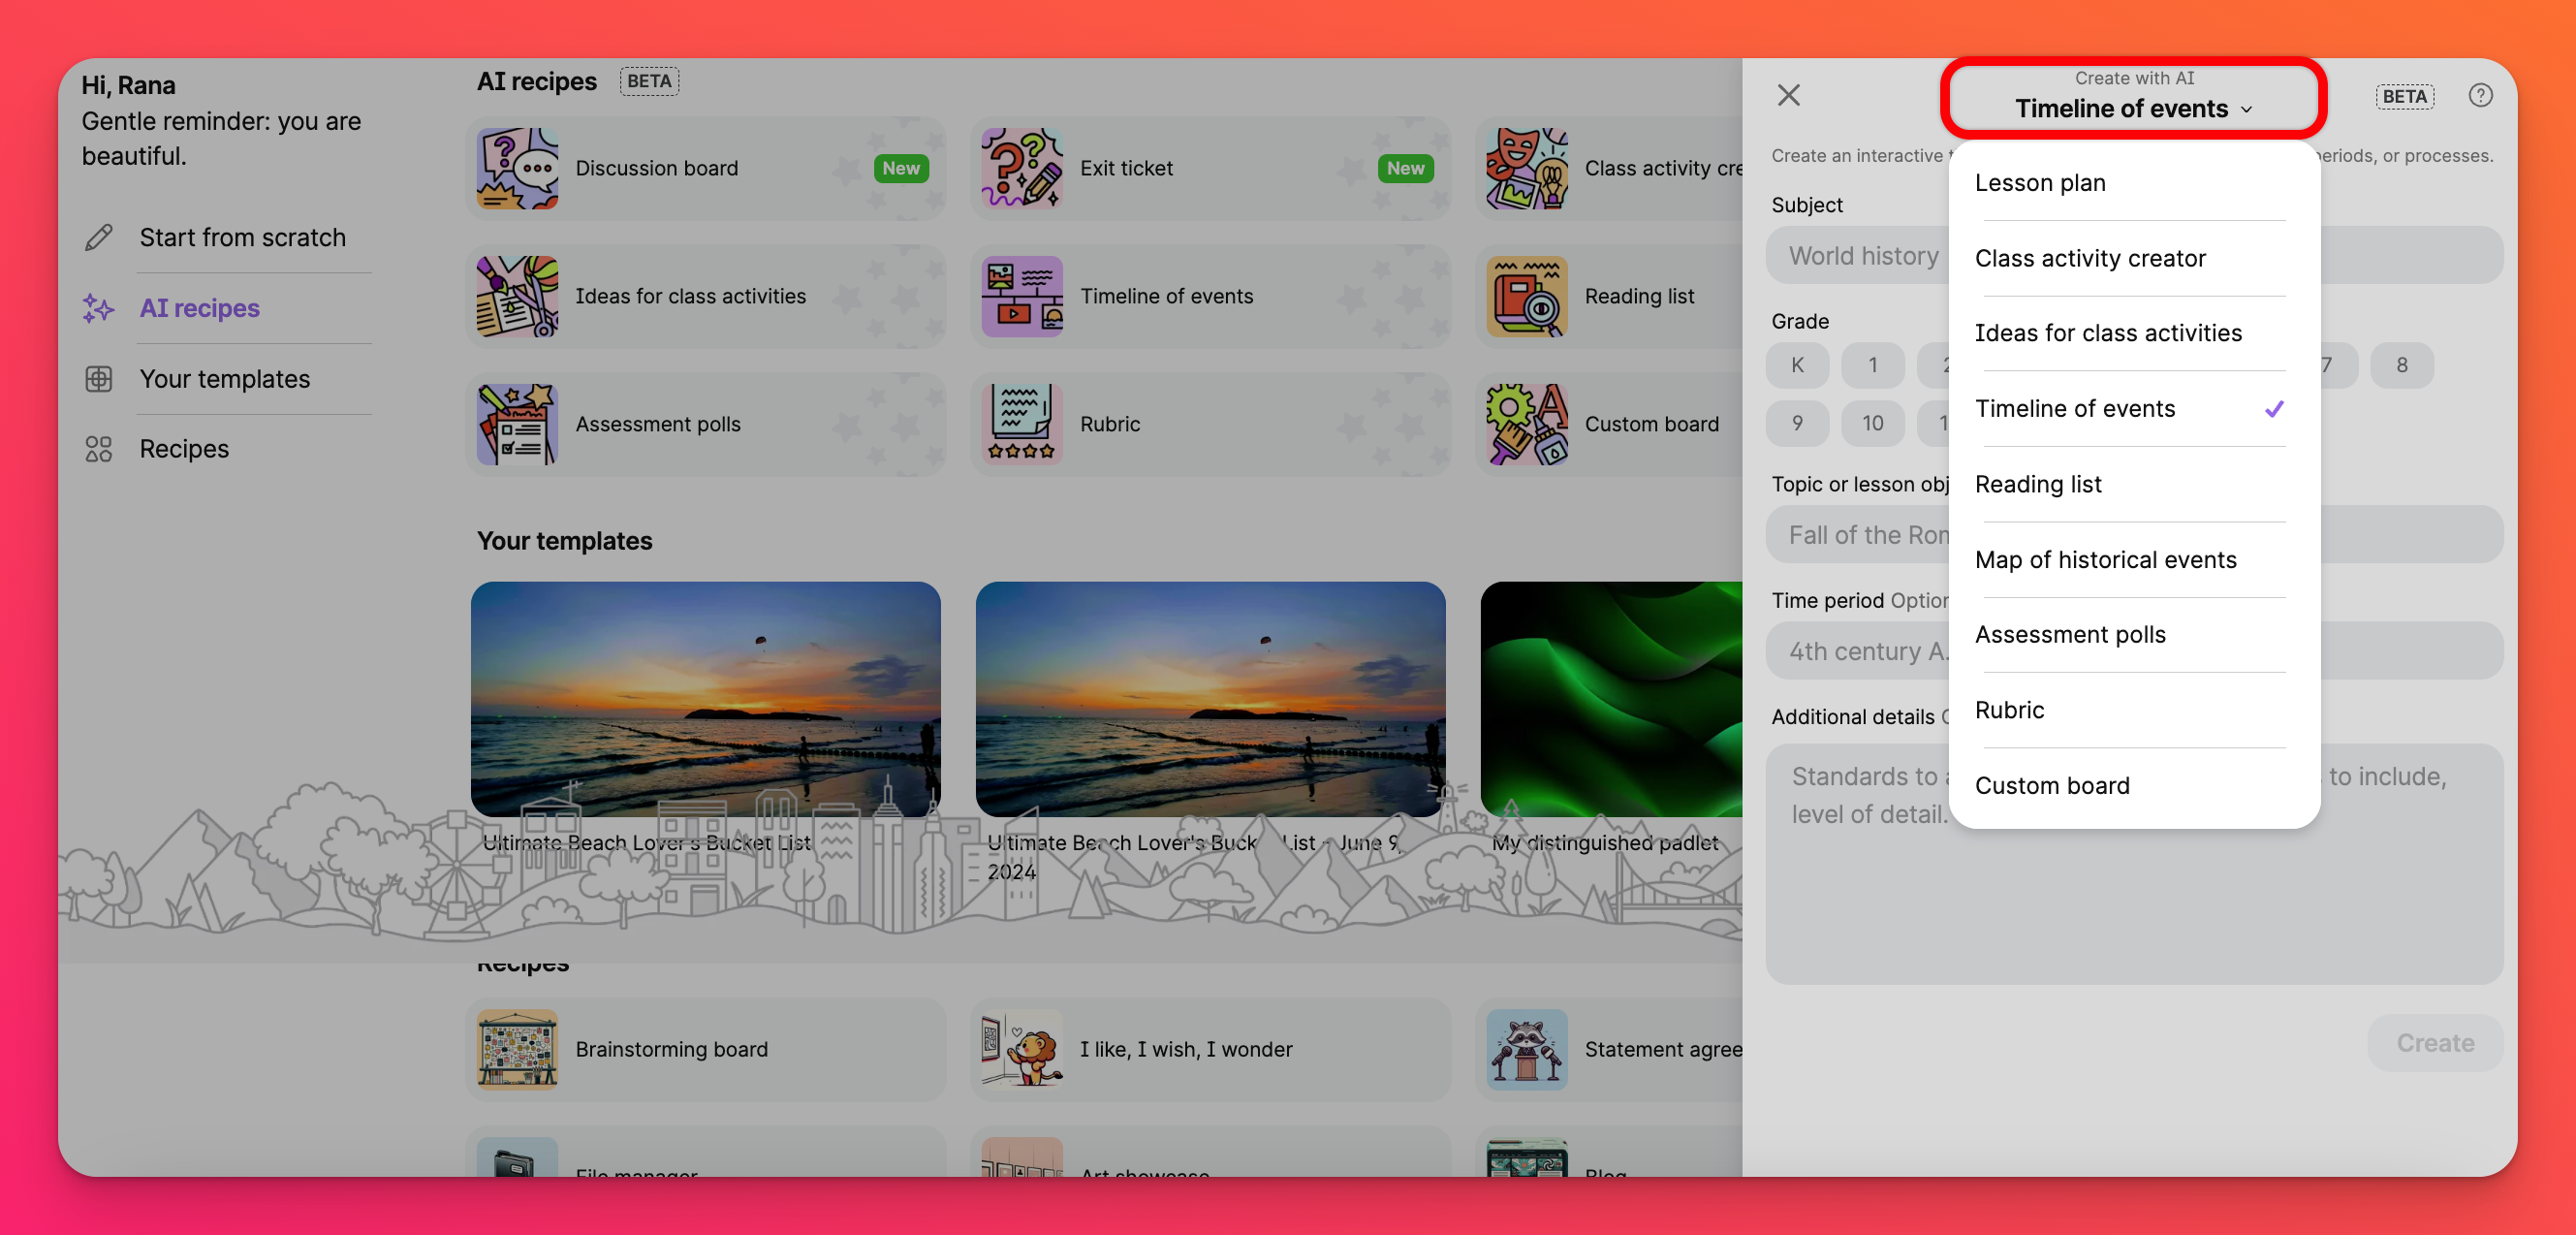
To get started, log into your account, click on the + Make button at the top of the page followed by AI recipes. Choose your recipe and start cooking!
Read more about our AI recipes here!
Templates
Not really sure where to start or need ideas? Search our Template gallery! Look through hundreds of pre-made templates (aka recipes) that you can use to get your creative juices flowing. Search based on a specific category of interest or even search by grade level!

For more tips and tricks to navigating through the Template gallery, you may find this article useful: Gallery Templates
Customize your padlet settings
Customize your padlet with a title, wallpaper and different content/moderation settings within the padlet's settings menu. Simply click the Settings cog icon (⚙️) on the right-hand side of your padlet and start the customization process!
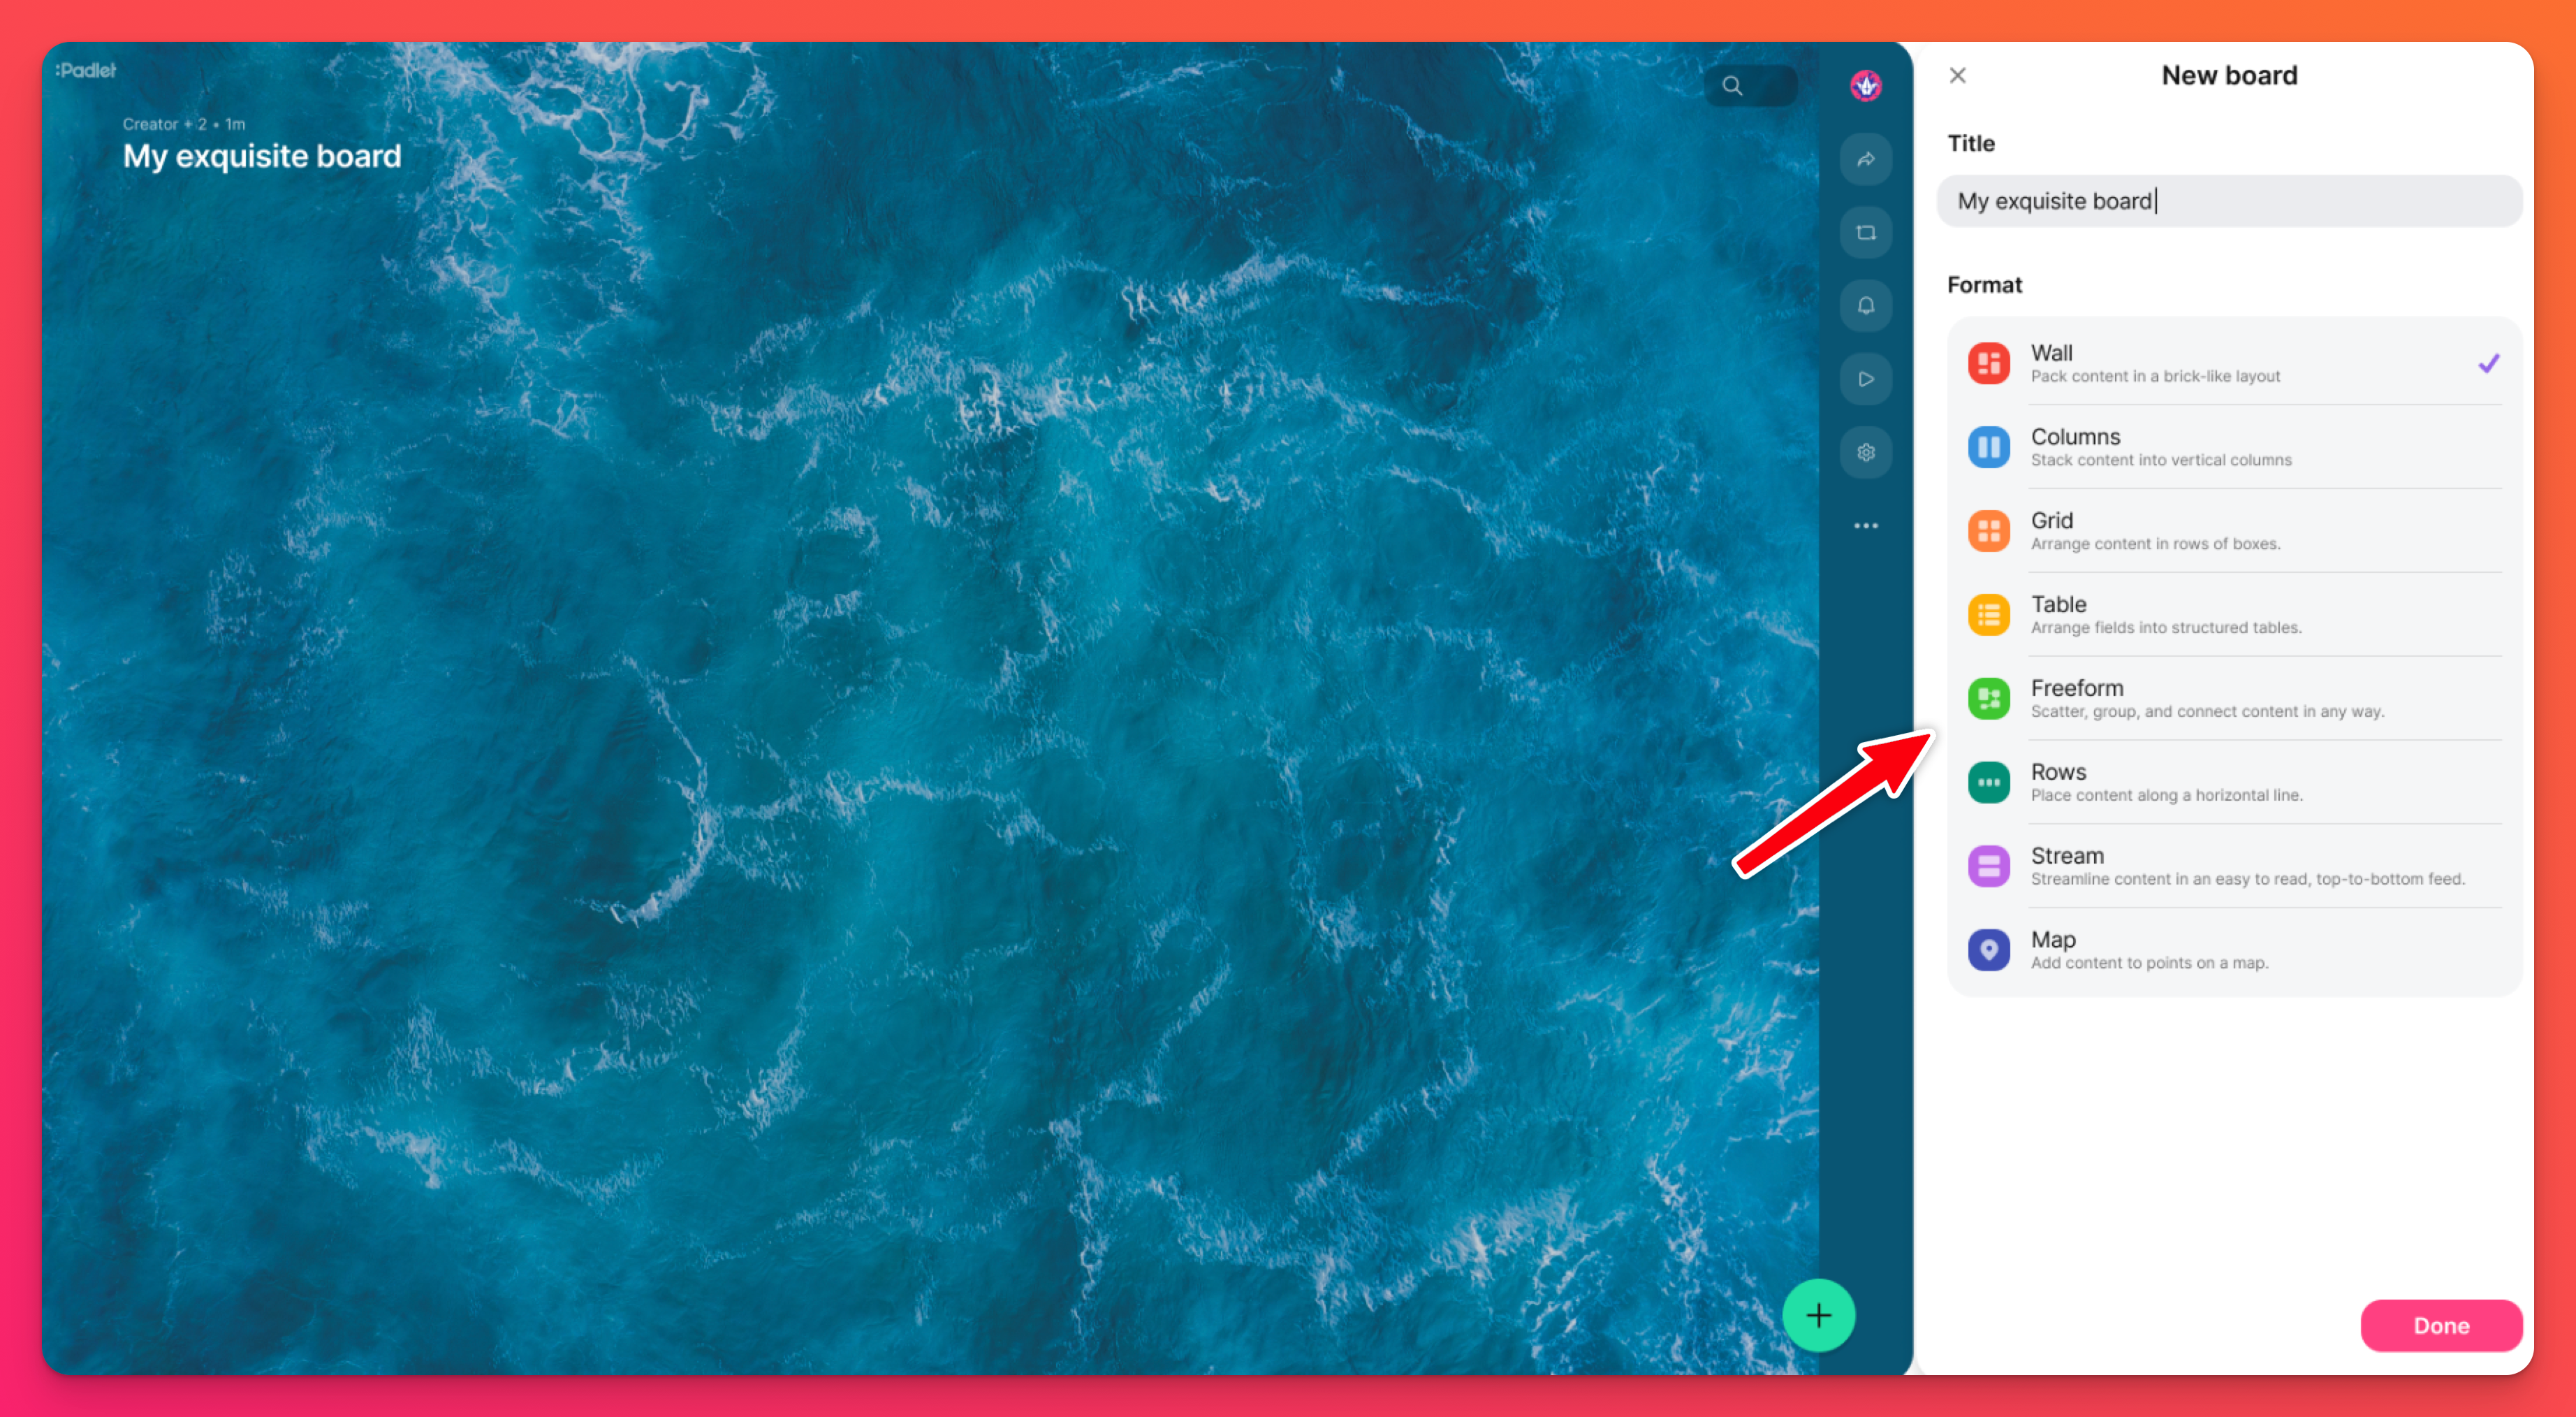
Choose a format
One of the first decisions you will make when you create a board is choosing a format. A board's format dictates how posts will be arranged. Some formats (like Wall, Columns and Grid) allow you to see many posts all at once on one large canvas. Others (like Timeline and Stream) allow you to order posts sequentially. We have a few other format types hiding in there, too! Check them out!
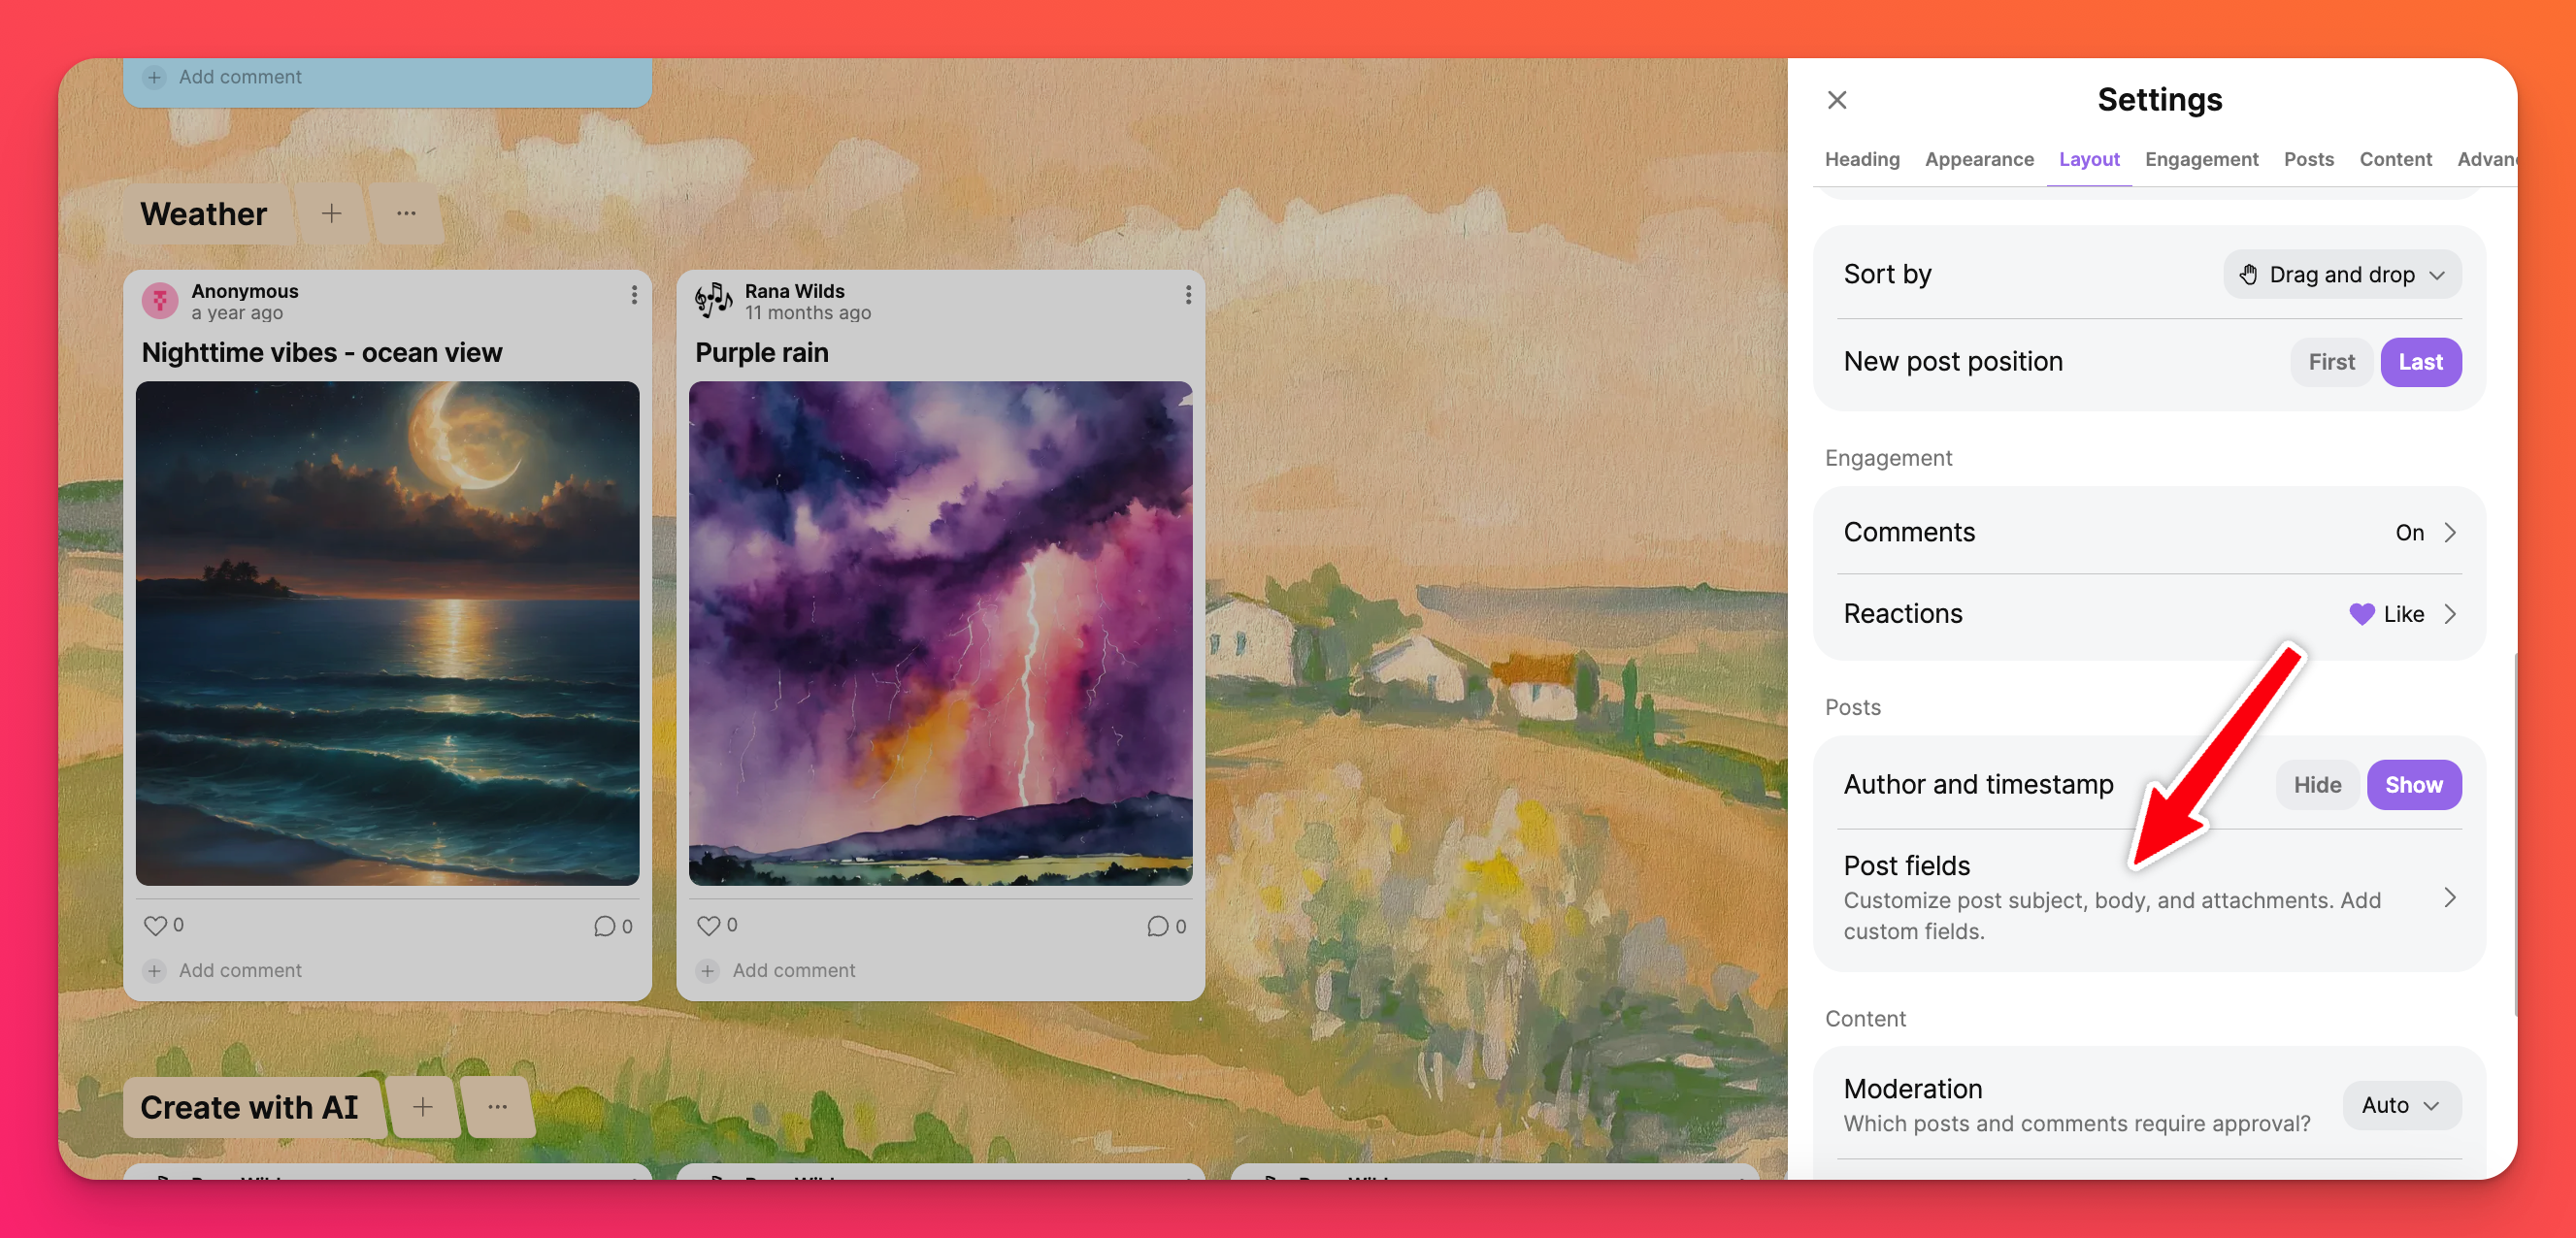
Additional customization options
Customize the available attachment options and post fields shown in the post composer! Read more about Post fields here!
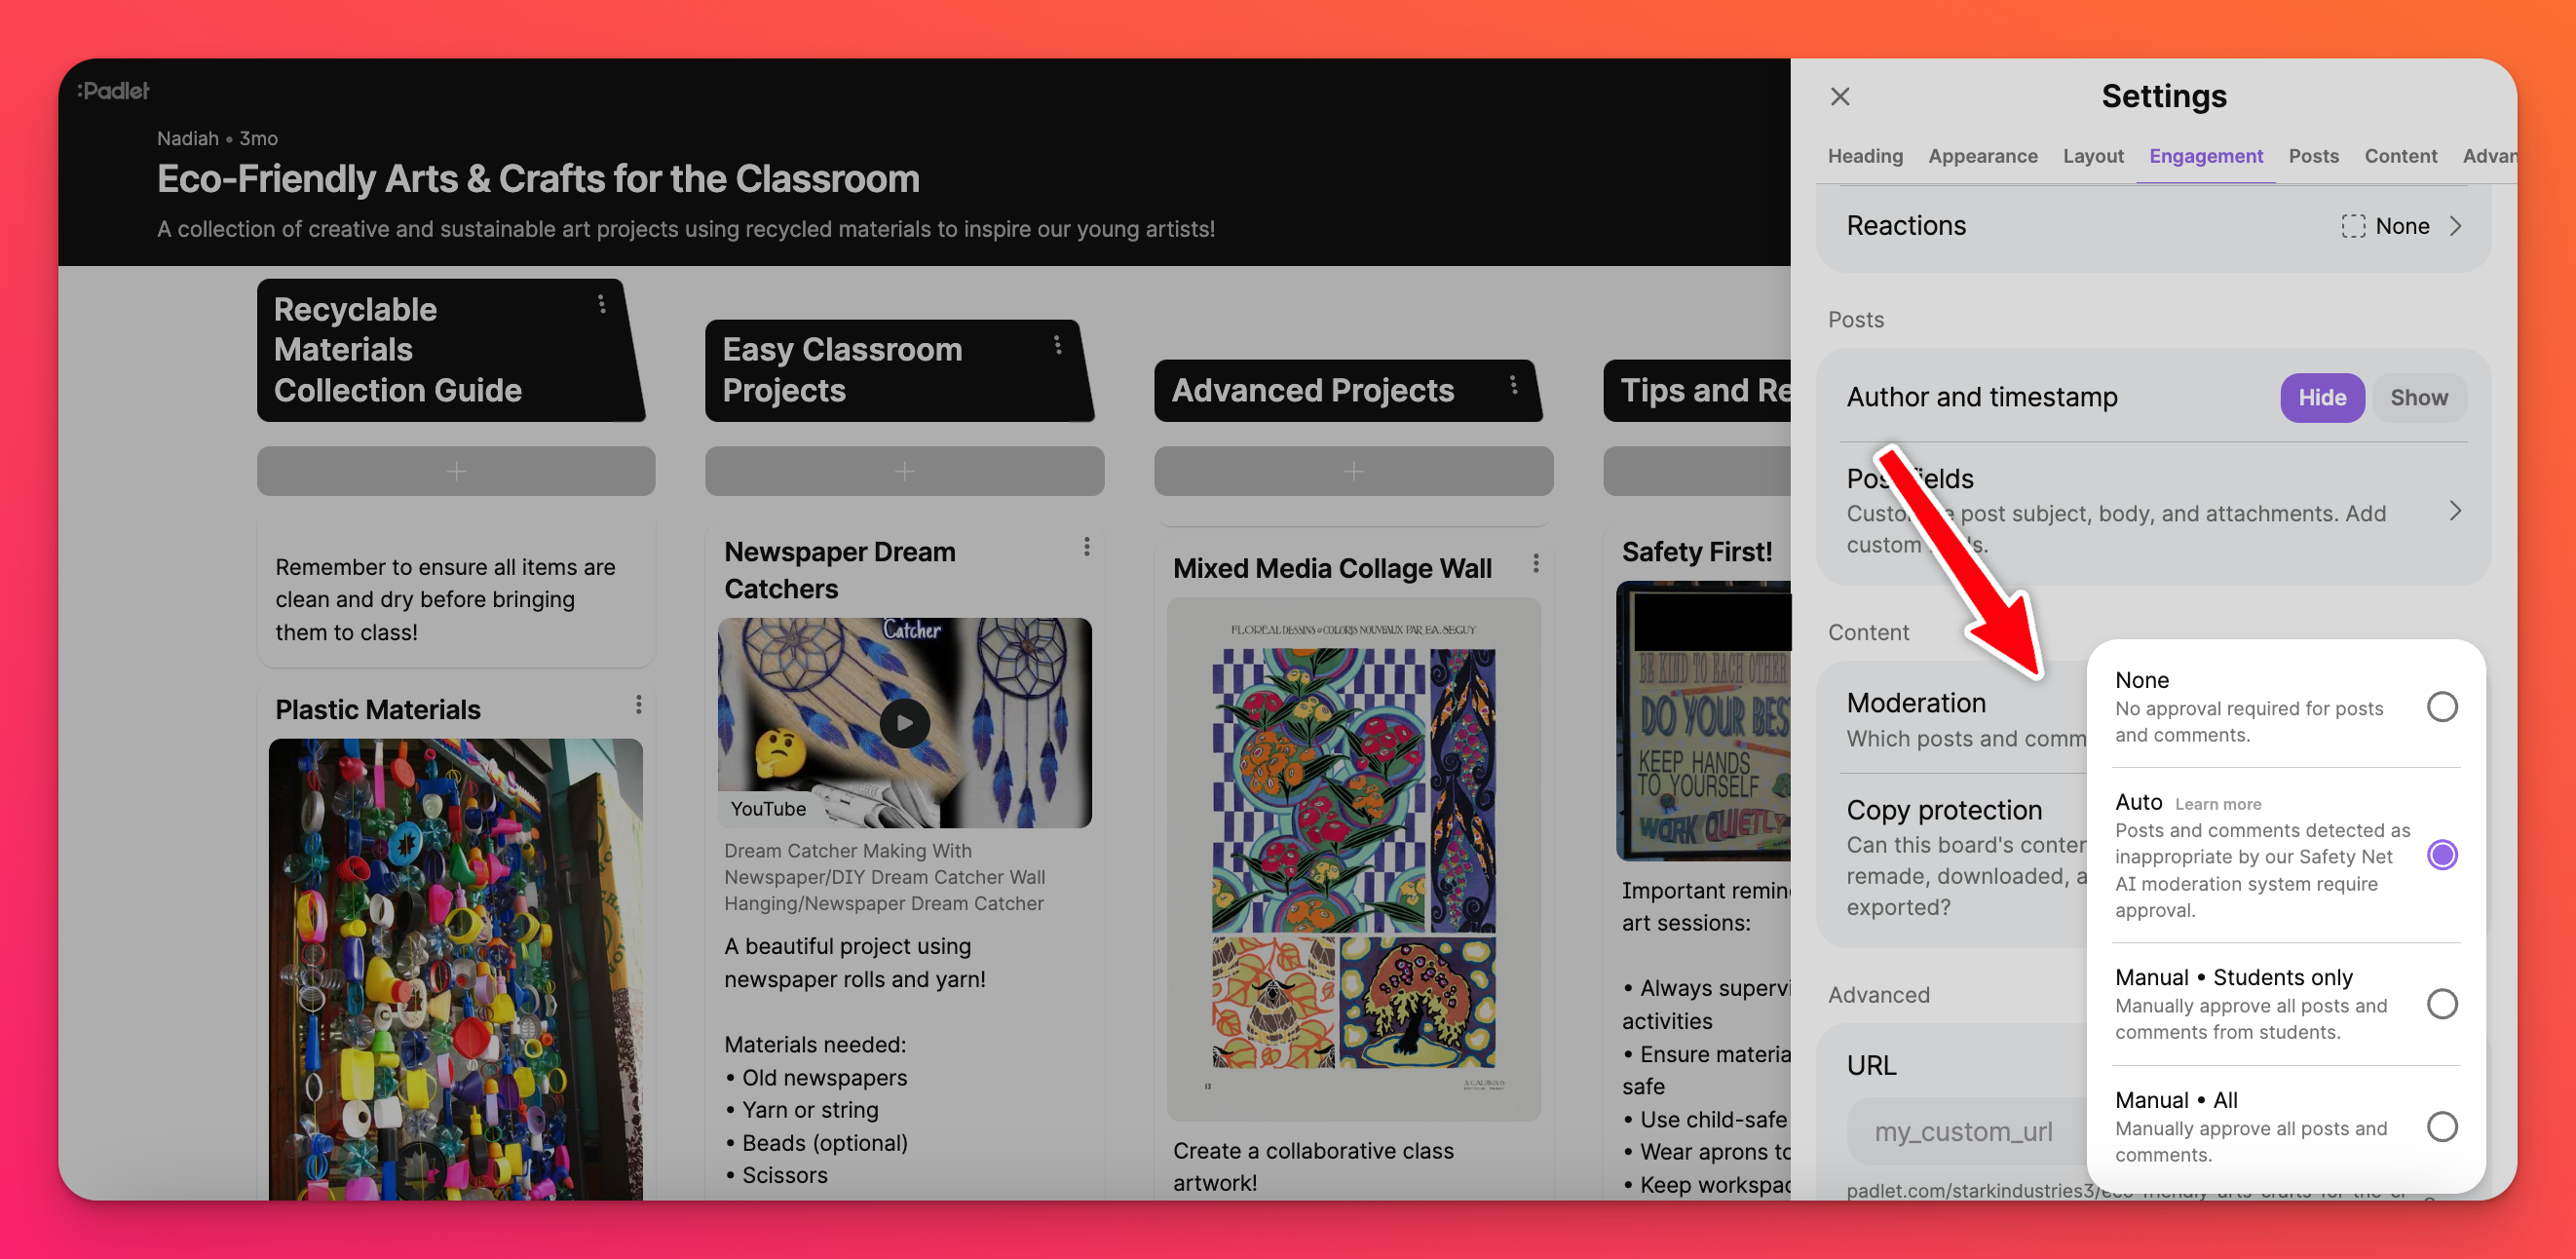
Enable Content moderation to protect your padlet from inappropriate posts. In the Content section of your Settings panel, you can click on the drop-down menu next to 'Moderation' to choose how much control you would like to have. Read more about Content moderation here!
Share settings
Whenever you create a padlet for use in a school environment, you'll need to establish the privacy settings.
Link privacy
Here are the possible privacy options to choose from:
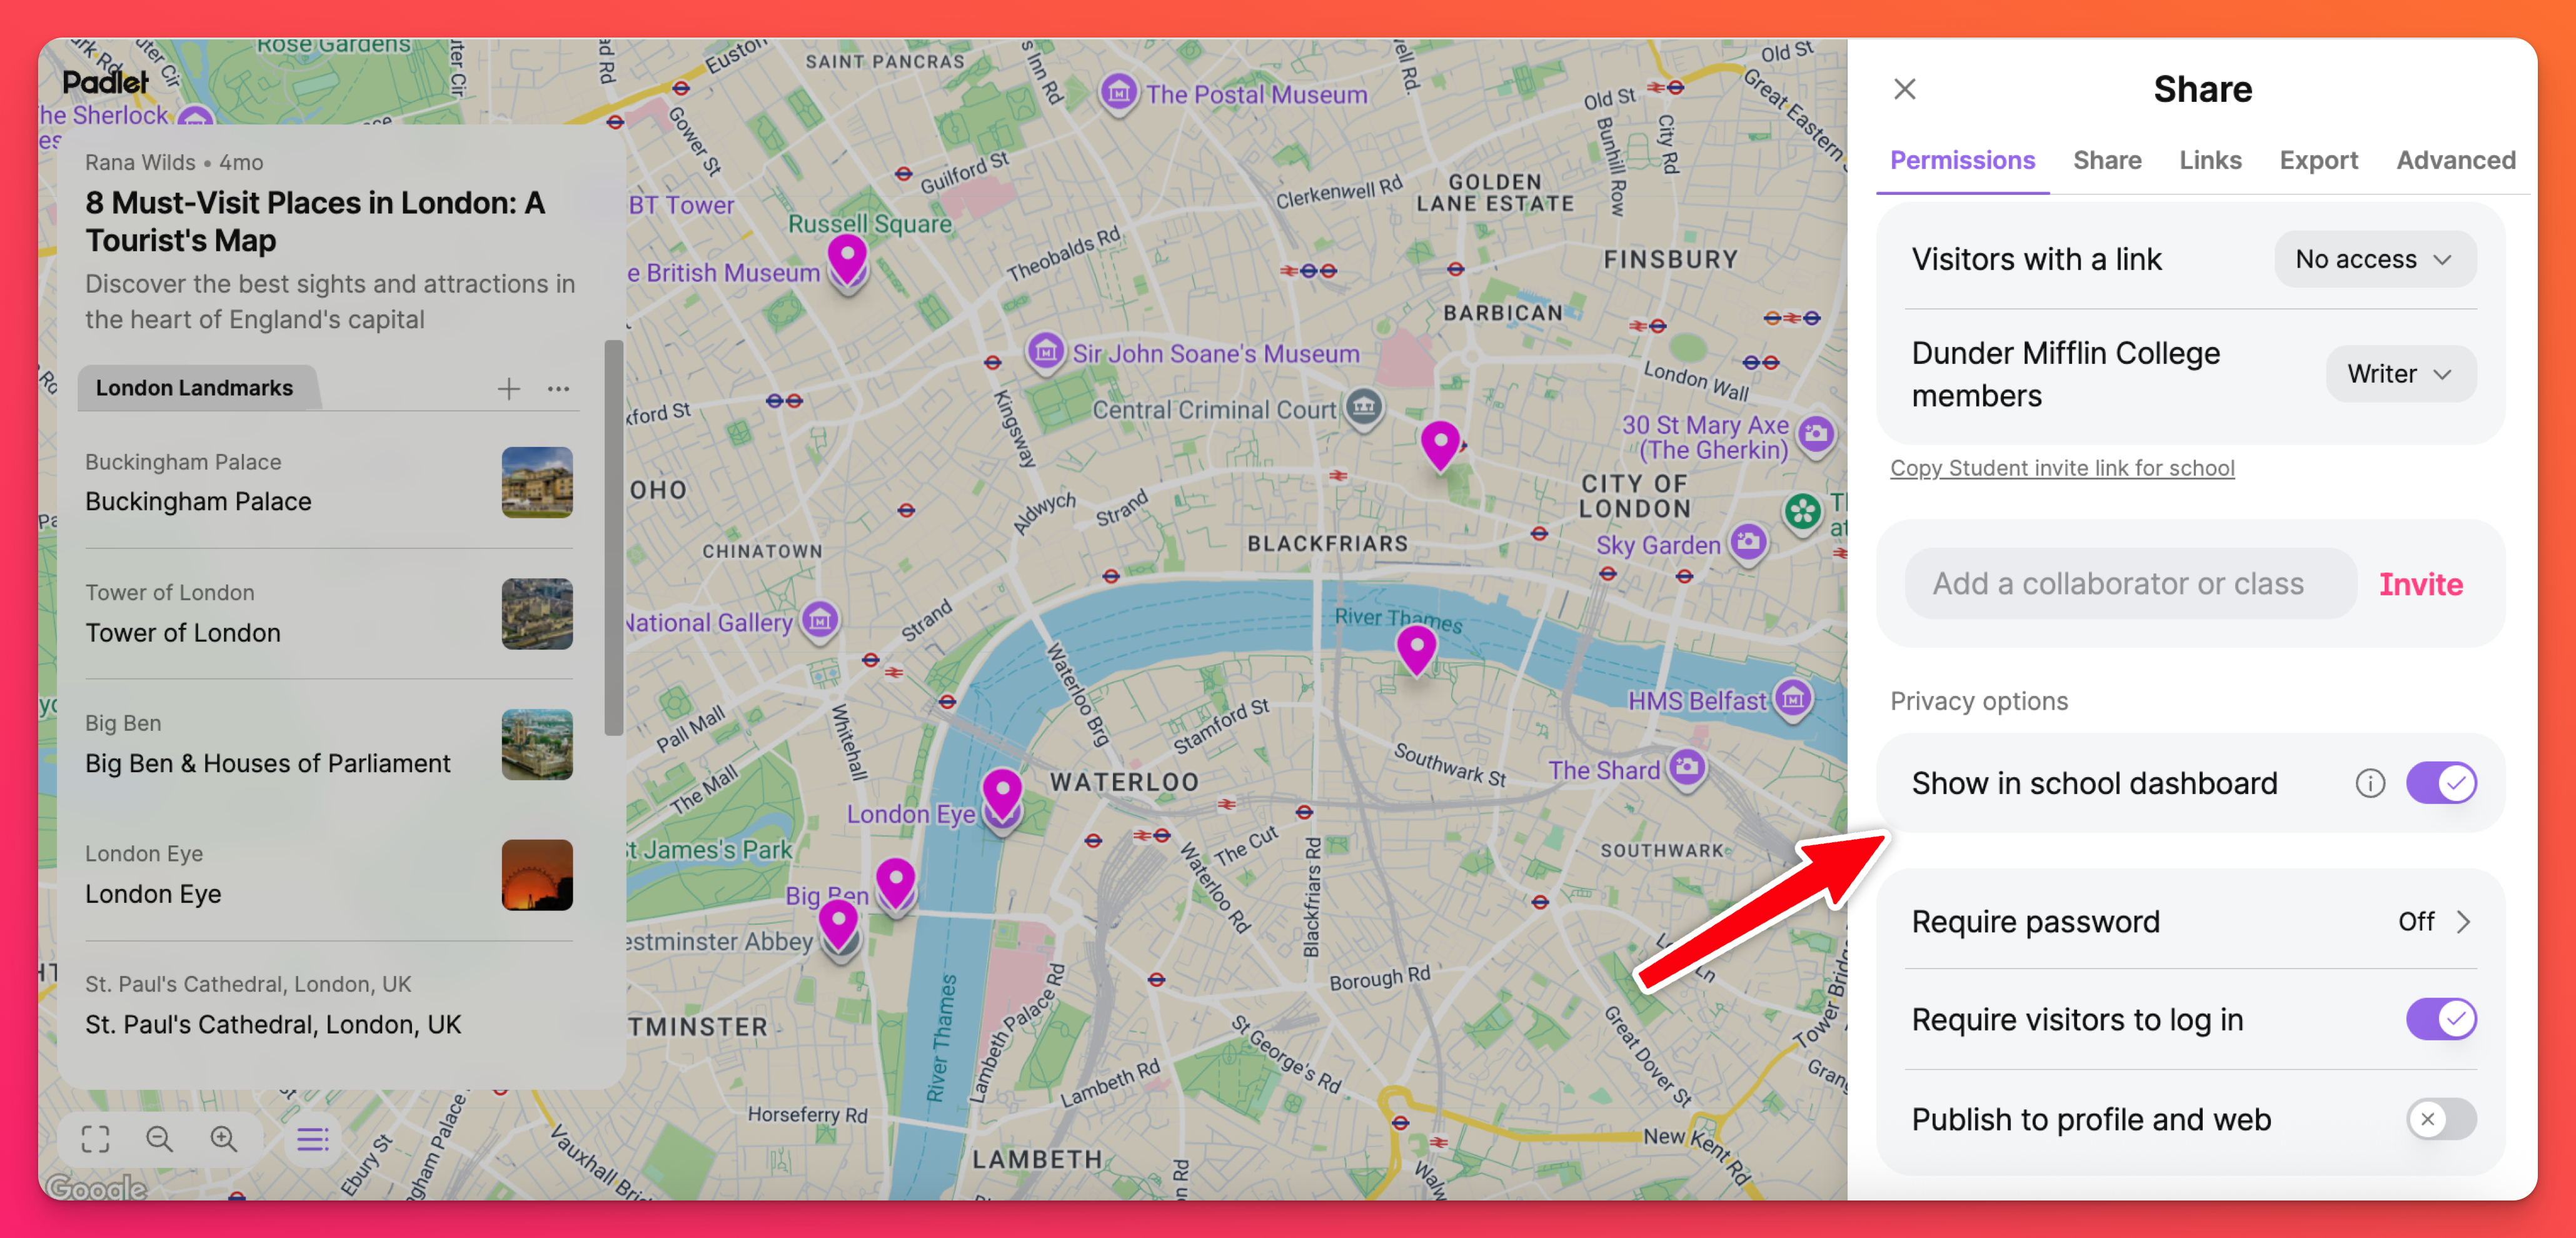
- School access only - To ensure only members of the school have access to the padlet and ensure the most privacy, we recommend the following settings:
- 'Visitors with a link' - No access
- '[Your school name here] members' - Any option you prefer (besides No access)
- 'Require visitors to log in' - Toggle ON
- Secret – Visitors are not restricted to members of your Padlet for Schools account. Anyone with the link can access the padlet. To choose this setting, toggle these options:
- 'Require password' - OFF
- 'Require visitors to log in' - OFF
- 'Publish to profile and web' - OFF
- Secret - Password – Visitors are required to enter a password to access this padlet. Visitors are not restricted to members of your Padlet for Schools account. Anyone with the link and the password can access the padlet. This option is great for padlets with potentially sensitive information. To choose this setting, toggle these options:
- 'Require password' - ON
- 'Require visitors to log in' - OFF
- 'Publish to profile and web' - OFF
- Secret - Log in - Only visitors that have access to the link and are logged into a Padlet account (not necessarily their Padlet for Schools account - any Padlet account) can access the padlet. This prevents posts from being created anonymously. To choose this setting, toggle these options:
- 'Require password' - OFF
- 'Require visitors to log in' - ON
- 'Publish to profile and web' - OFF
- Public - Anyone can access this padlet. It will show up on the creator's profile page and in Google search results. To choose this setting, toggle these options:
- 'Require password' - OFF
- 'Require visitors to log in' - OFF
- 'Publish to profile and web' - ON
Visitor permissions
Decide what permissions visitors have within your padlet. You control whether a visitor can leave comments on your padlet, make their own posts or have editing access. You can also choose to keep your padlet completely private!
- No access - Only users added as collaborators can access the padlet.
- Reader - Assign visitors this permission if your padlet is designed to present stagnant information. If you set 'Visitor permissions' to Reader, users will be able to see everything on the padlet but can’t change the material or add to it.
- Commenter - This is a great option if you only want to collect feedback on existing posts. Users with this permission will be allowed to make comments or react to posts (as long as those features are enabled within the padlet's settings).
- Writer - This permission is ideal for padlets that you want your students to collaborate on and contribute to with their own posts. Users can create their own posts but they cannot change any settings on the padlet.
- Moderator/Administrator - Set your 'Visitor permissions' to this setting to allow visitors to create, edit and approve others' posts. This is not recommended for Padlet for Schools accounts. If you'd like to use these permissions for one specific person, we encourage you to add them as a collaborator and assign the permissions that way.
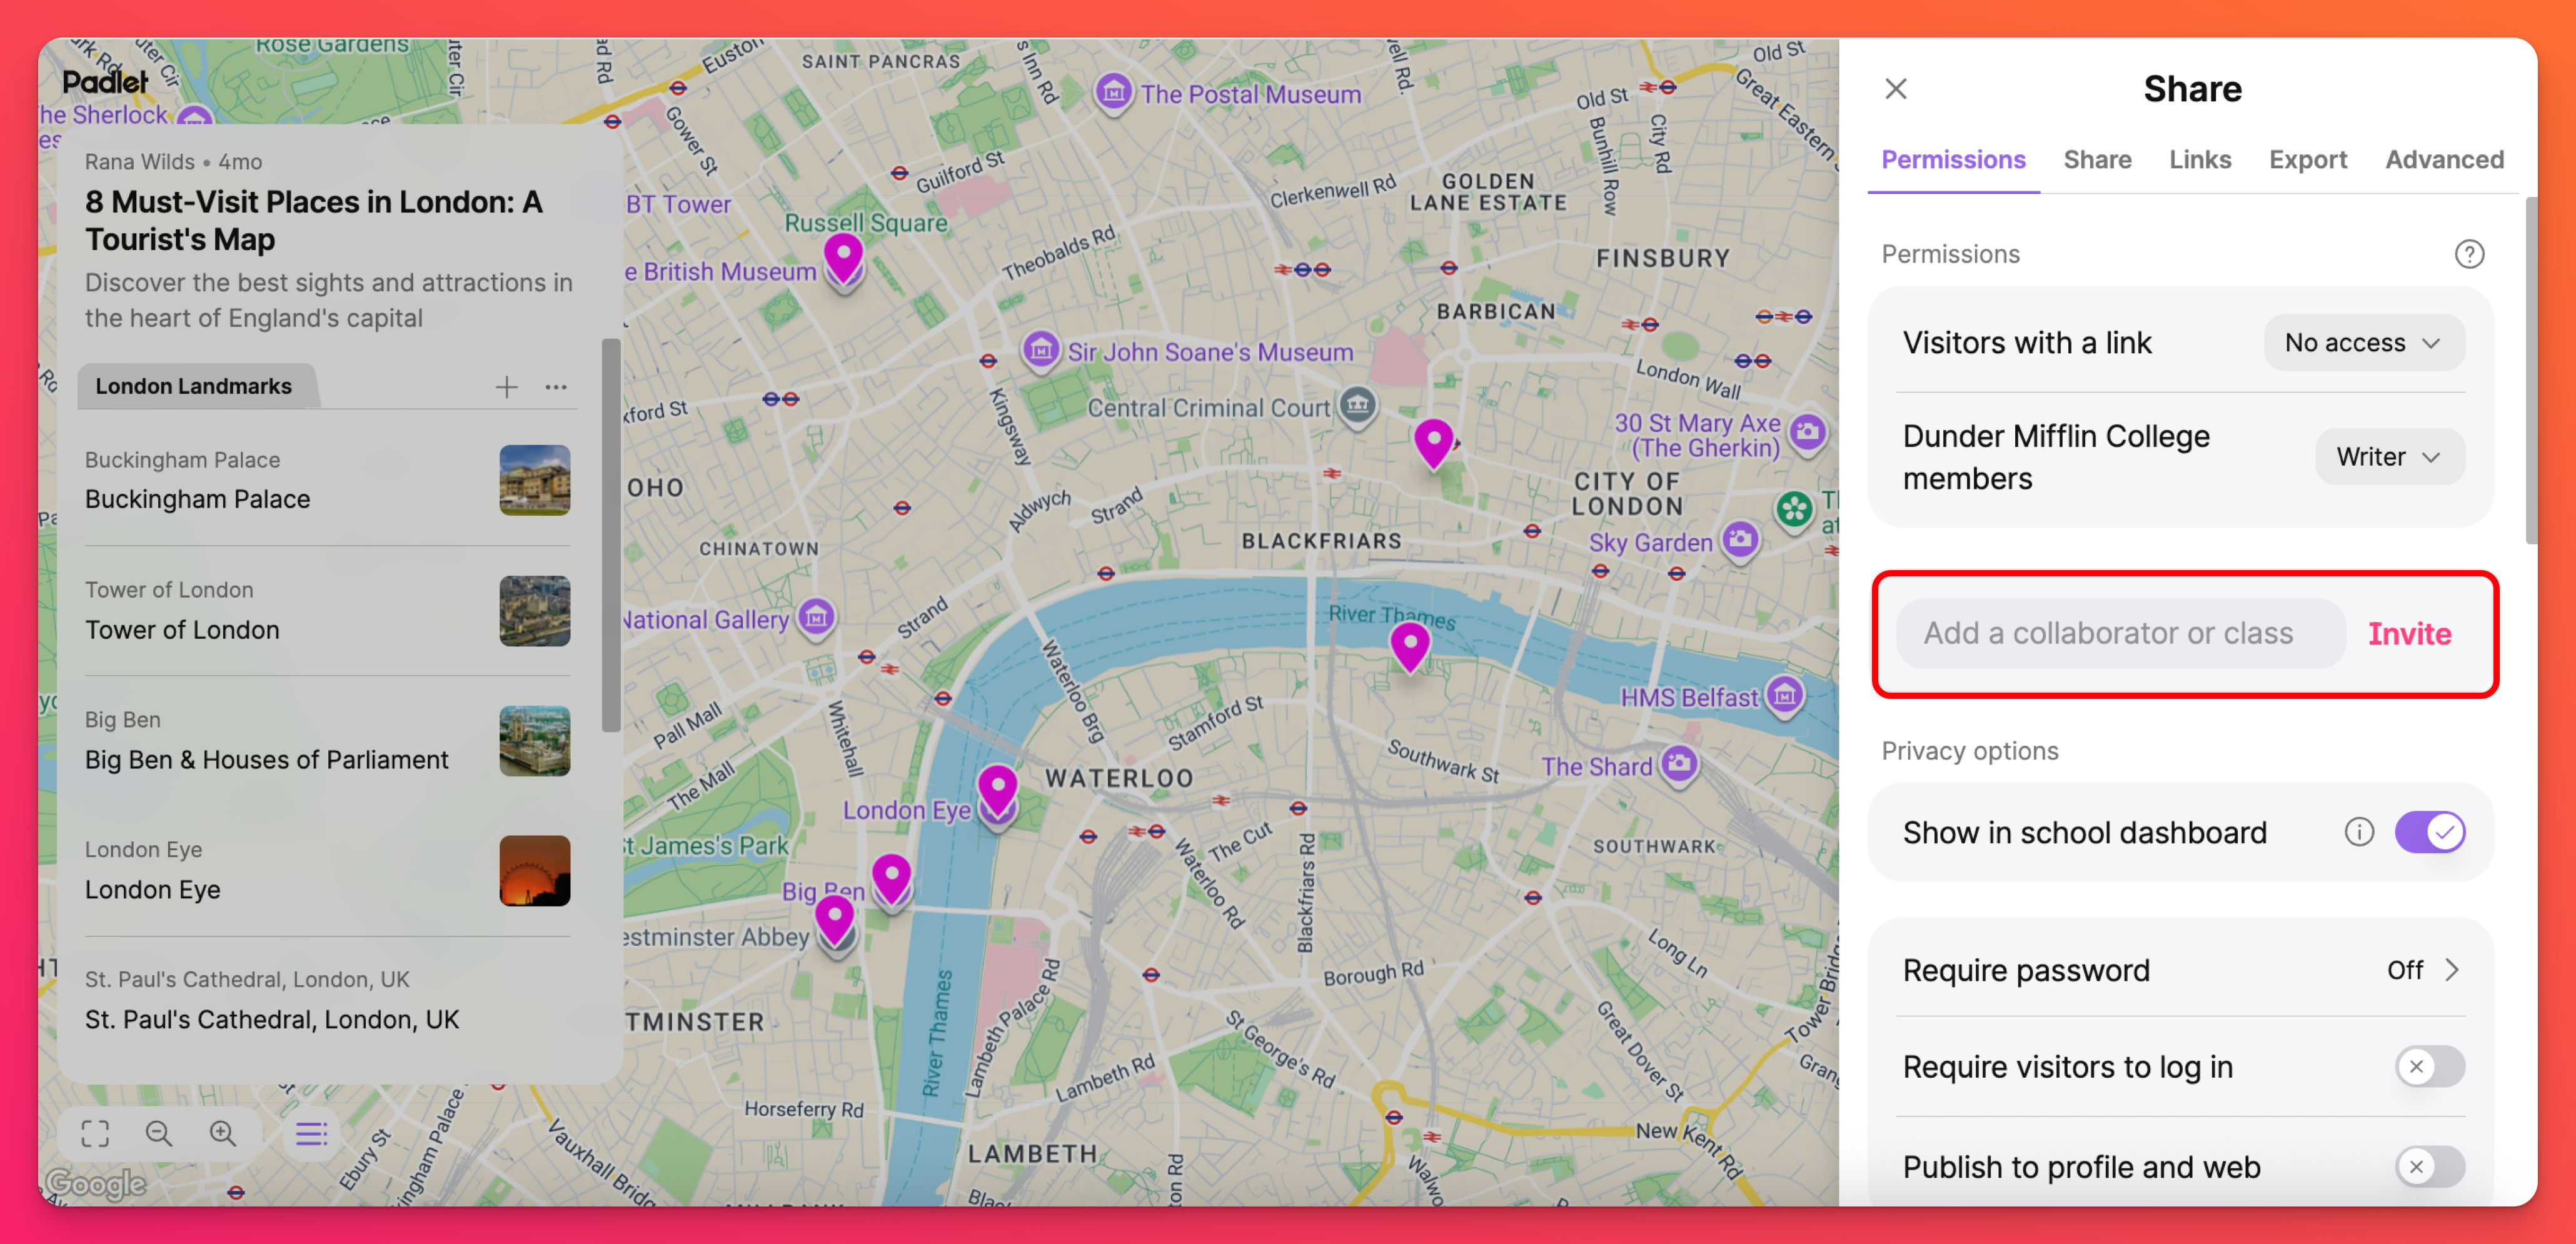
For example, if you want to manually allow students to post their answers to a question by noon, you can begin by setting 'Visitor permissions' to Writer and change it to Reader at noon, so that no new submissions can be added past the deadline.
If you prefer your padlet to automatically restrict posting, set up an automation!
Special links for restricted viewing
Restrict students from viewing part (or all) of your padlet, while still allowing them to make posts!
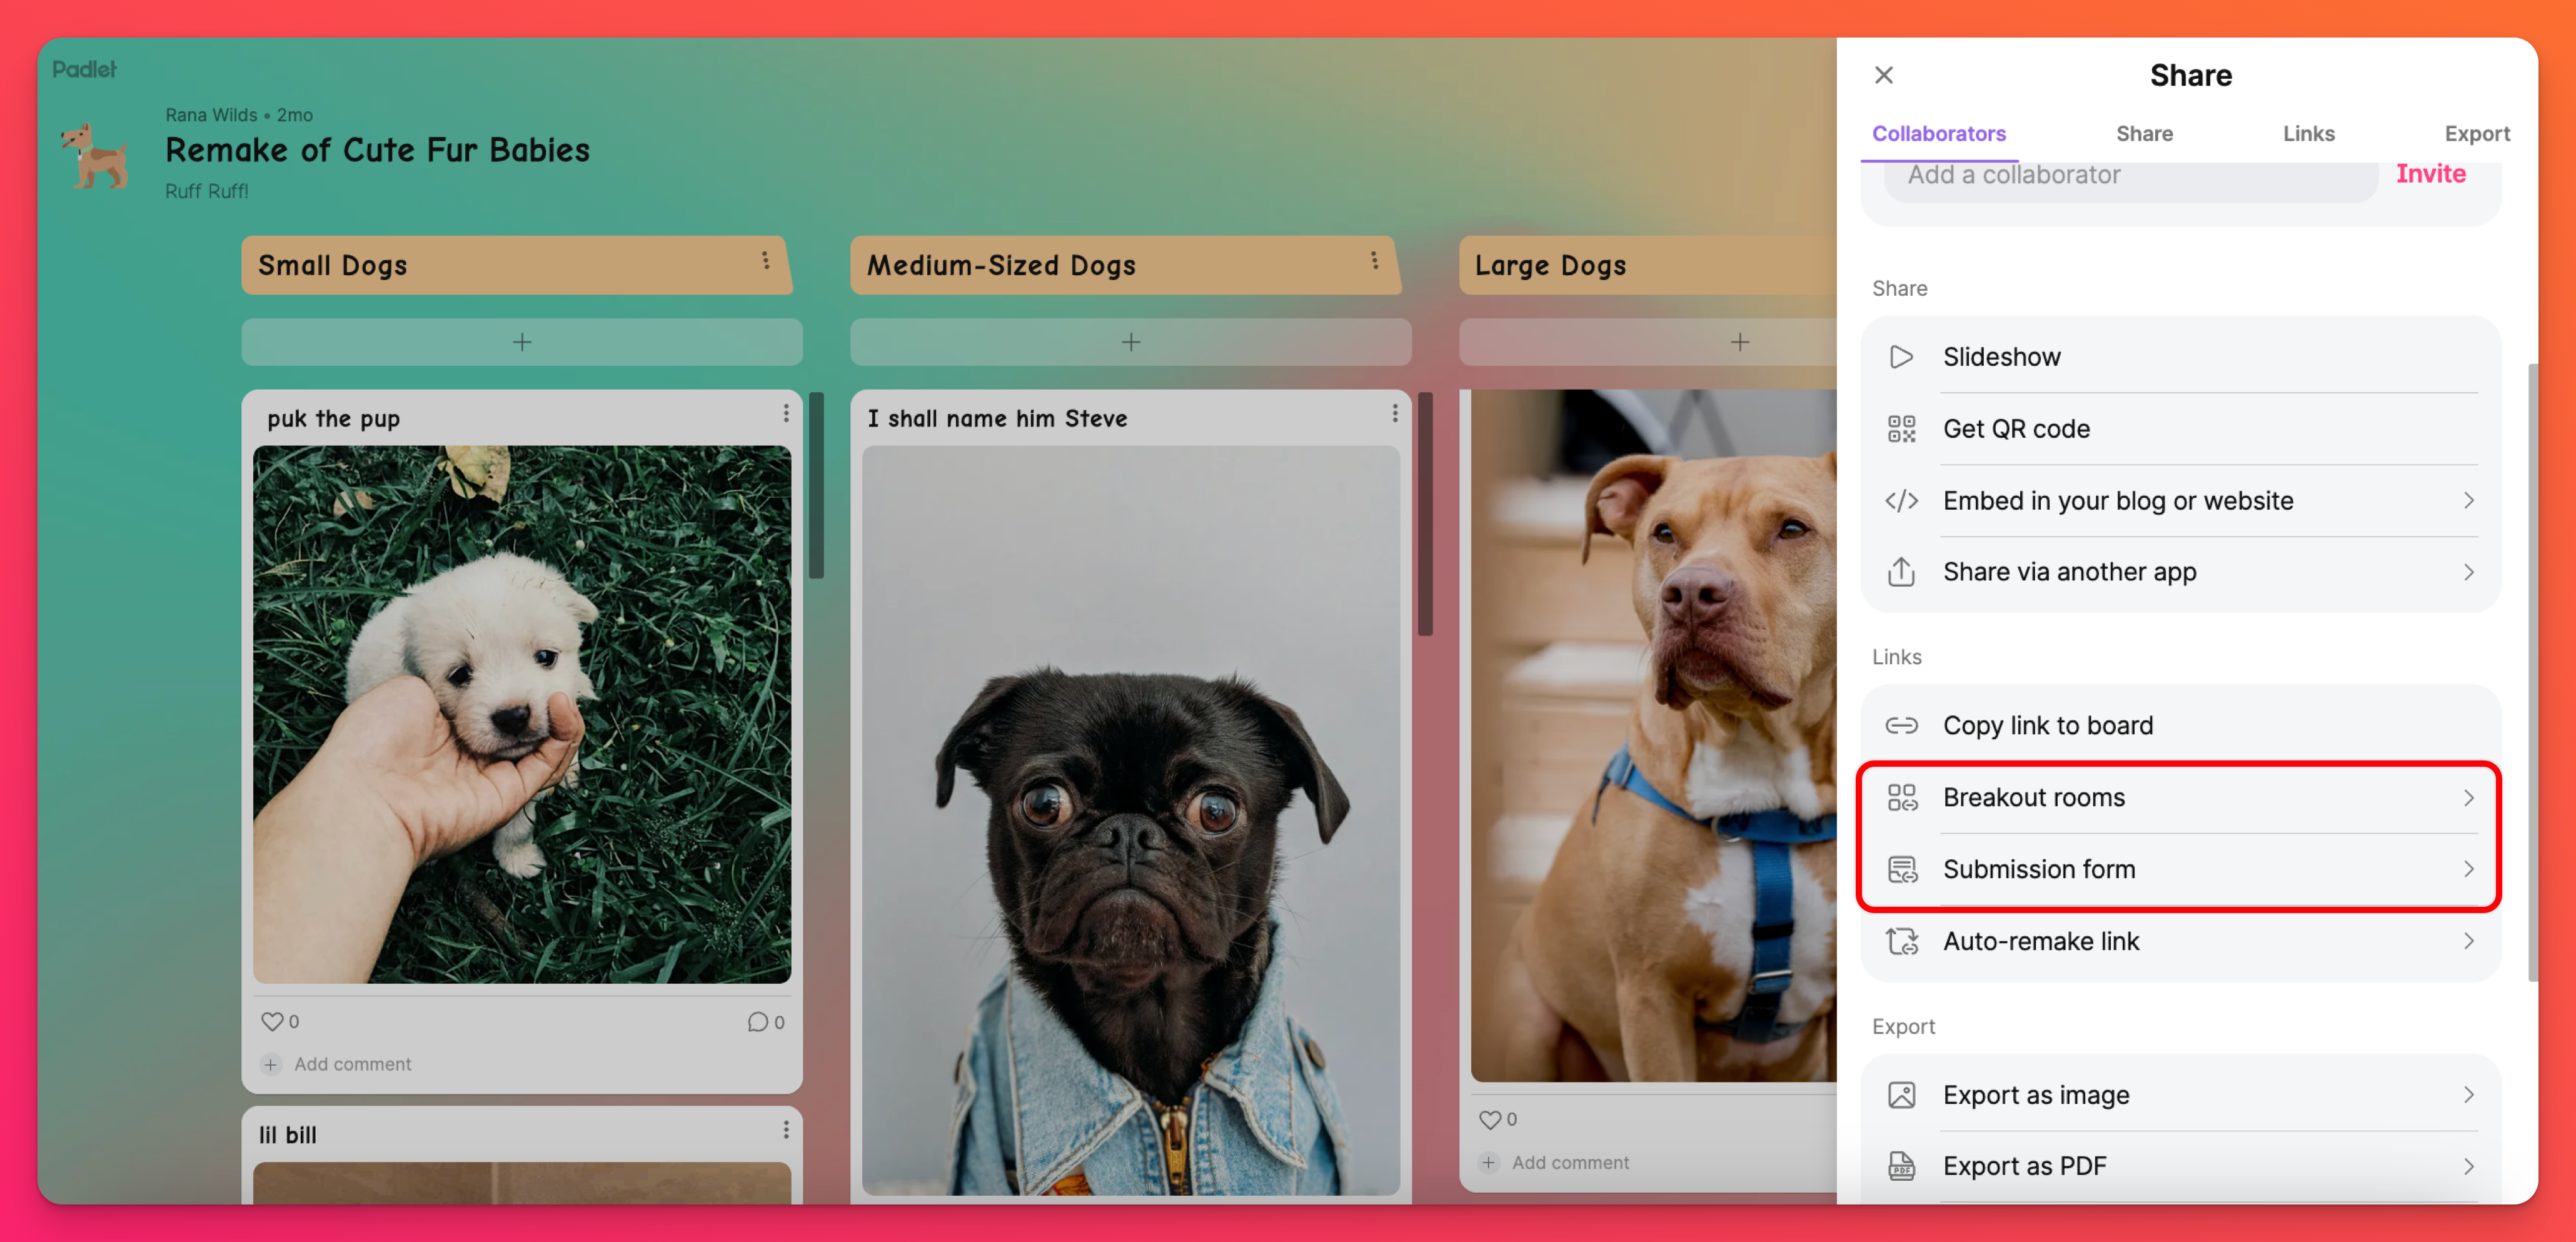
Use Breakout rooms to allow a group of users to collaborate in a single section of the padlet without being able to see the other sections. This is a great way to encourage group work on your padlet without seeing other students' contributions.
Use submission forms to invite them to post on a board - without the ability to see the contents of the board beforehand.
