Set up your Classroom
A Classroom plan is a great alternative to our bigger school plan - Padlet for Schools. A Classroom plan starts at two teacher licenses and 200 student accounts!
Create your Classroom
It is important that no one else create the Classroom to avoid taking up 1 of the 2 Teacher licenses.
To begin creating your Classroom workspace, click this link to get started!
Follow along with the step-by-step guide below.
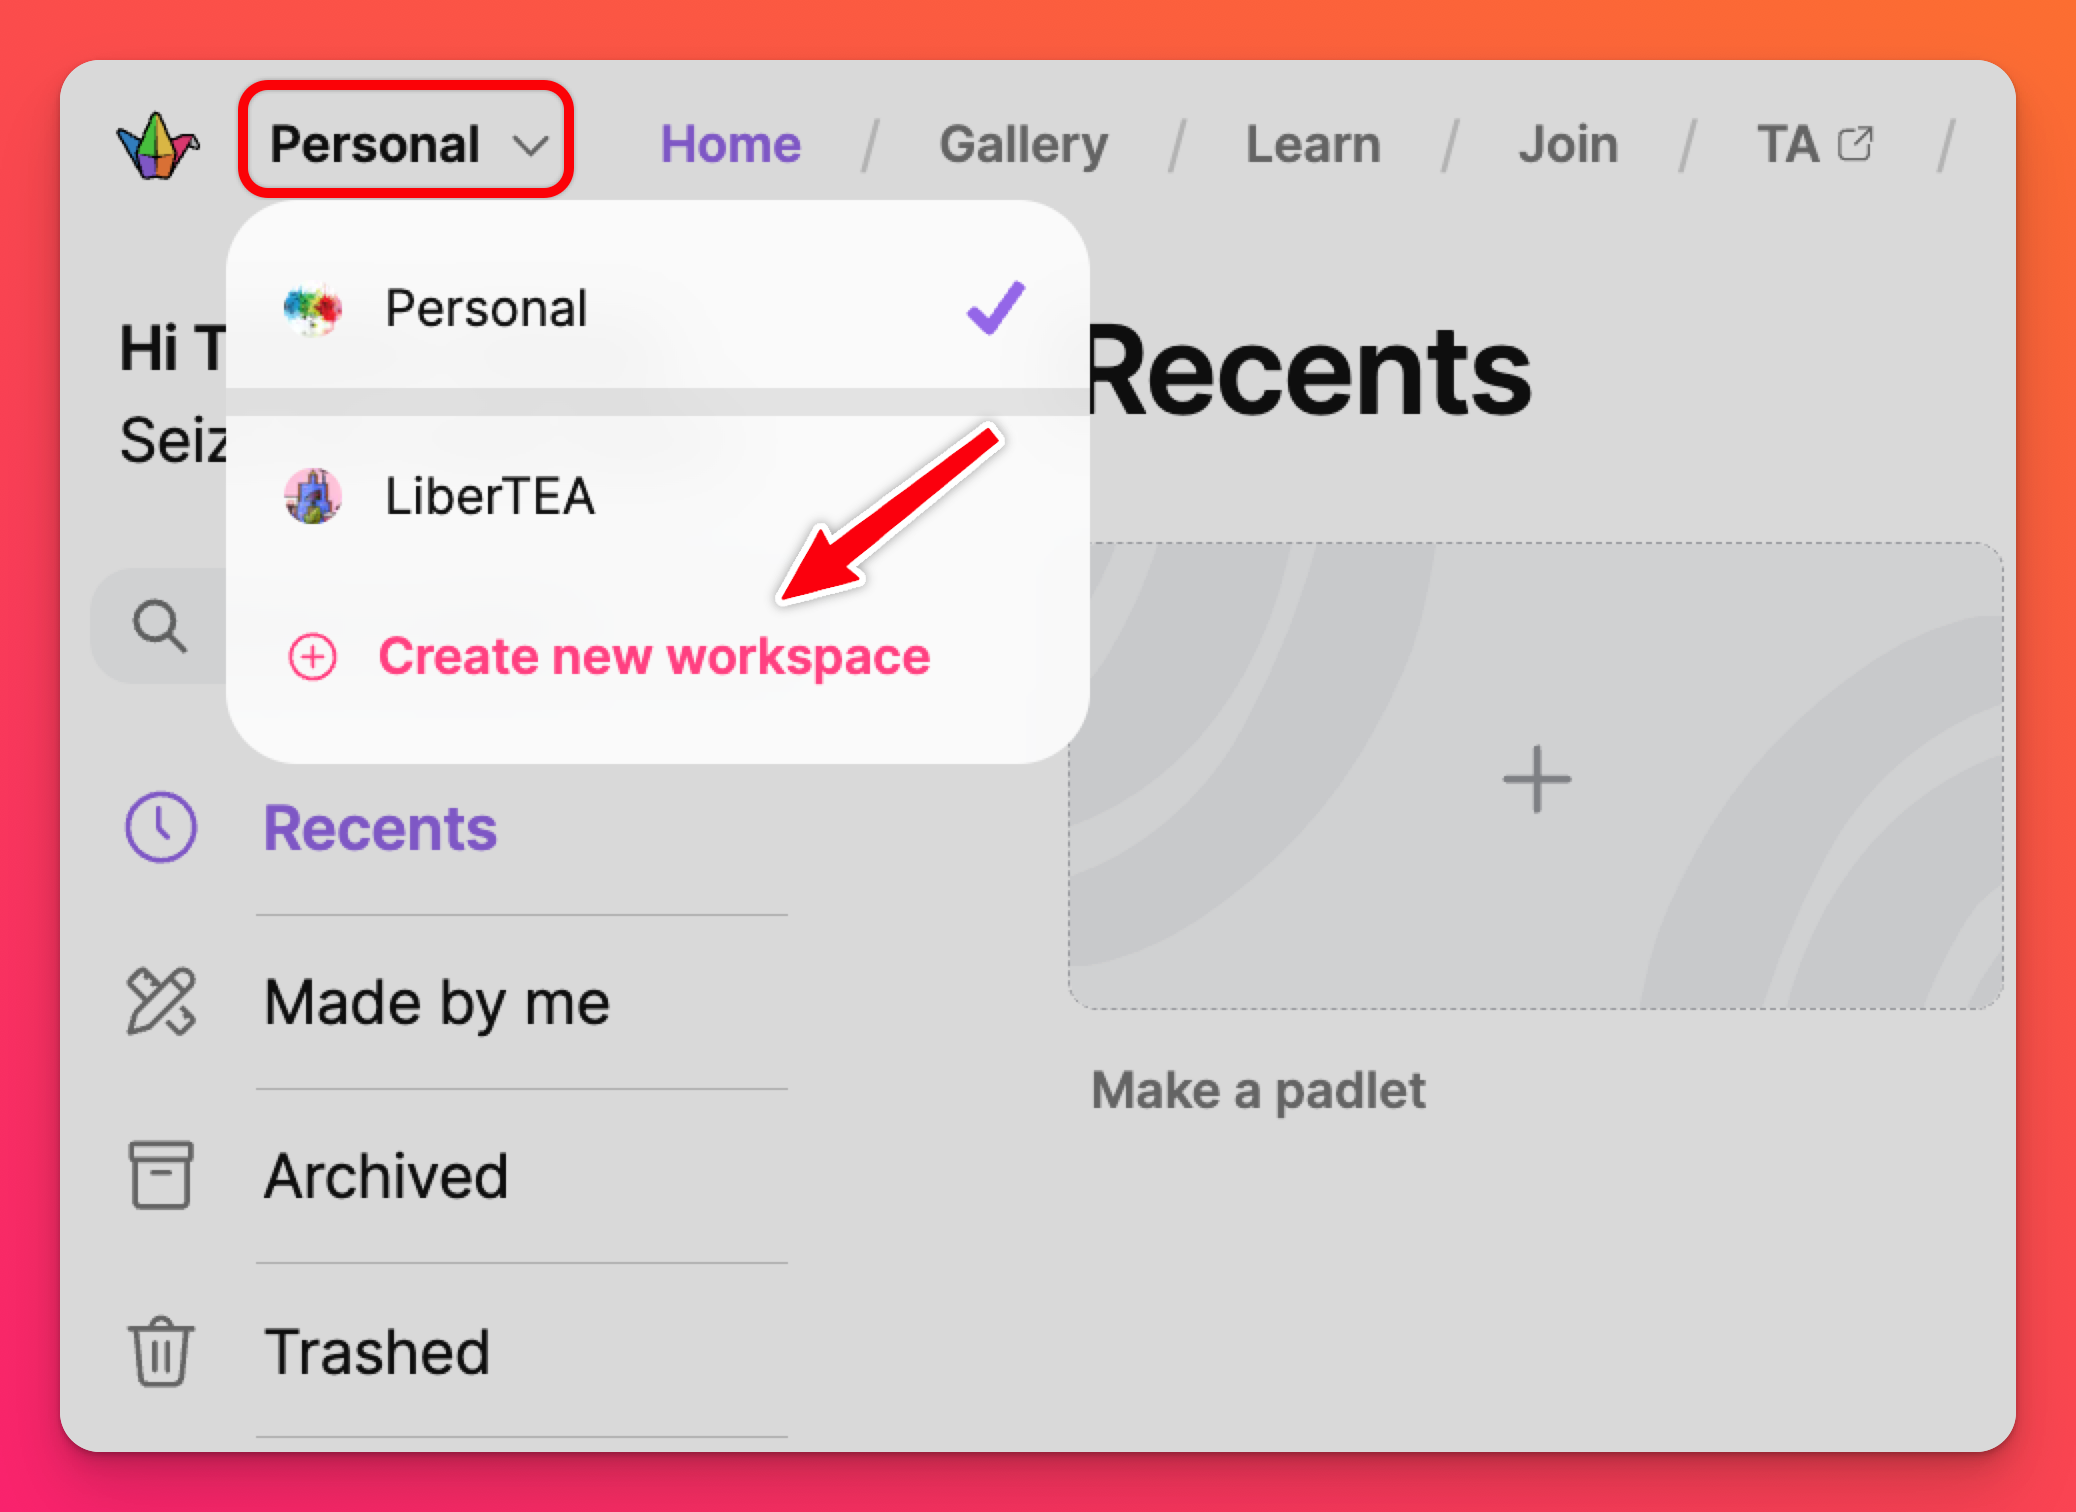
- Click the link above or click on your account menu in the top-left corner of your dashboard. Then, select Create new workspace.
- Give your Classroom a name and URL.
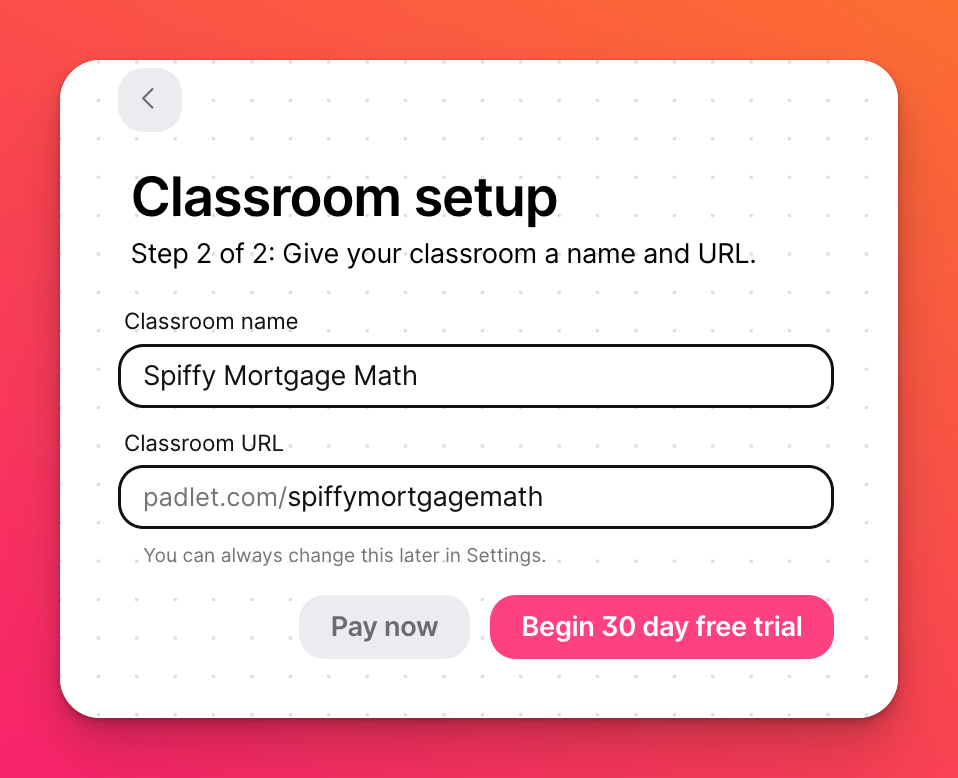
- Select whether you would like to start a free 30-day trial or subscribe to a paid plan immediately. You can upgrade to a paid plan at any time within the free trial period.
Getting started
Follow the steps below to finish setting up your Classroom.
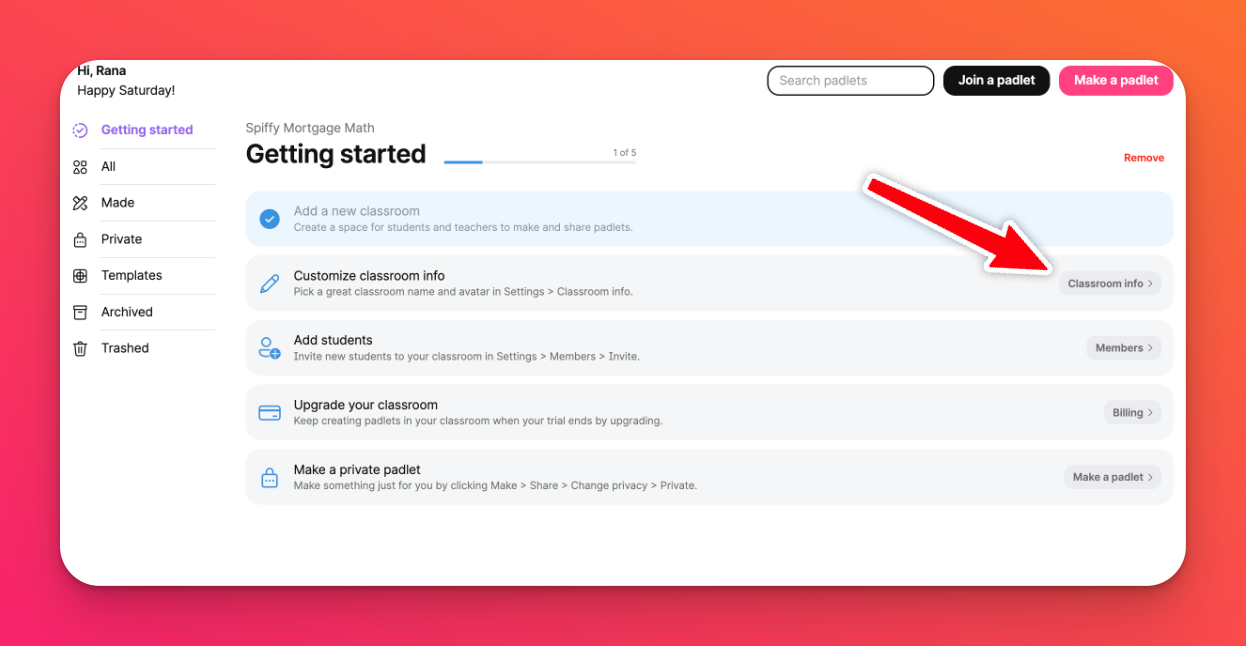
- Customize your Classroom info. Click the Classroom info button on the right side of the screen.
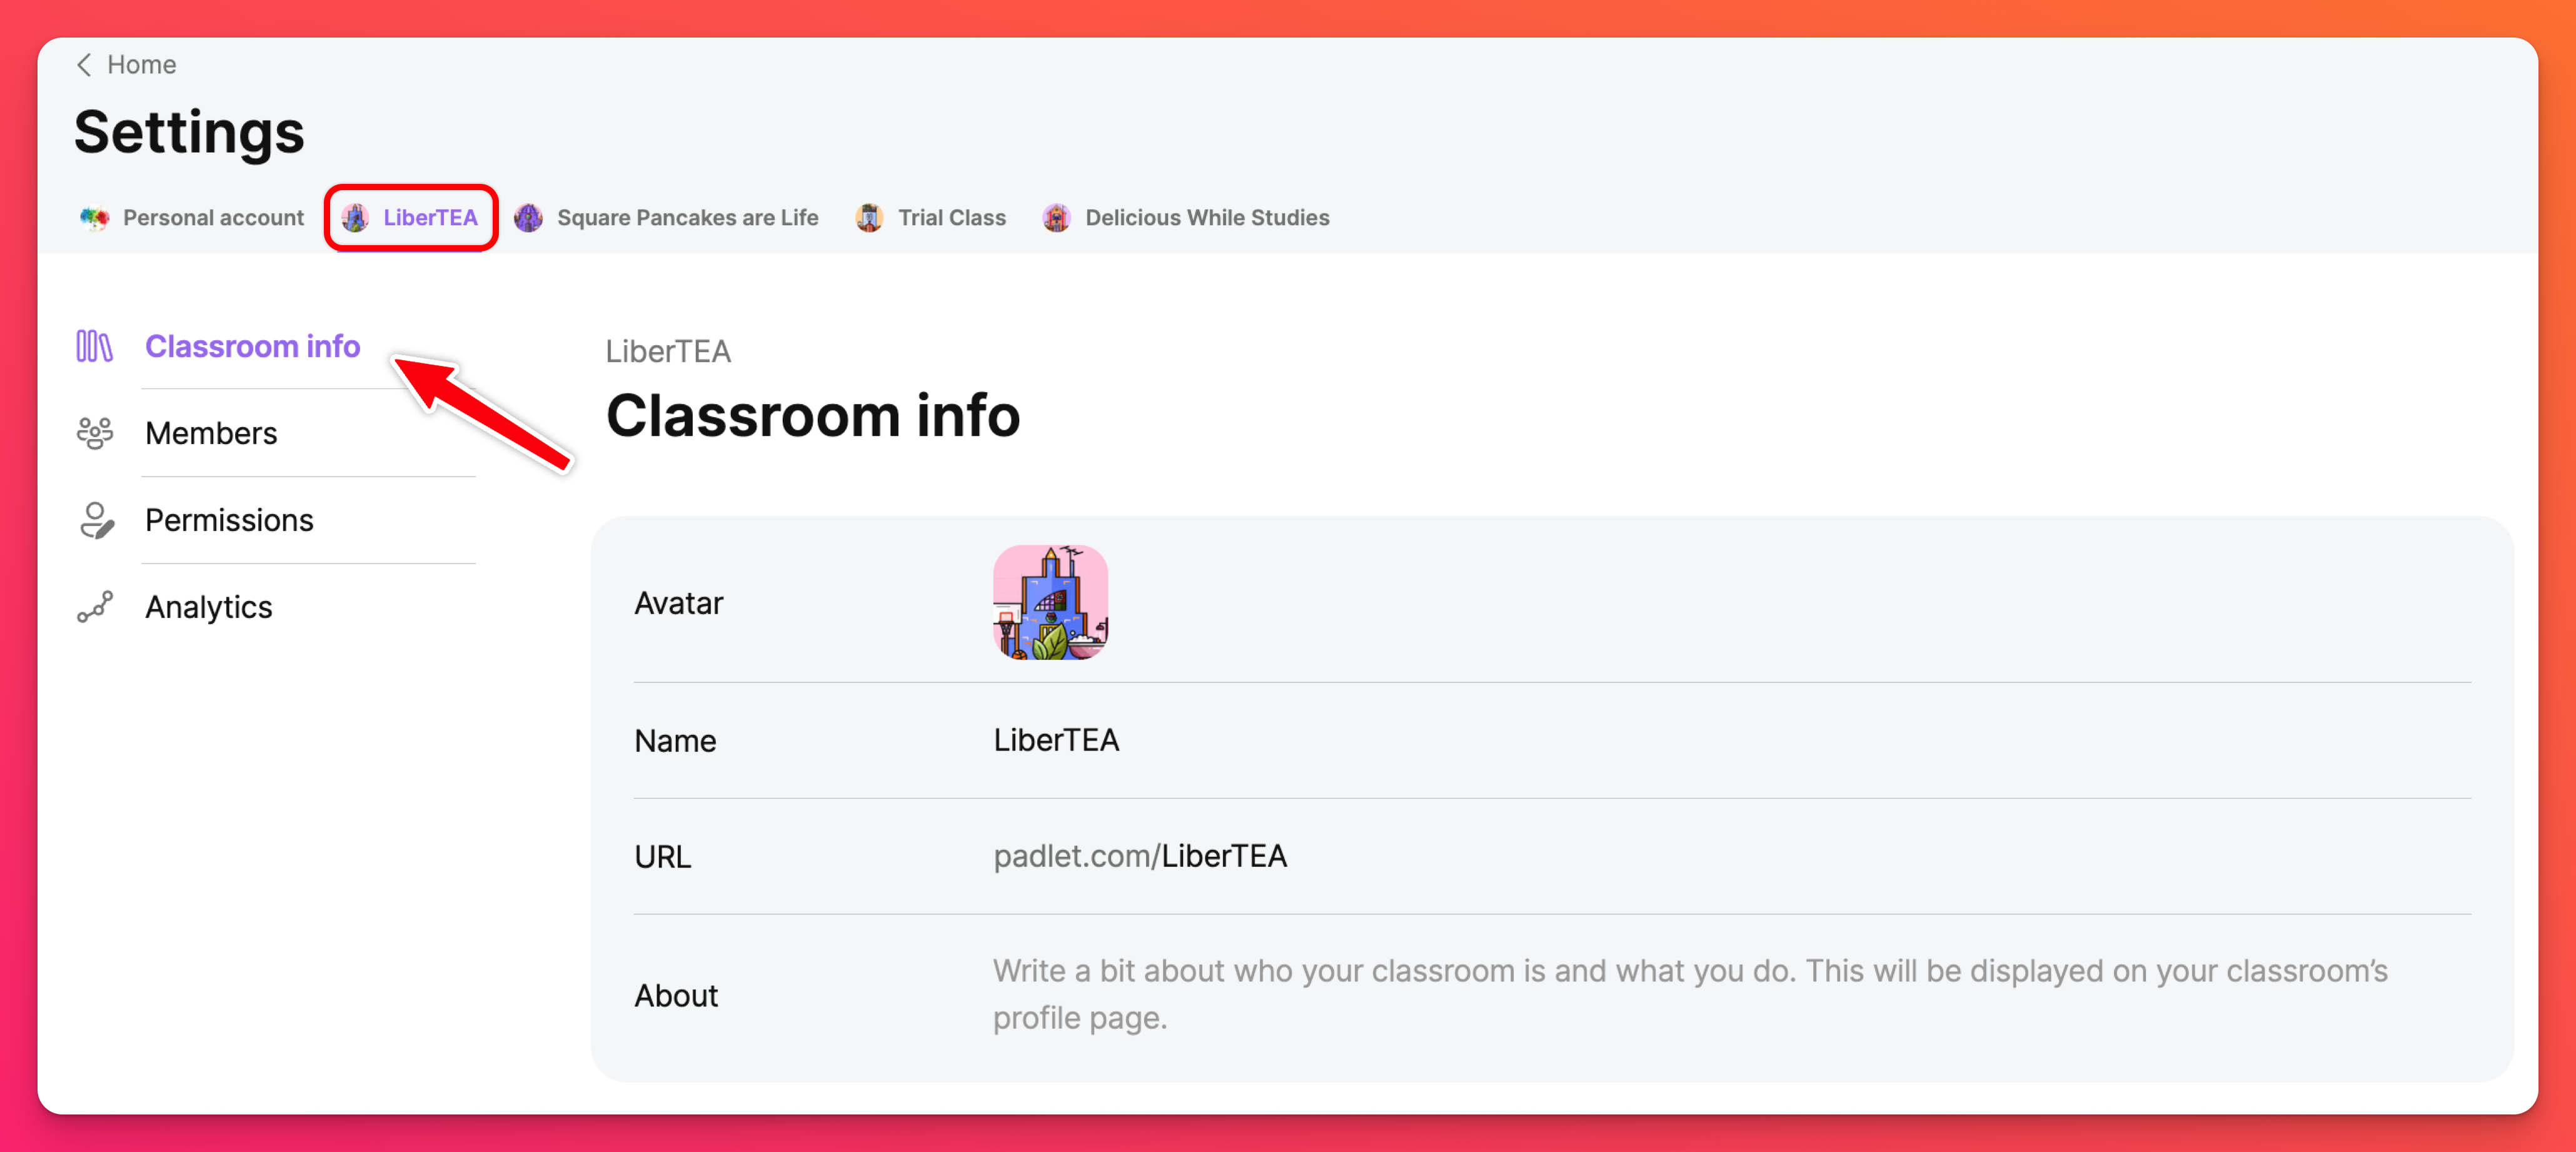
- Customize your Classroom by clicking on the text (or the pencil icon on the right) to change your account information. Don't forget to hit Save when you're finished!
Continue working your way down the column on the left (under your Classroom account) until you've finished all the steps!
Members
Within your Settings, click on the Members button located under Classroom info on the left. Here you can add the second teacher and all students to the account.
Add members
- Click the pink Invite button at the top-right to send out your invite links.
- To invite the additional teacher, click Enable link next to 'Teacher.' If inviting students, click Enable link next to 'Student.'
- Copy the appropriate link and send it out!

- When a user clicks on the Invite link, they will be taken to a page like the one below. Click Sign up to accept invite/ Accept invite to be added to the Classroom.

Remove members
To remove users from your Classroom, click Members from the Settings page. Find the user you would like to remove and click the drop-down menu next to their name. Then, select Deactivate.
Permissions
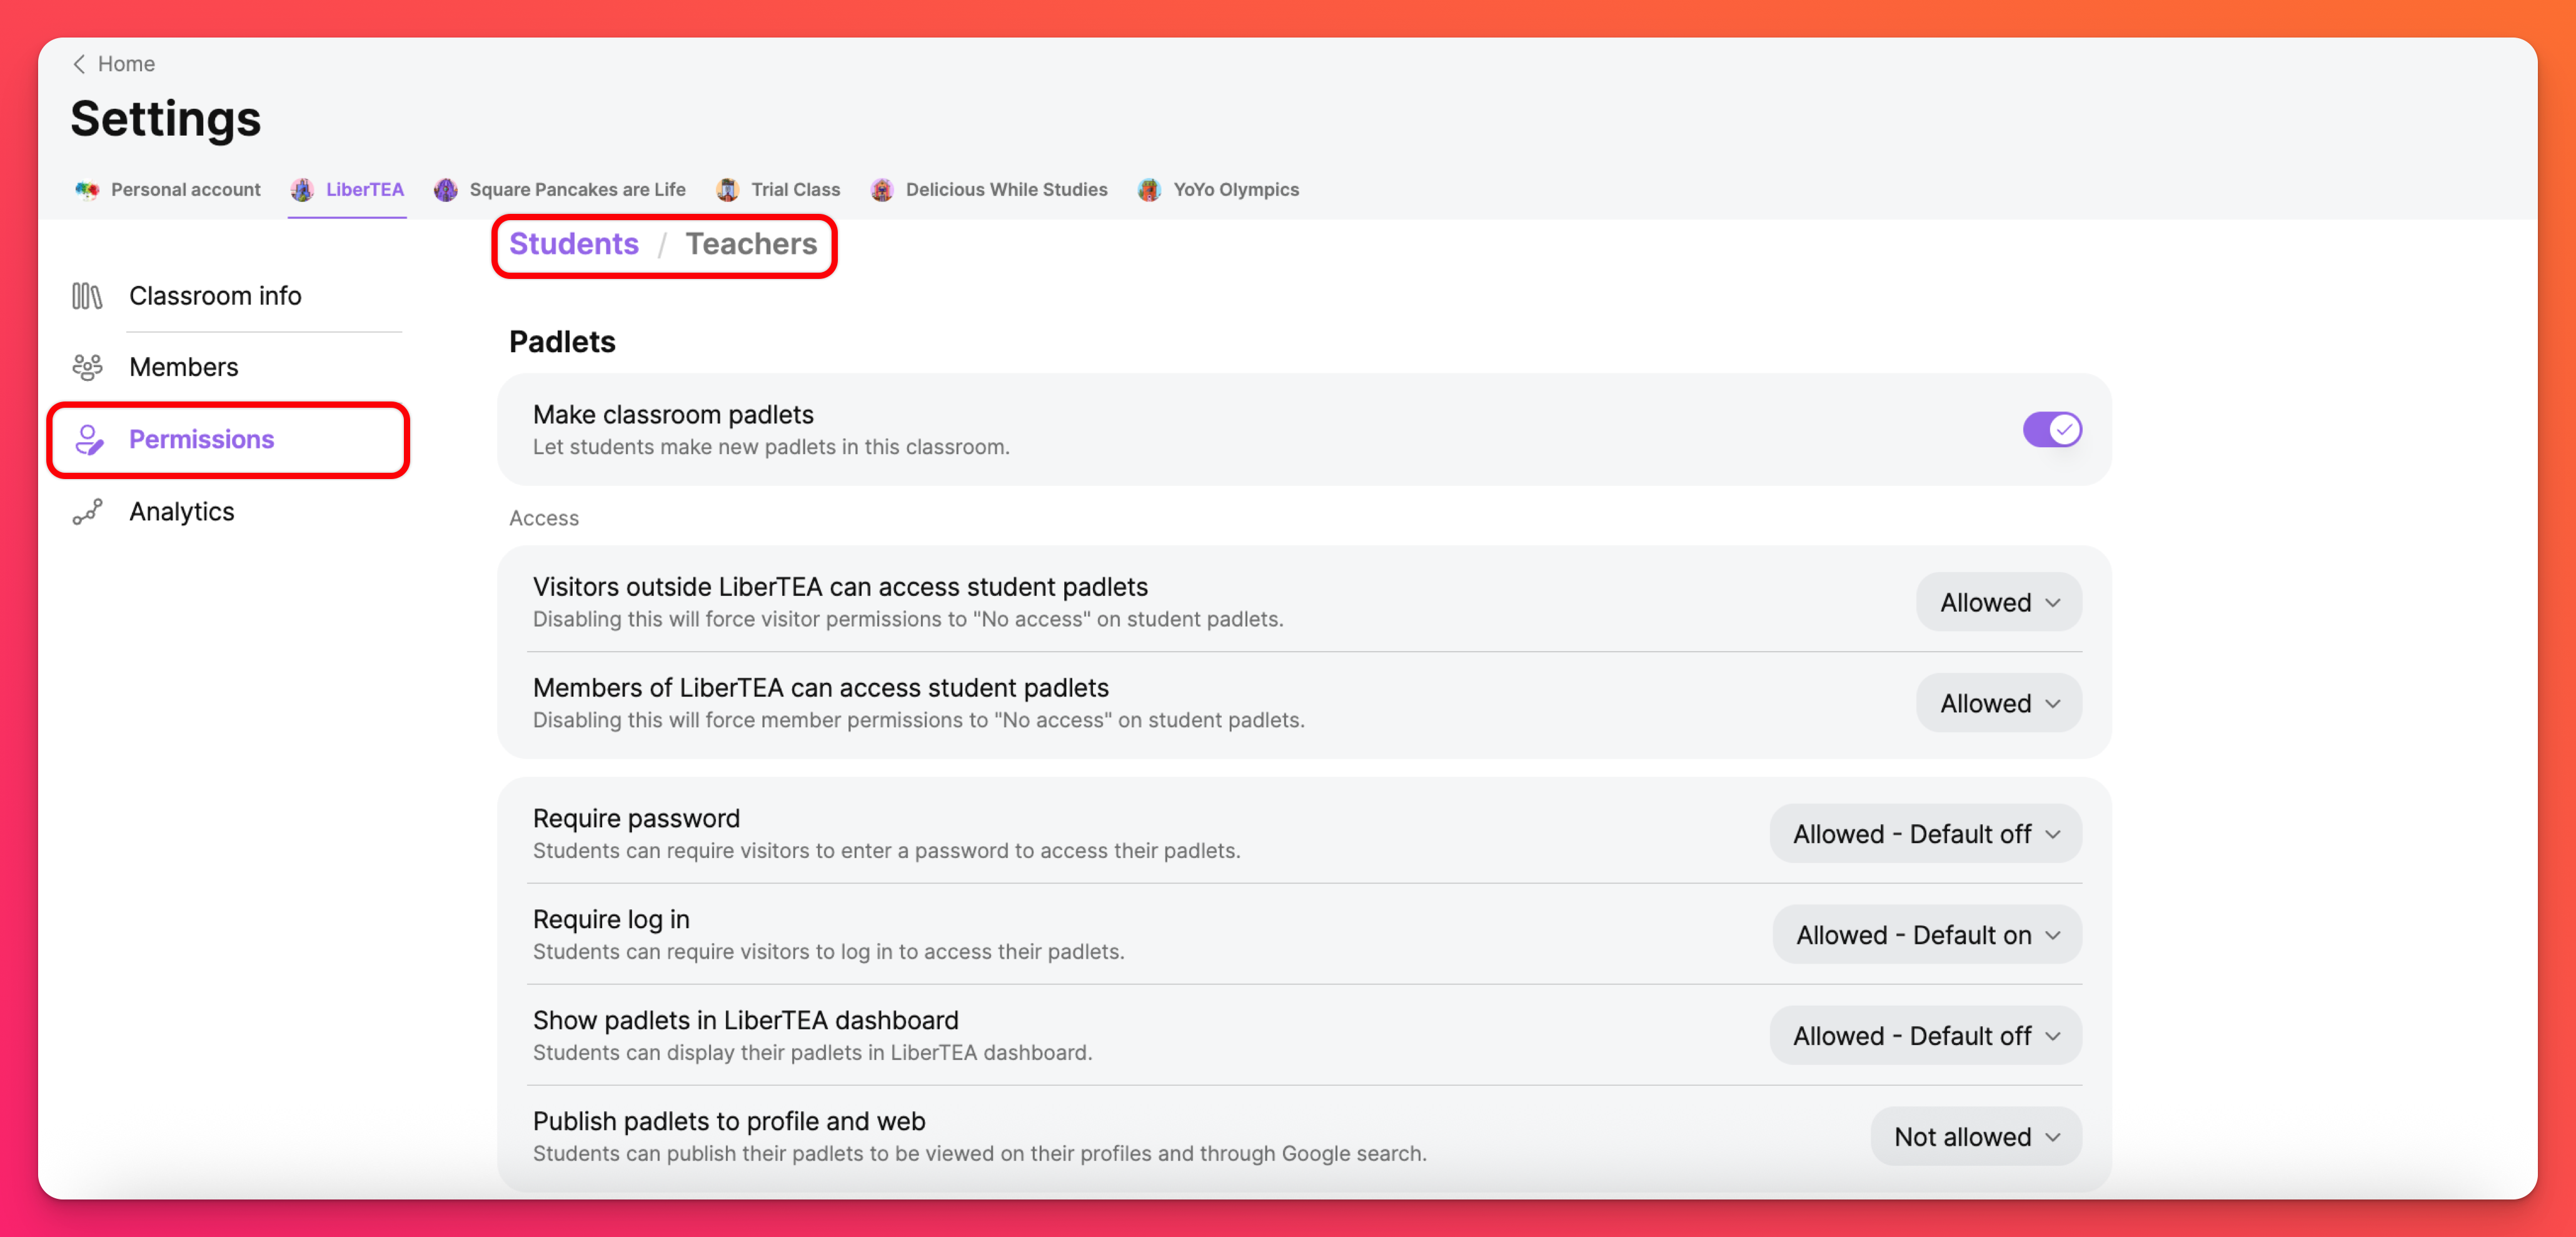
Give your Teachers and Students customized settings by clicking Permissions. Toggle between Students and Teachers at the top of the page to choose different permissions for each role.
Content
Customize your Classroom's safety moderation and available attachments. Click on Content and choose between Moderation and Attachments at the top of the page.
Moderation
Safety Net is our AI moderation tool that monitors content and automatically blocks things deemed inappropriate. Choose what is appropriate for you and your Classroom needs by clicking Moderation. Read more about Content safety here.
Attachments
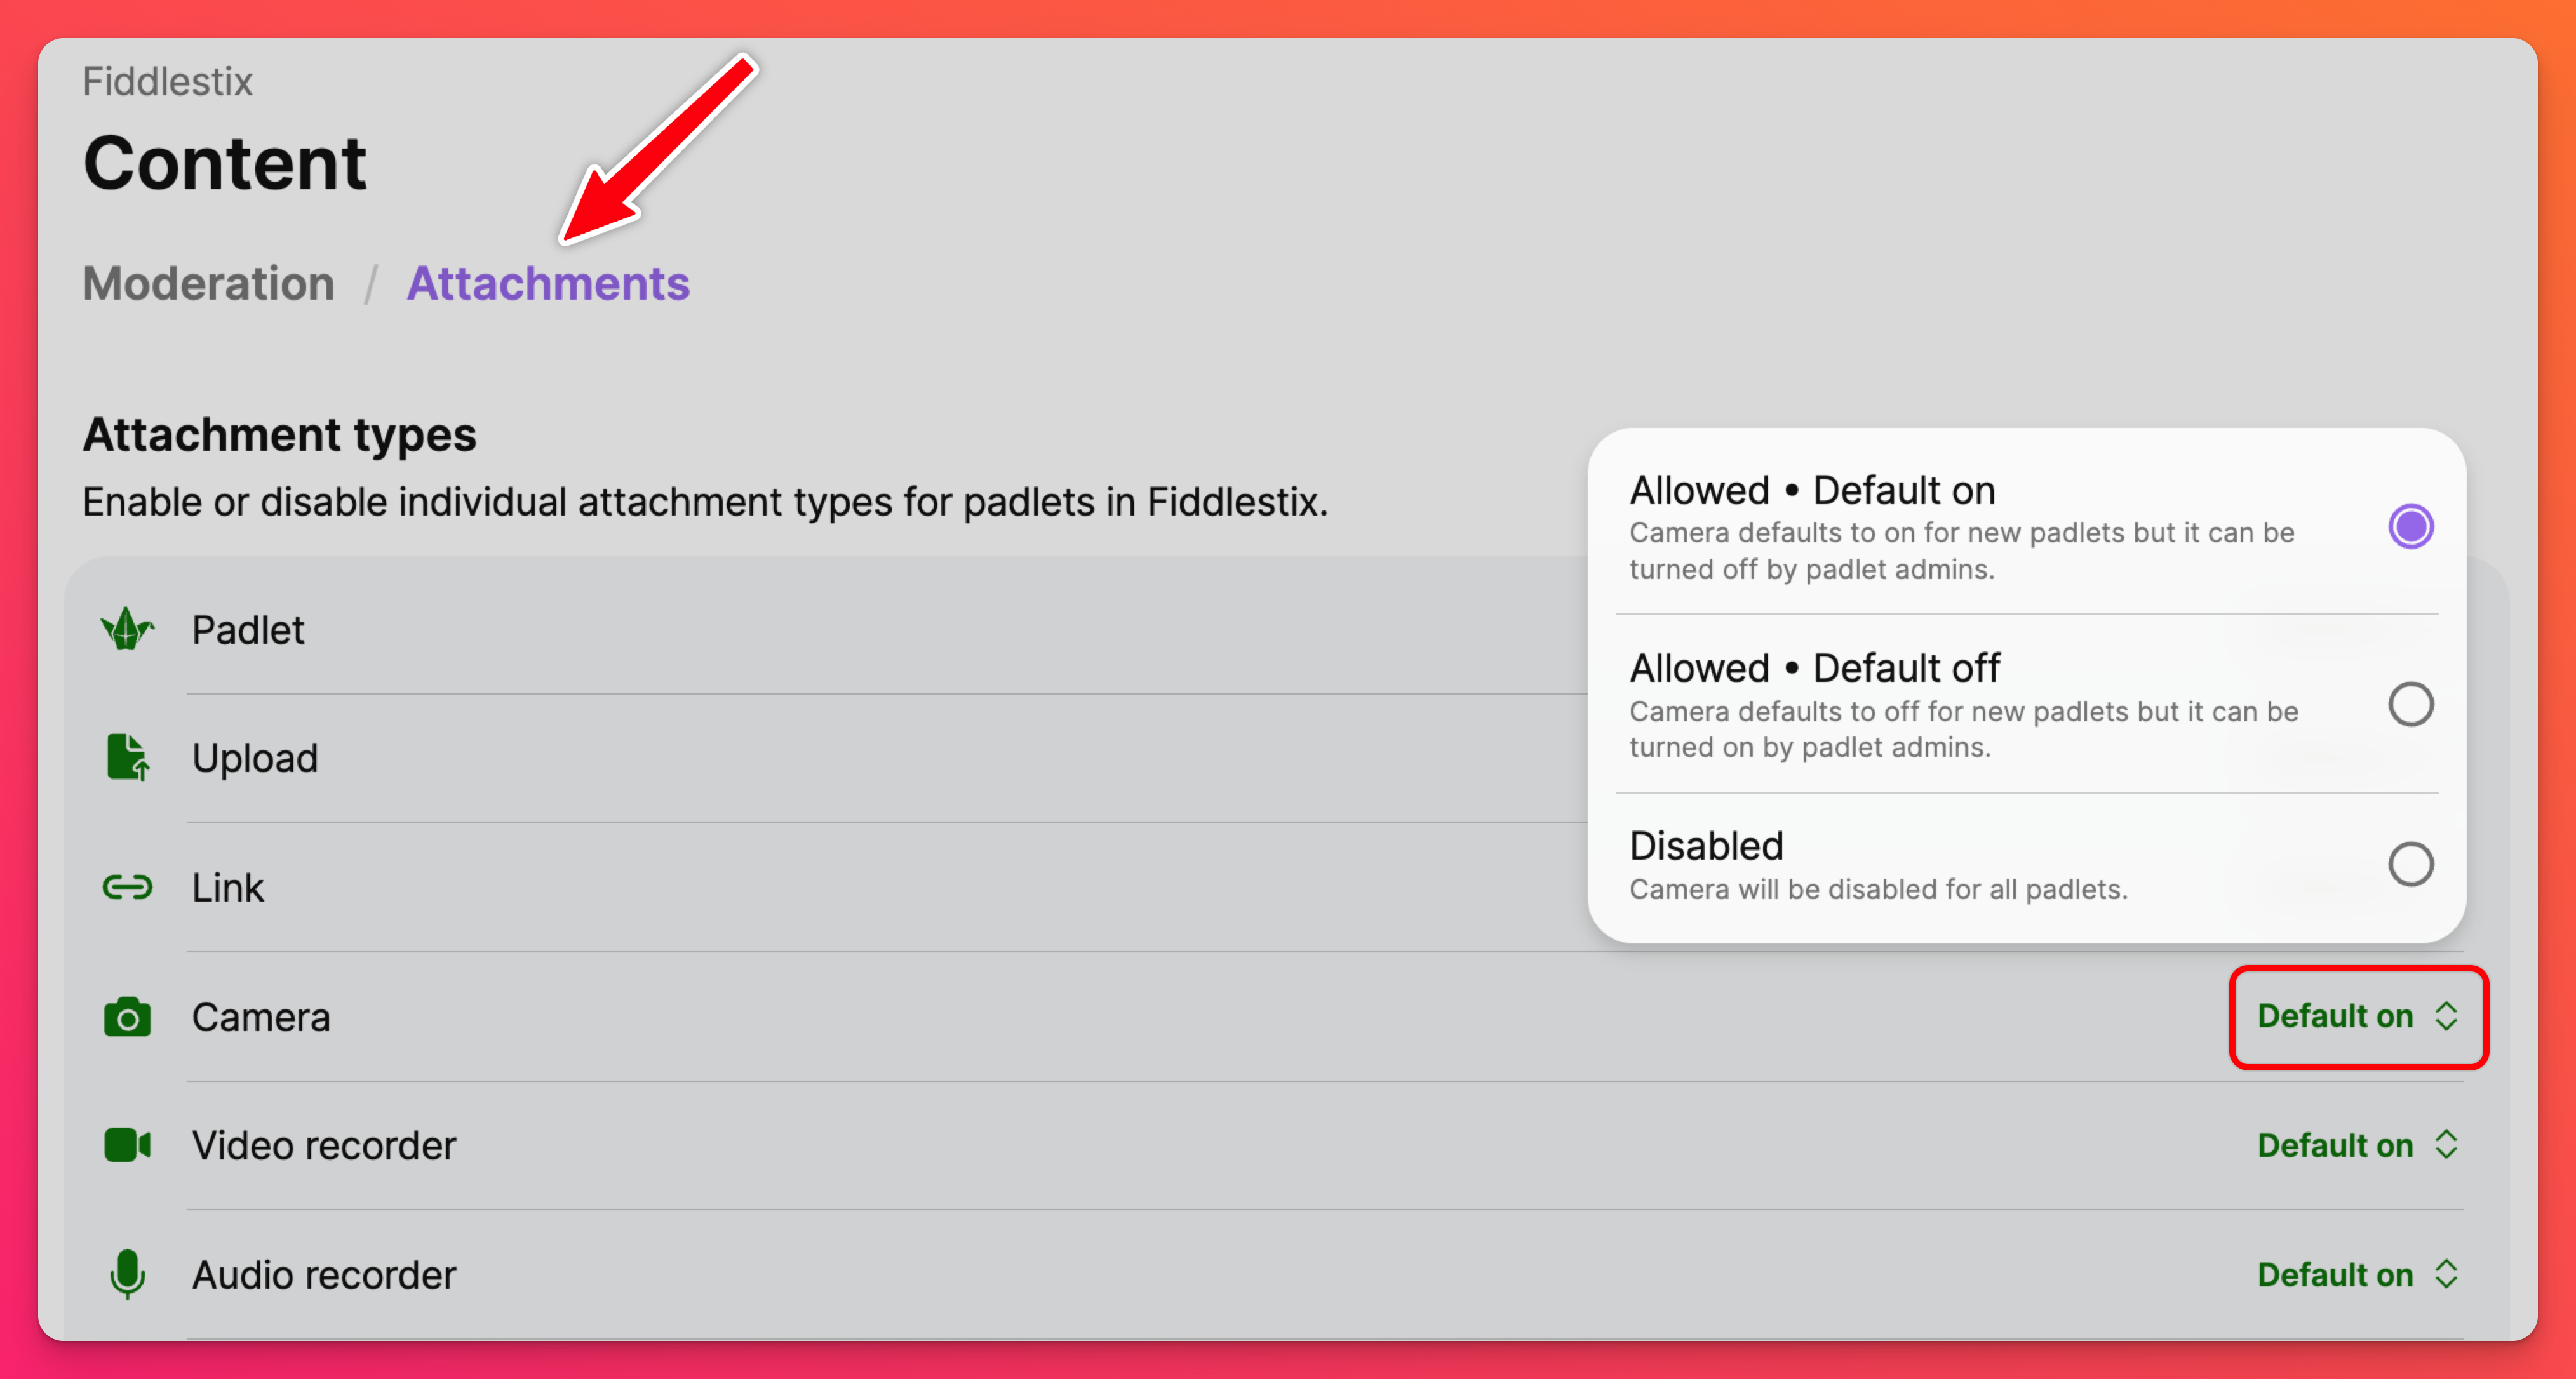
Enable/disable attachment types for all padlets within the Classroom. Under Attachments, click the button to the right of the attachment you want to change and choose your default setting.
Billing
Use the Billing page to upgrade your Classroom to a paid subscription. Click the Upgrade button next to the Classroom plan to get started.

Purchase additional license bundles
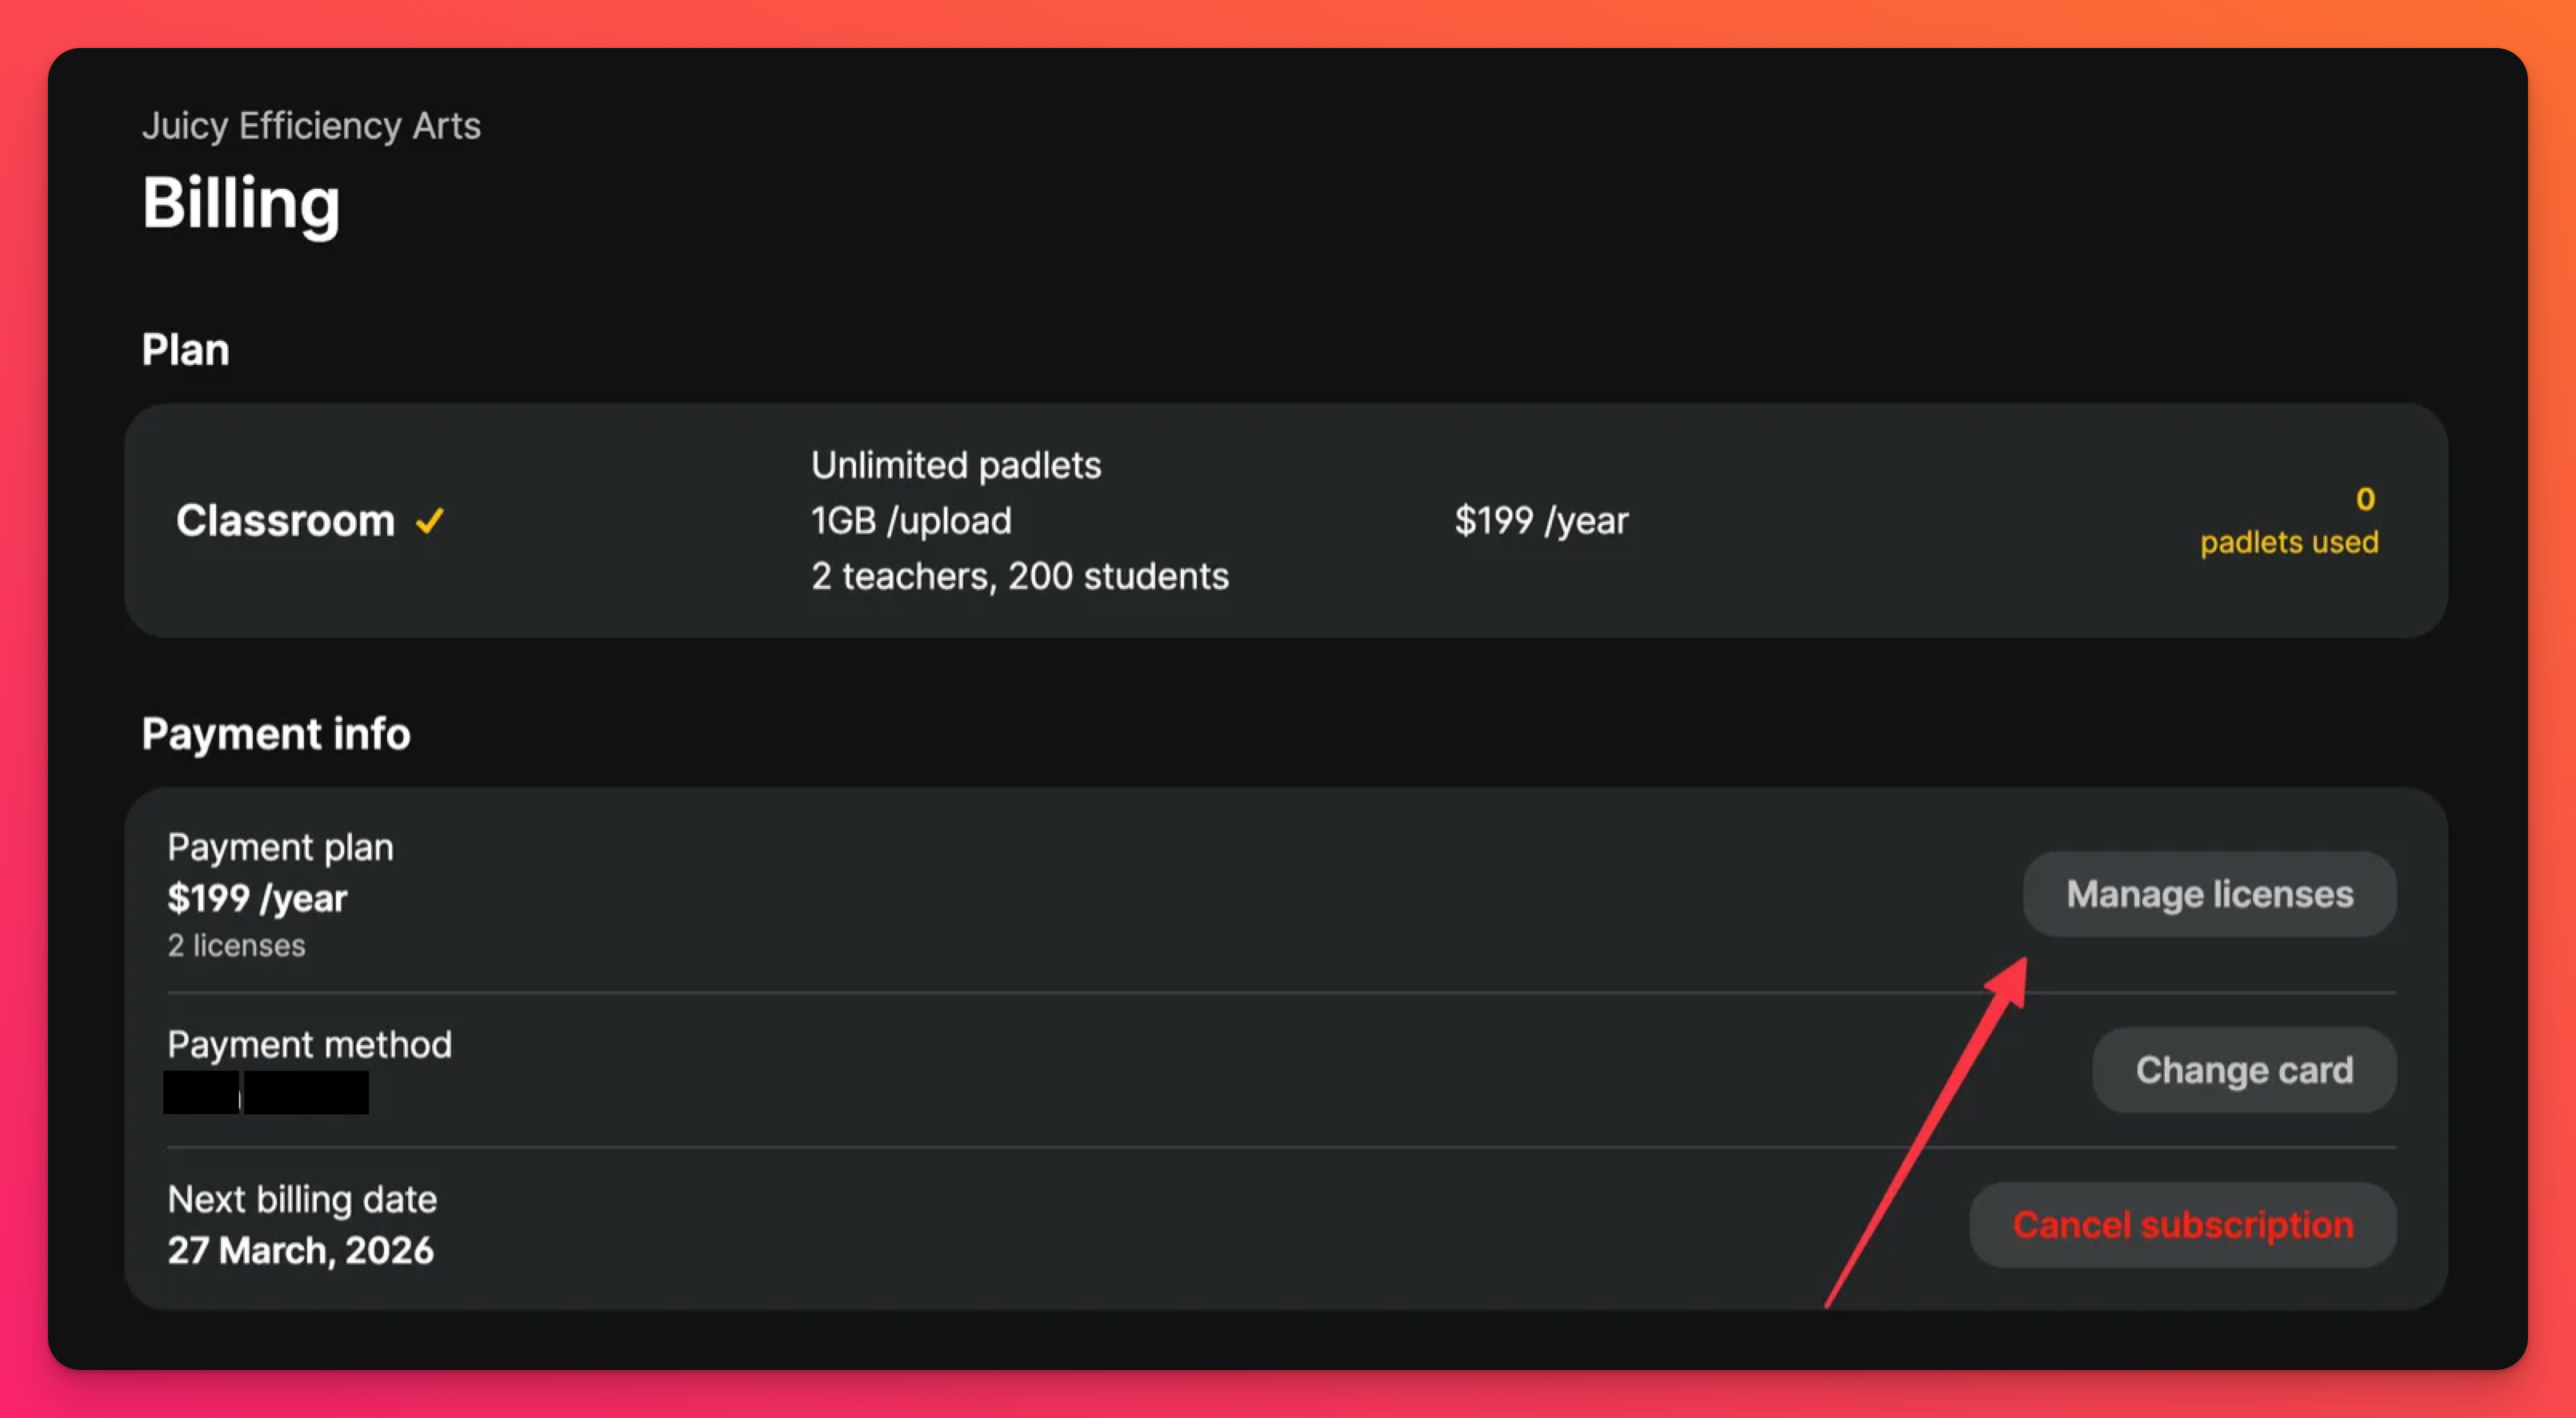
Upgrading to a paid subscription allows you to manage more licenses! Each license bundle purchased will include 1 teacher license and 100 student licenses. On the Billing page, just click Manage licenses.
Add up to a total of 10 license bundles for one Classroom!
If you need more than 10 license bundles, you may want to look into our Padlet for Schools subscription to save some of your hard earned cash. Click below to request a quote!
FAQs
How do I upgrade to a paid subscription if Classroom is not an option on the billing page?
What happens if I've reached my student license limit?
How do I know when I've reached my limit for adding users?
I've reached my license limit. How do I add more users to my Classroom?
Can I add more licenses in the middle of a billing period?
Can I remove licenses in the middle of a billing period?
Note: No prorated refunds will be given for removing licenses in the middle of a term.

