Add, edit, and remove users in Padlet for Schools (at padlet.org)
Not currently set up for rostering? Click the name of the rostering system above to learn how to get set up!
Add users
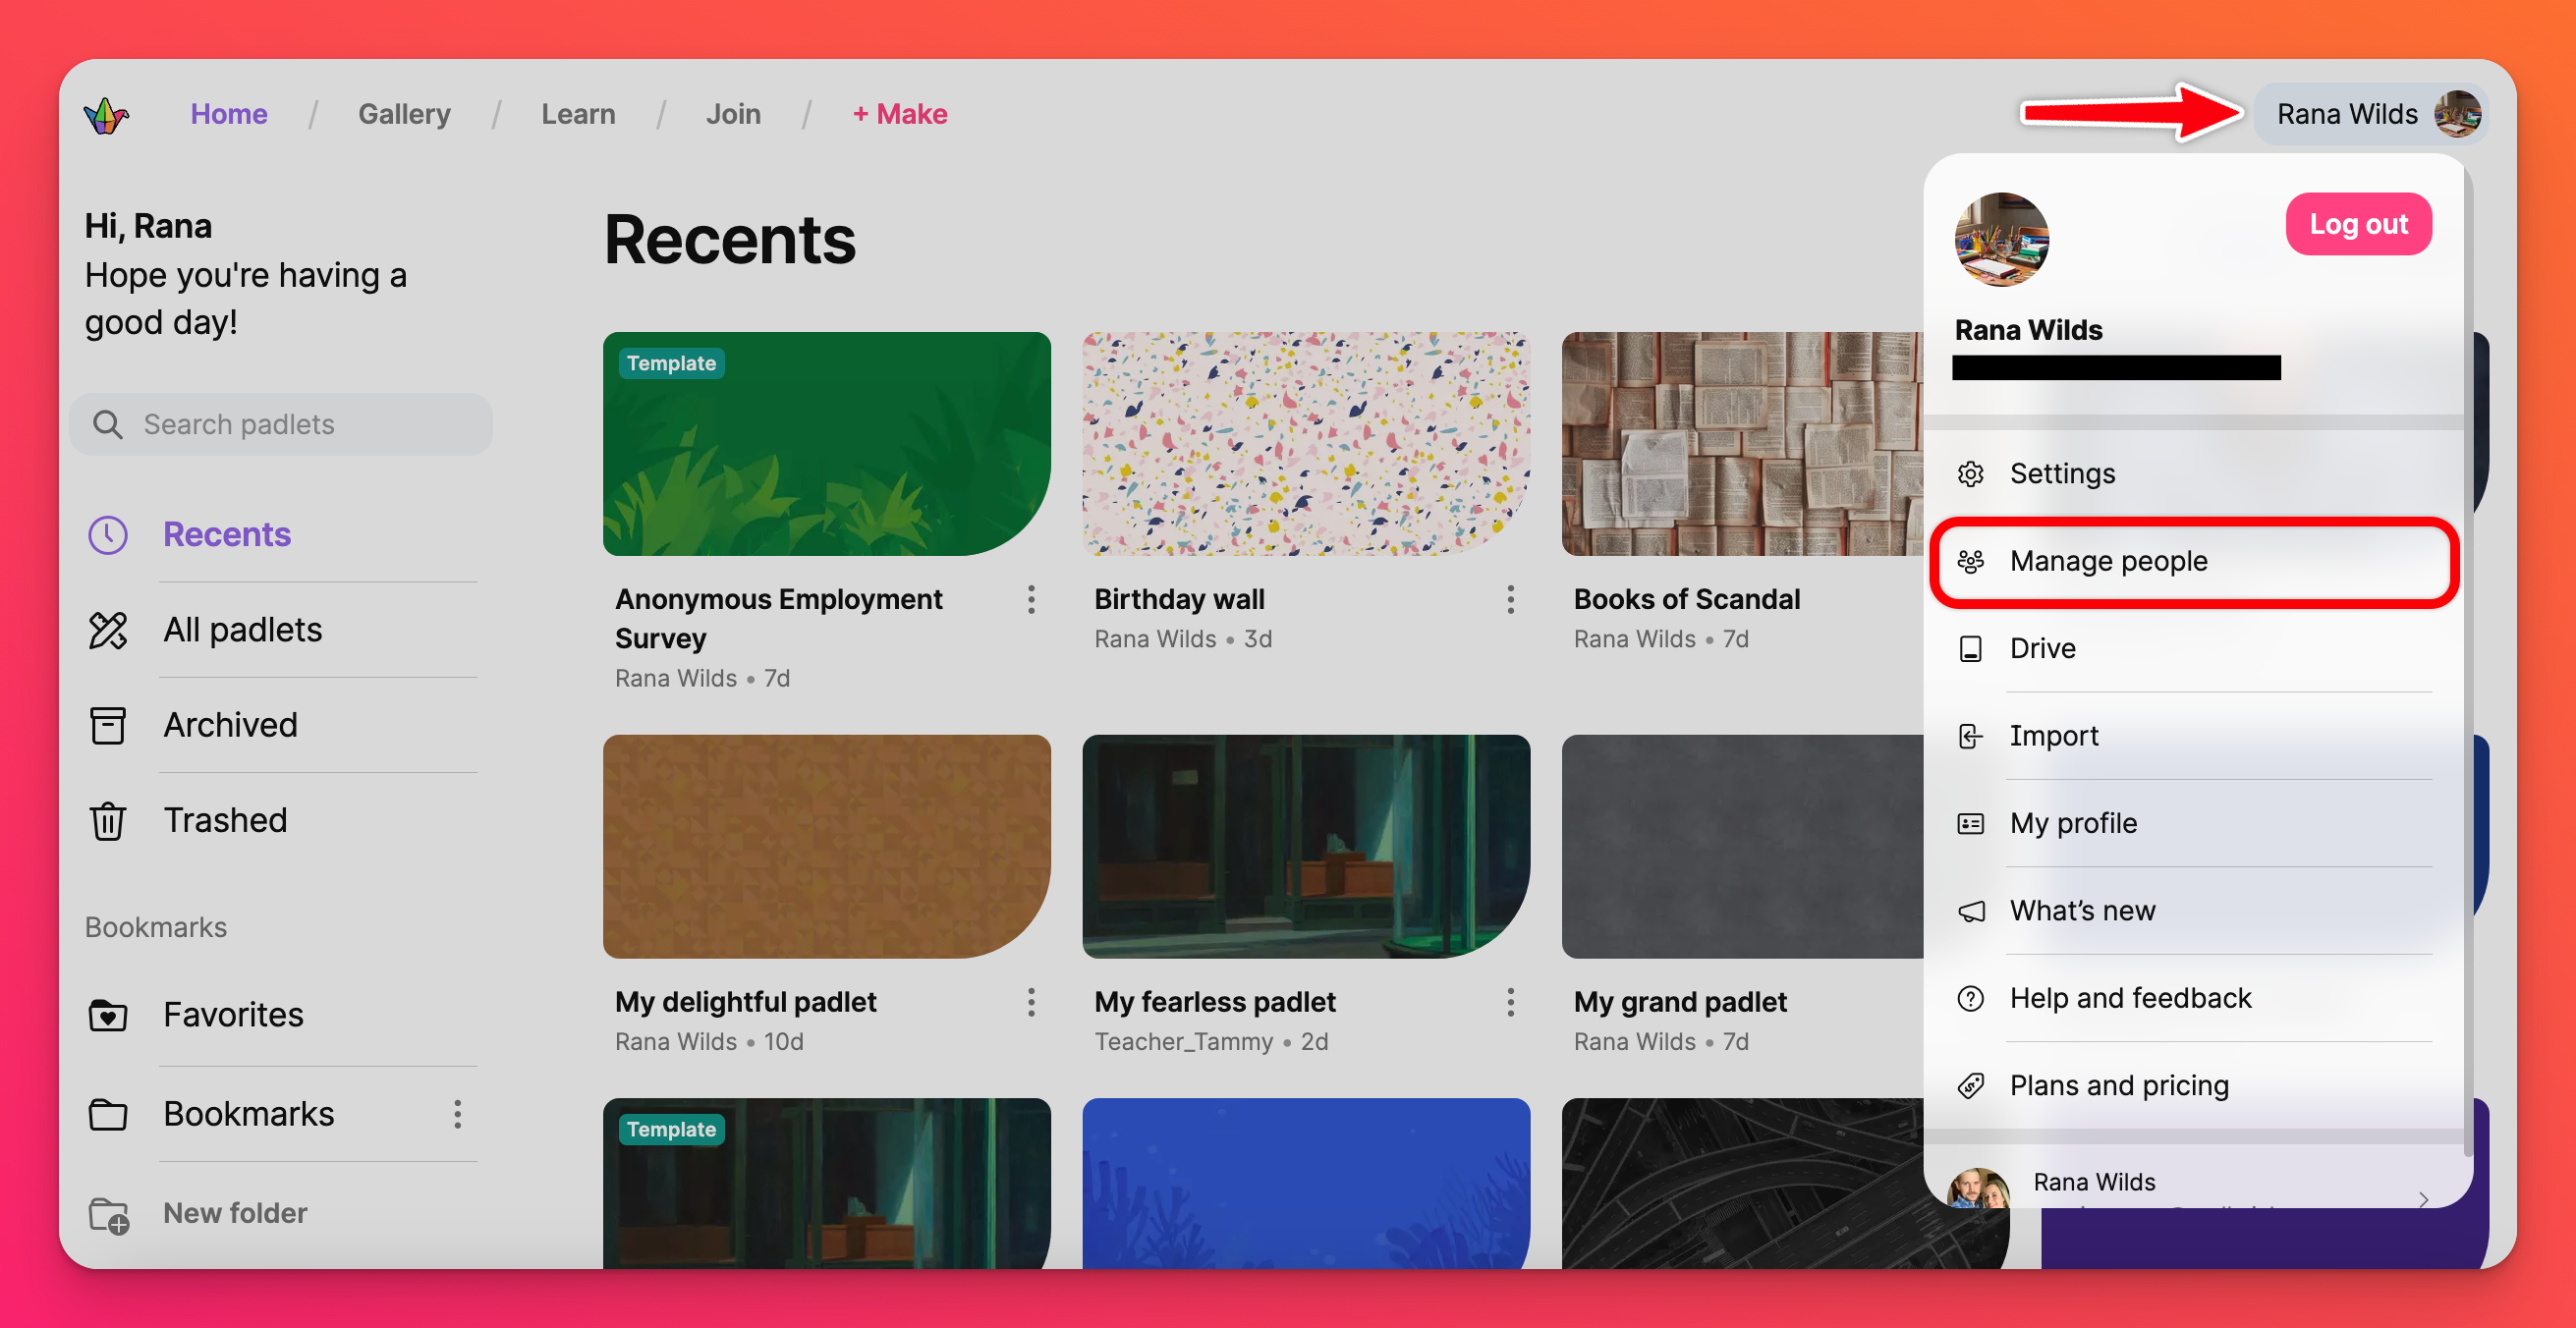
If you are an owner or teacher in a Padlet for Schools account at padlet.org, you should have access to the user management page from your dashboard. Click on your account name in the top-right corner of your dashboard and then Manage people.
There are a few ways you can bring people in:
- Sharing an invite link
- Adding individuals manually
- Inviting multiple users at once
- Enabling automatic account creation
Share an invite link
Sending out an invite link is the most convenient way to get people to join your organization. With links, you can add people without assigning usernames and passwords or filling out a spreadsheet. This is especially useful when inviting users in bulk with assigned user roles.
Owners and Admins can share invite links by performing the following steps:
- Click on your account name in the top-right corner of your dashboard > Manage people.
- Click Add New User.
- Select Invite Links.
- Click the COPY button next to the designated role for the recipient.
- Paste the link into an email (or whichever form of communication you prefer) and send the link to those you wish to invite!
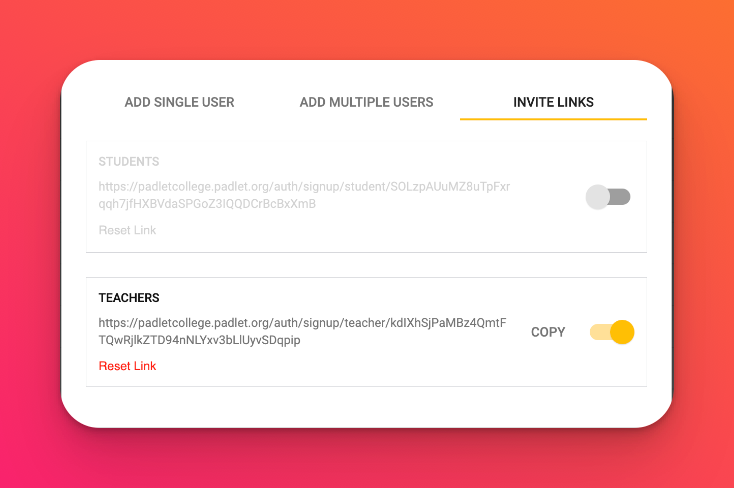
Recipients will be prompted to sign up and their roles are automatically assigned based on the link they access.
Invite links do not expire but account owners have the option to disable invite link sharing and reset the URLs to control the registration to the Padlet for Schools account.
Add a single user
- Click your account name on the dashboard > Manage people.
- Click Add New User.
- Select Add Single User.
- Fill in the required fields.
- An email address is optional for student accounts.
- The username is auto-generated but can be changed. The username has to be unique.
- The password is auto-generated but can be changed. Please make sure it is at least 8 characters long.
- Choose the Student role for student accounts, Teacher for teacher accounts or Admin for those needing just a bit more authority over the Padlet for Schools settings.
- Click ADD.
Add multiple users
- Click your account name on the dashboard > Manage people.
- Click Add New User.
- Press Add Multiple Users.
- Enter user details following the format suggested. You can also follow these instructions to invite people with a CSV file.
Once the users are added, they will receive an email notification with details on how to join your organization.
Allow third-party log in
Account owners can also allow self-registration for their organization by enabling Third-party Log in for users. This way, users can use their school-issued email addresses to log in. Most importantly, you just have to share your official Padlet for Schools address (<myschool>.padlet.org) for people to join your account.
- To turn on Google/Microsoft/ClassLink log in, sign into your unique Padlet for Schools account (it will be a URL ending in padlet.org [i.e. hogwarts.padlet.org] -- not padlet.com).
- Click your account name in the top-right corner of your dashboard.
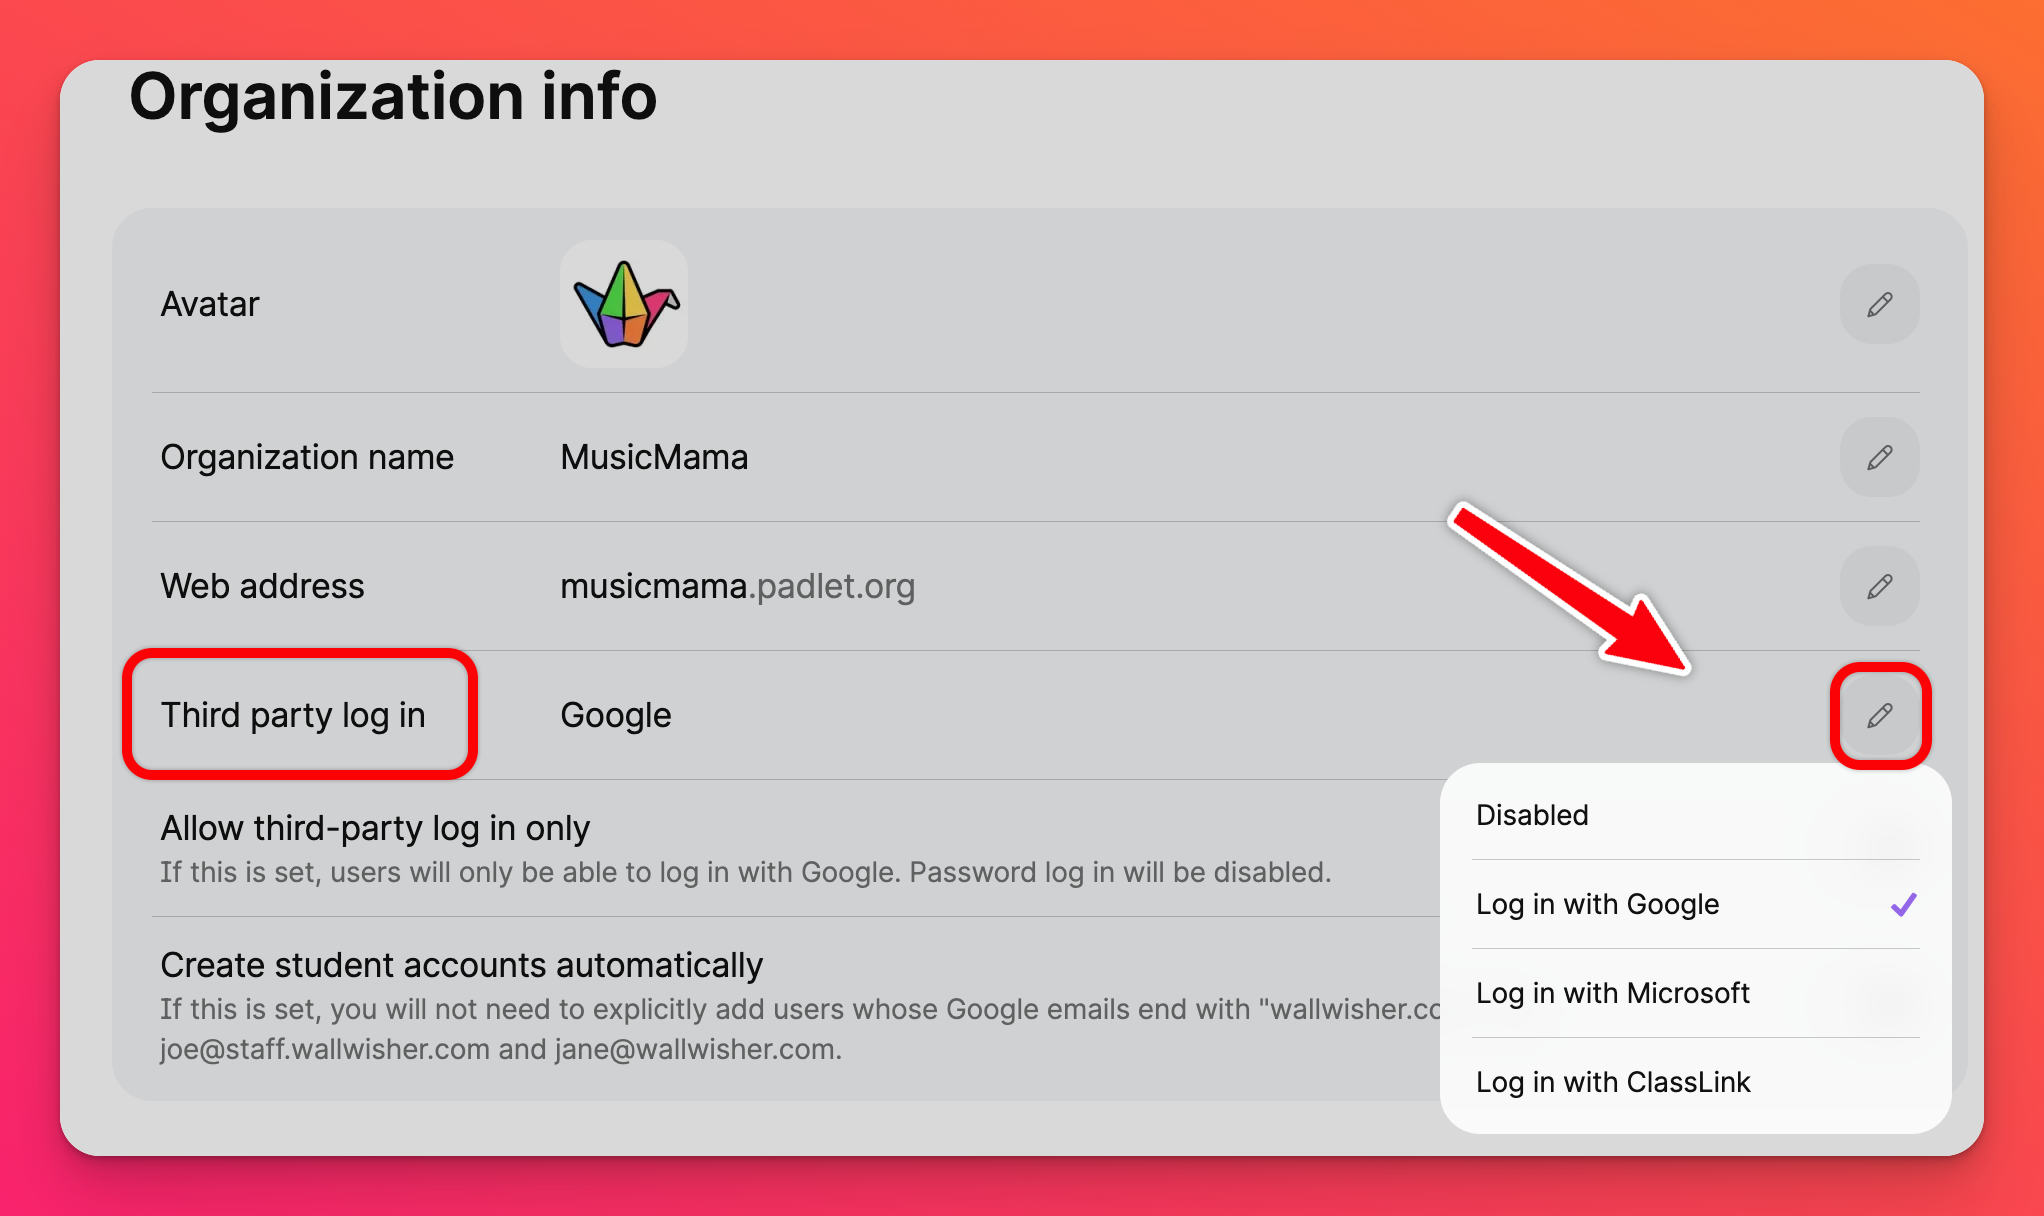
- Click Settings > Organization info.
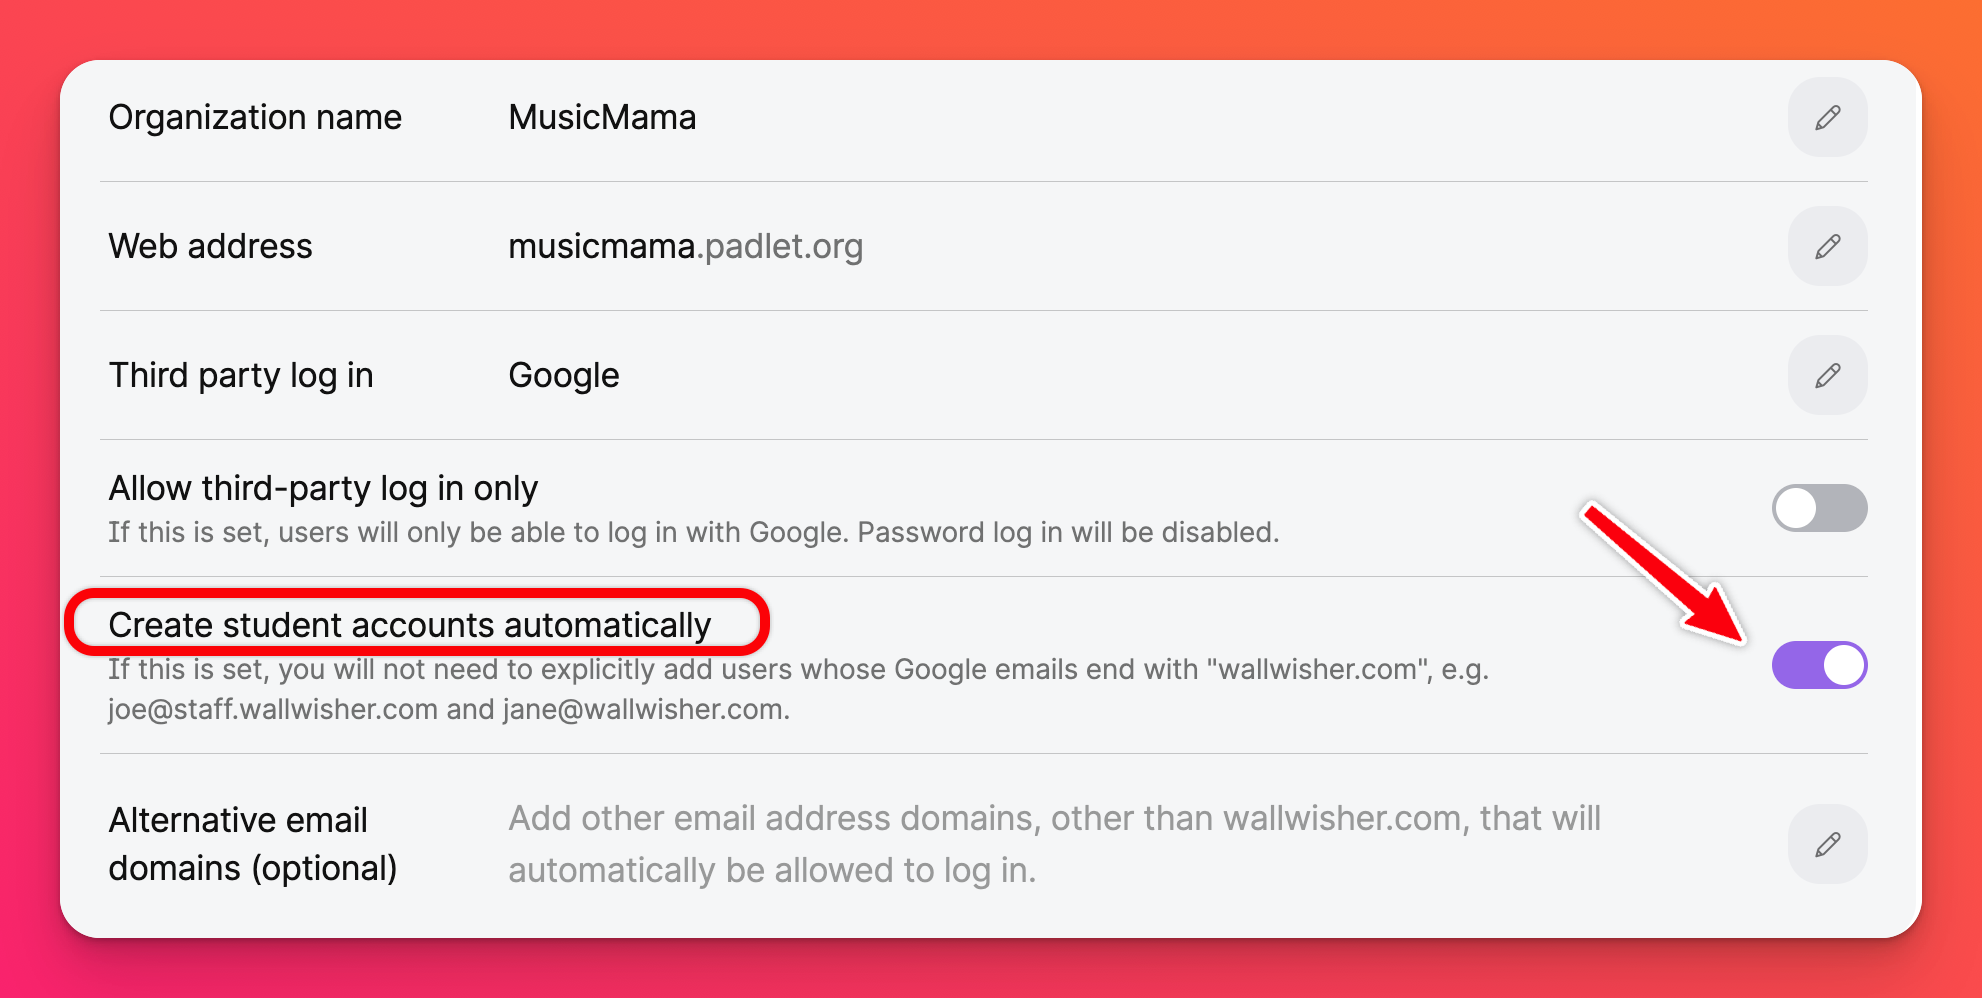
- Use the pencil icon next to 'Third party log in' to choose between Google, Microsoft or ClassLink log in.
- Move the toggle to the ON position for 'Create student accounts automatically.'
Your choices will be automatically saved!
Edit users and assign roles
Once a user is added, you can edit their display name, username, email and role.
Edit a single user
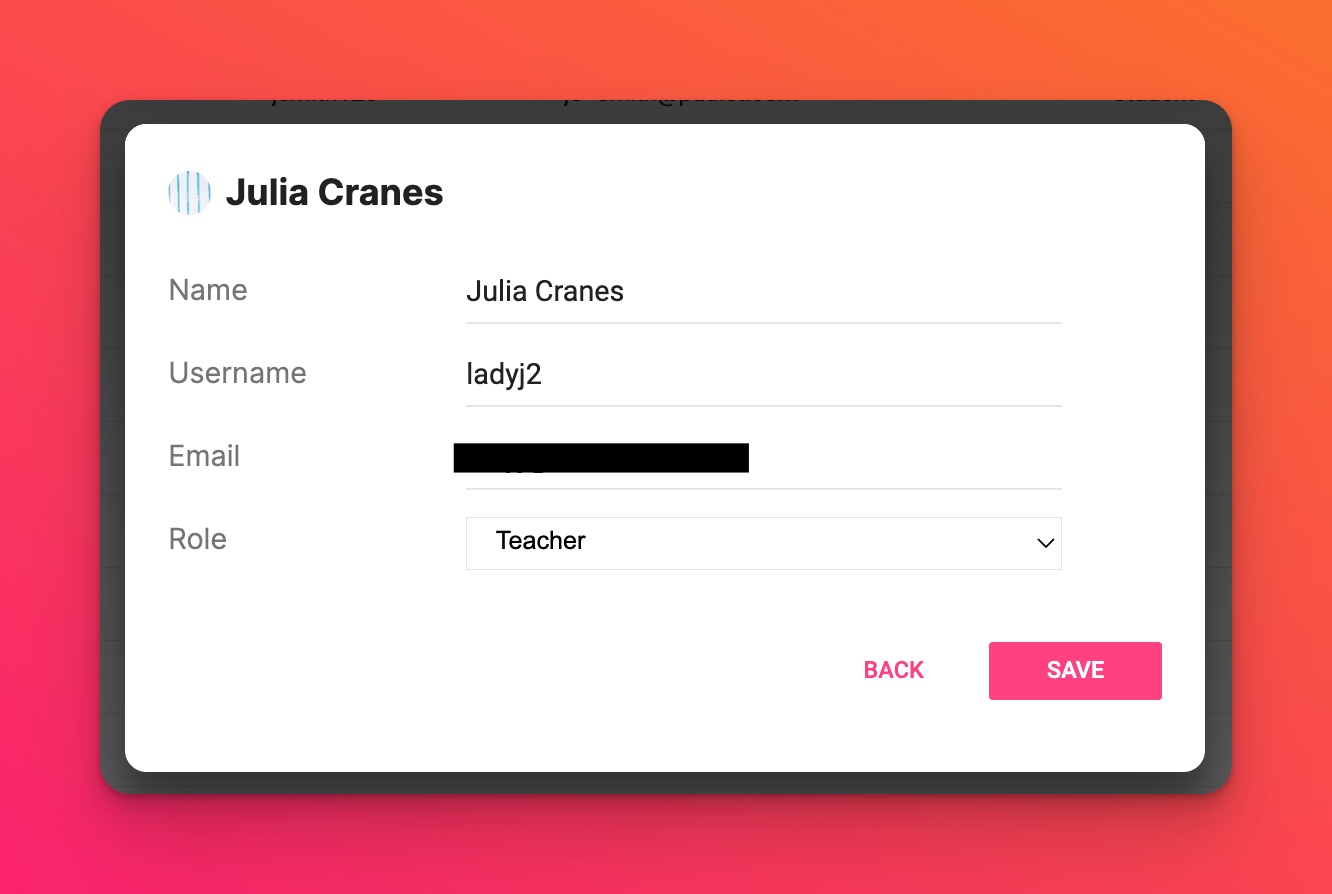
From the Manage people page, click anywhere in the row of the user you want to edit and then click EDIT. If you want to update their role, click the dropdown menu next to 'Role' and select the correct option. Once you've updated the user, click SAVE.

Edit multiple users
Here is how to adjust user roles or edit in bulk.
- From the Manage people page, click the Bulk Select Users button.
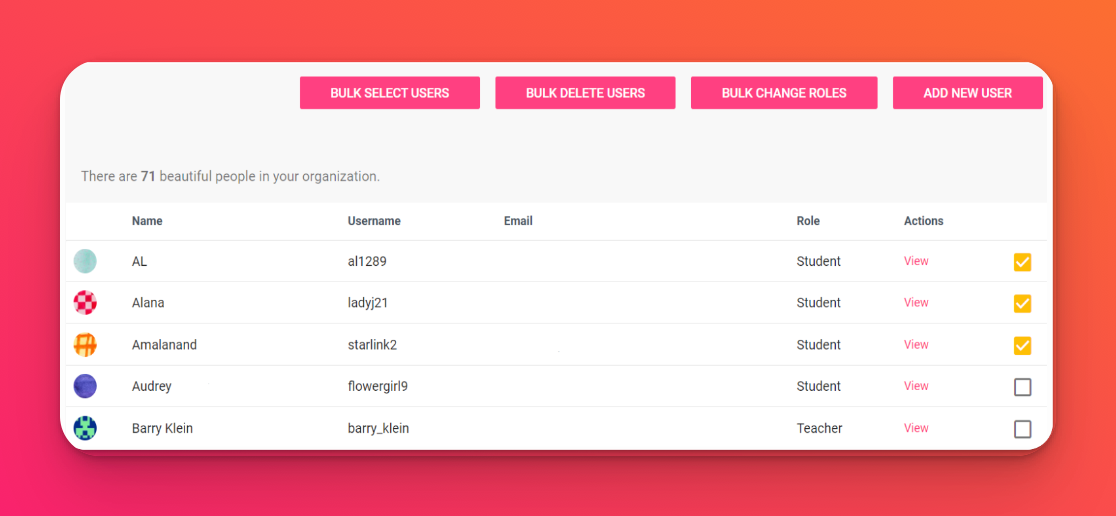
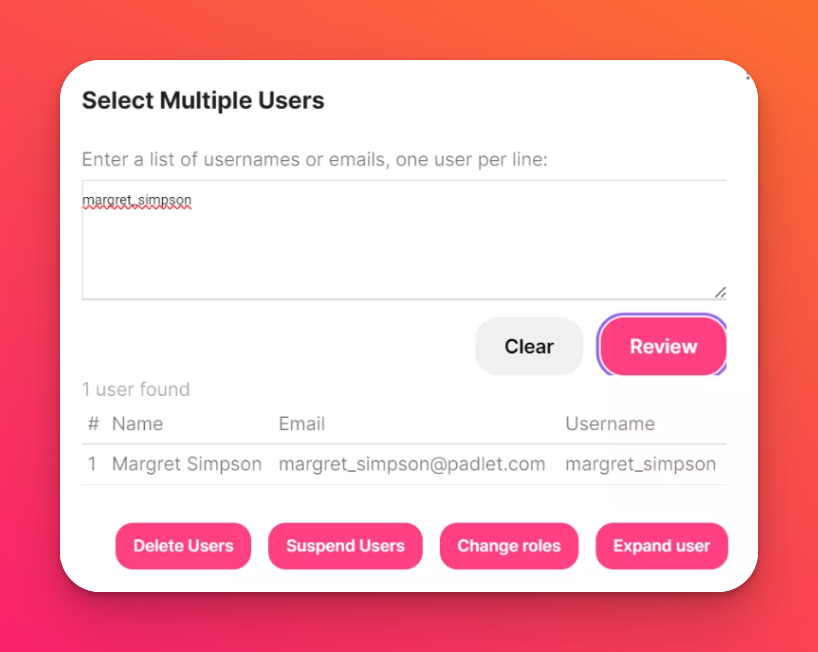
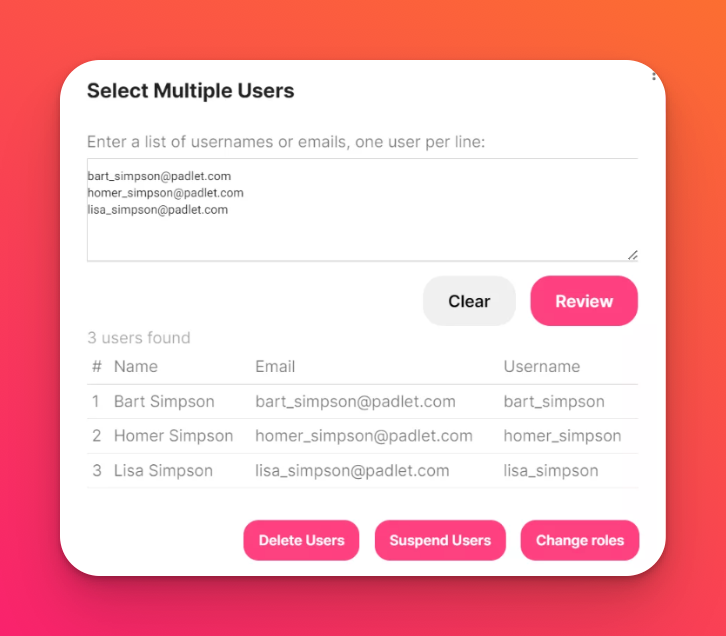
- Enter the usernames or email addresses on the 'Select Multiple Users' page (one user per line) and then click Review.
- Click Change roles > Continue.
- Choose the role you want for the selected users using the dropdown box.
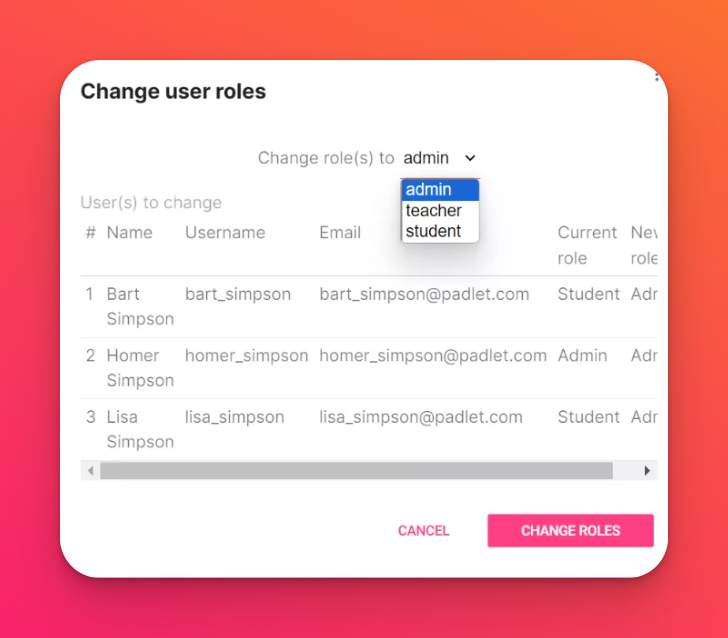
- Finally, click Change Roles.
Remove users
When a student or teacher leaves, the account owner may delete their user accounts. All padlets associated with the account will be deleted permanently - so please proceed with caution.
Bulk delete users

- From the Manage people page, check the box next to the user. Once checked, the Bulk Delete Users button on top will become enabled.
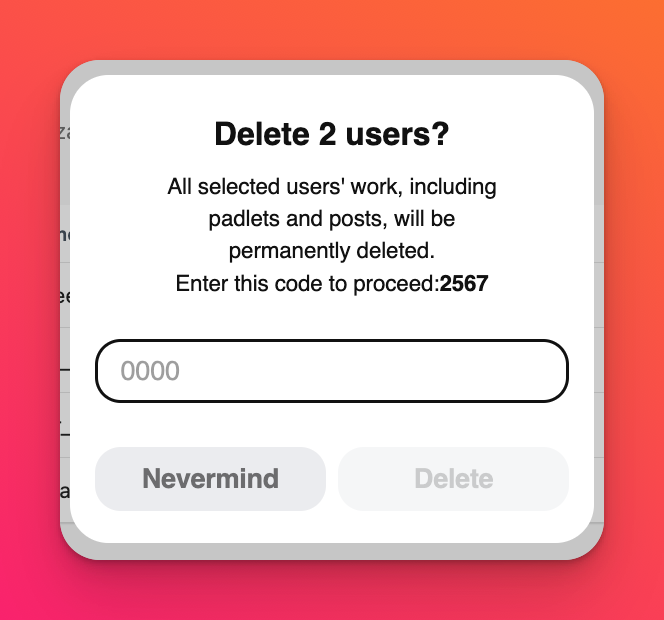
- Select Bulk Delete Users > Continue.
- Finally, enter the 4-digit code to confirm removal and press DELETE.
Search users
To search for users within the Manage People page - Use the Bulk Select Users button.
After entering their username or email address, click Review > Expand user. The next page will show options for viewing, editing and deleting the user's school account.
