Quick start guide: Welcome to Padlet for Schools for administrators!
Thanks for choosing Padlet for Schools. Here’s how to quickly sign up and get started.
Want a more comprehensive guide? Check out this article.
Prefer to watch a video? This covers everything below.
1. Sign up for your account
The first step is to sign up for a Padlet for Schools account. Even if you have an existing Padlet account, you need to use this link to sign up for Padlet for Schools:
If you already have a Padlet for Schools account started, you'll need to make sure it gets set up properly!
Accounts at padlet.org
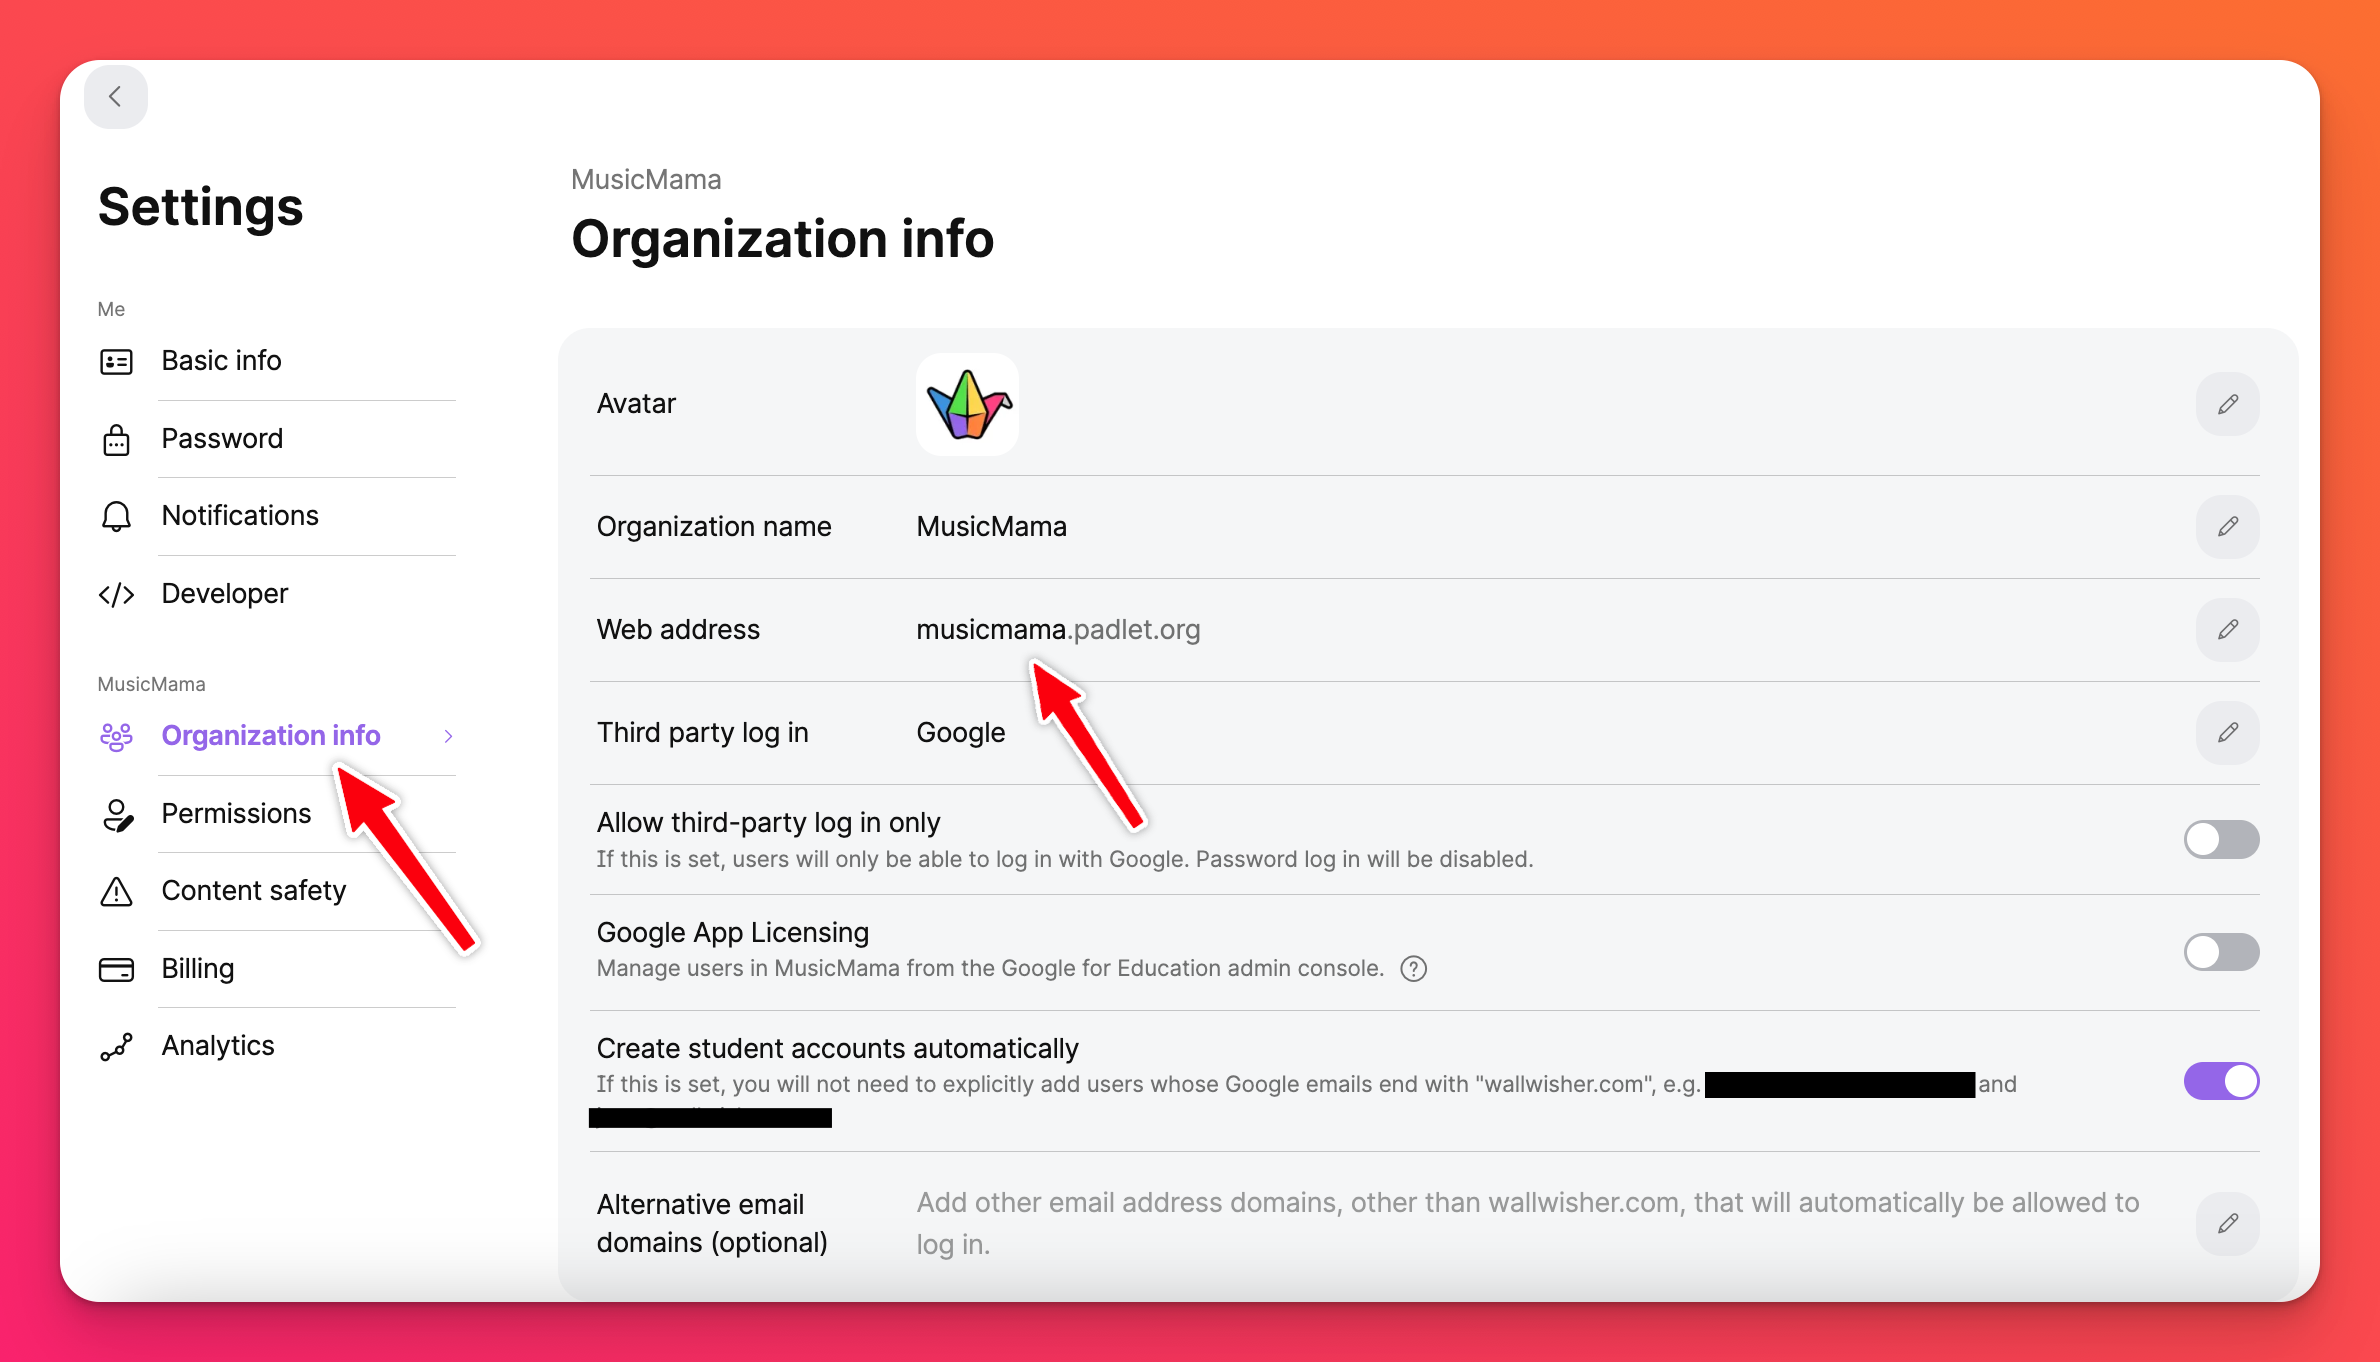
The most important part of this step is choosing your Padlet for Schools domain. You get to decide your Padlet for Schools domain - so you are deciding the URL that your school will use to access Padlet! As the owner of the account, you can change your institution name and Padlet for Schools domain through the organization settings at any time. Don’t stress too hard about this step!
Accounts at padlet.com
All Padlet for Schools accounts at padlet.com will not need to choose a domain. Skip to Step 2.
2. Enable single sign-on
Accounts at padlet.org
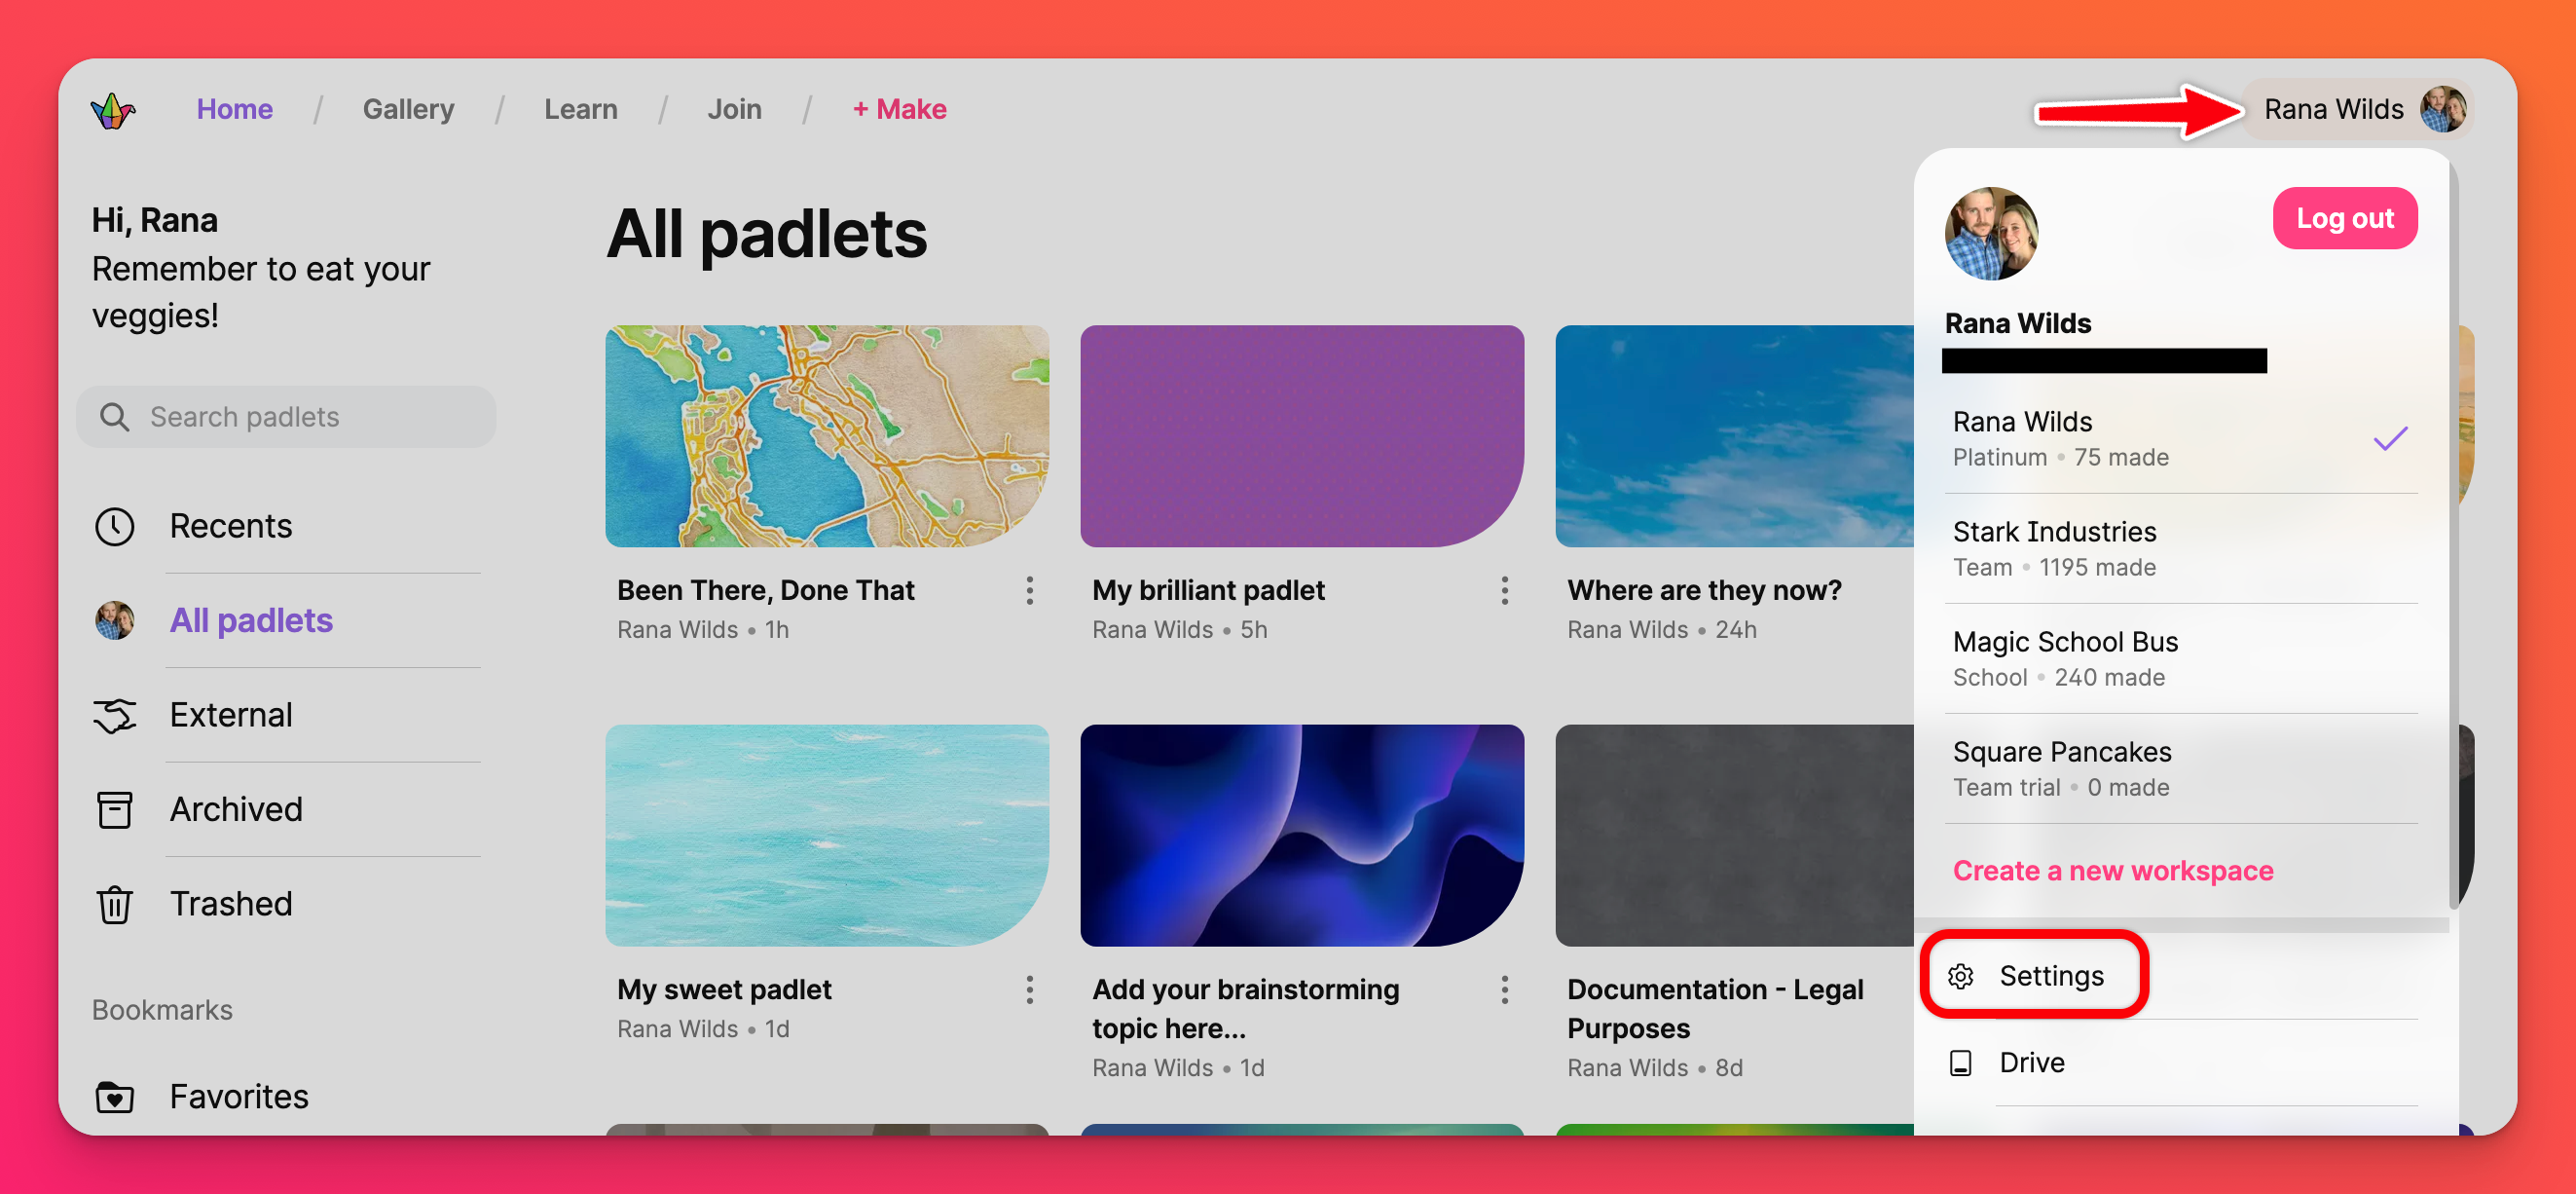
From the dashboard, open your organization settings by clicking on your account name in the top-right corner of the screen > Settings > Organization info.
 |
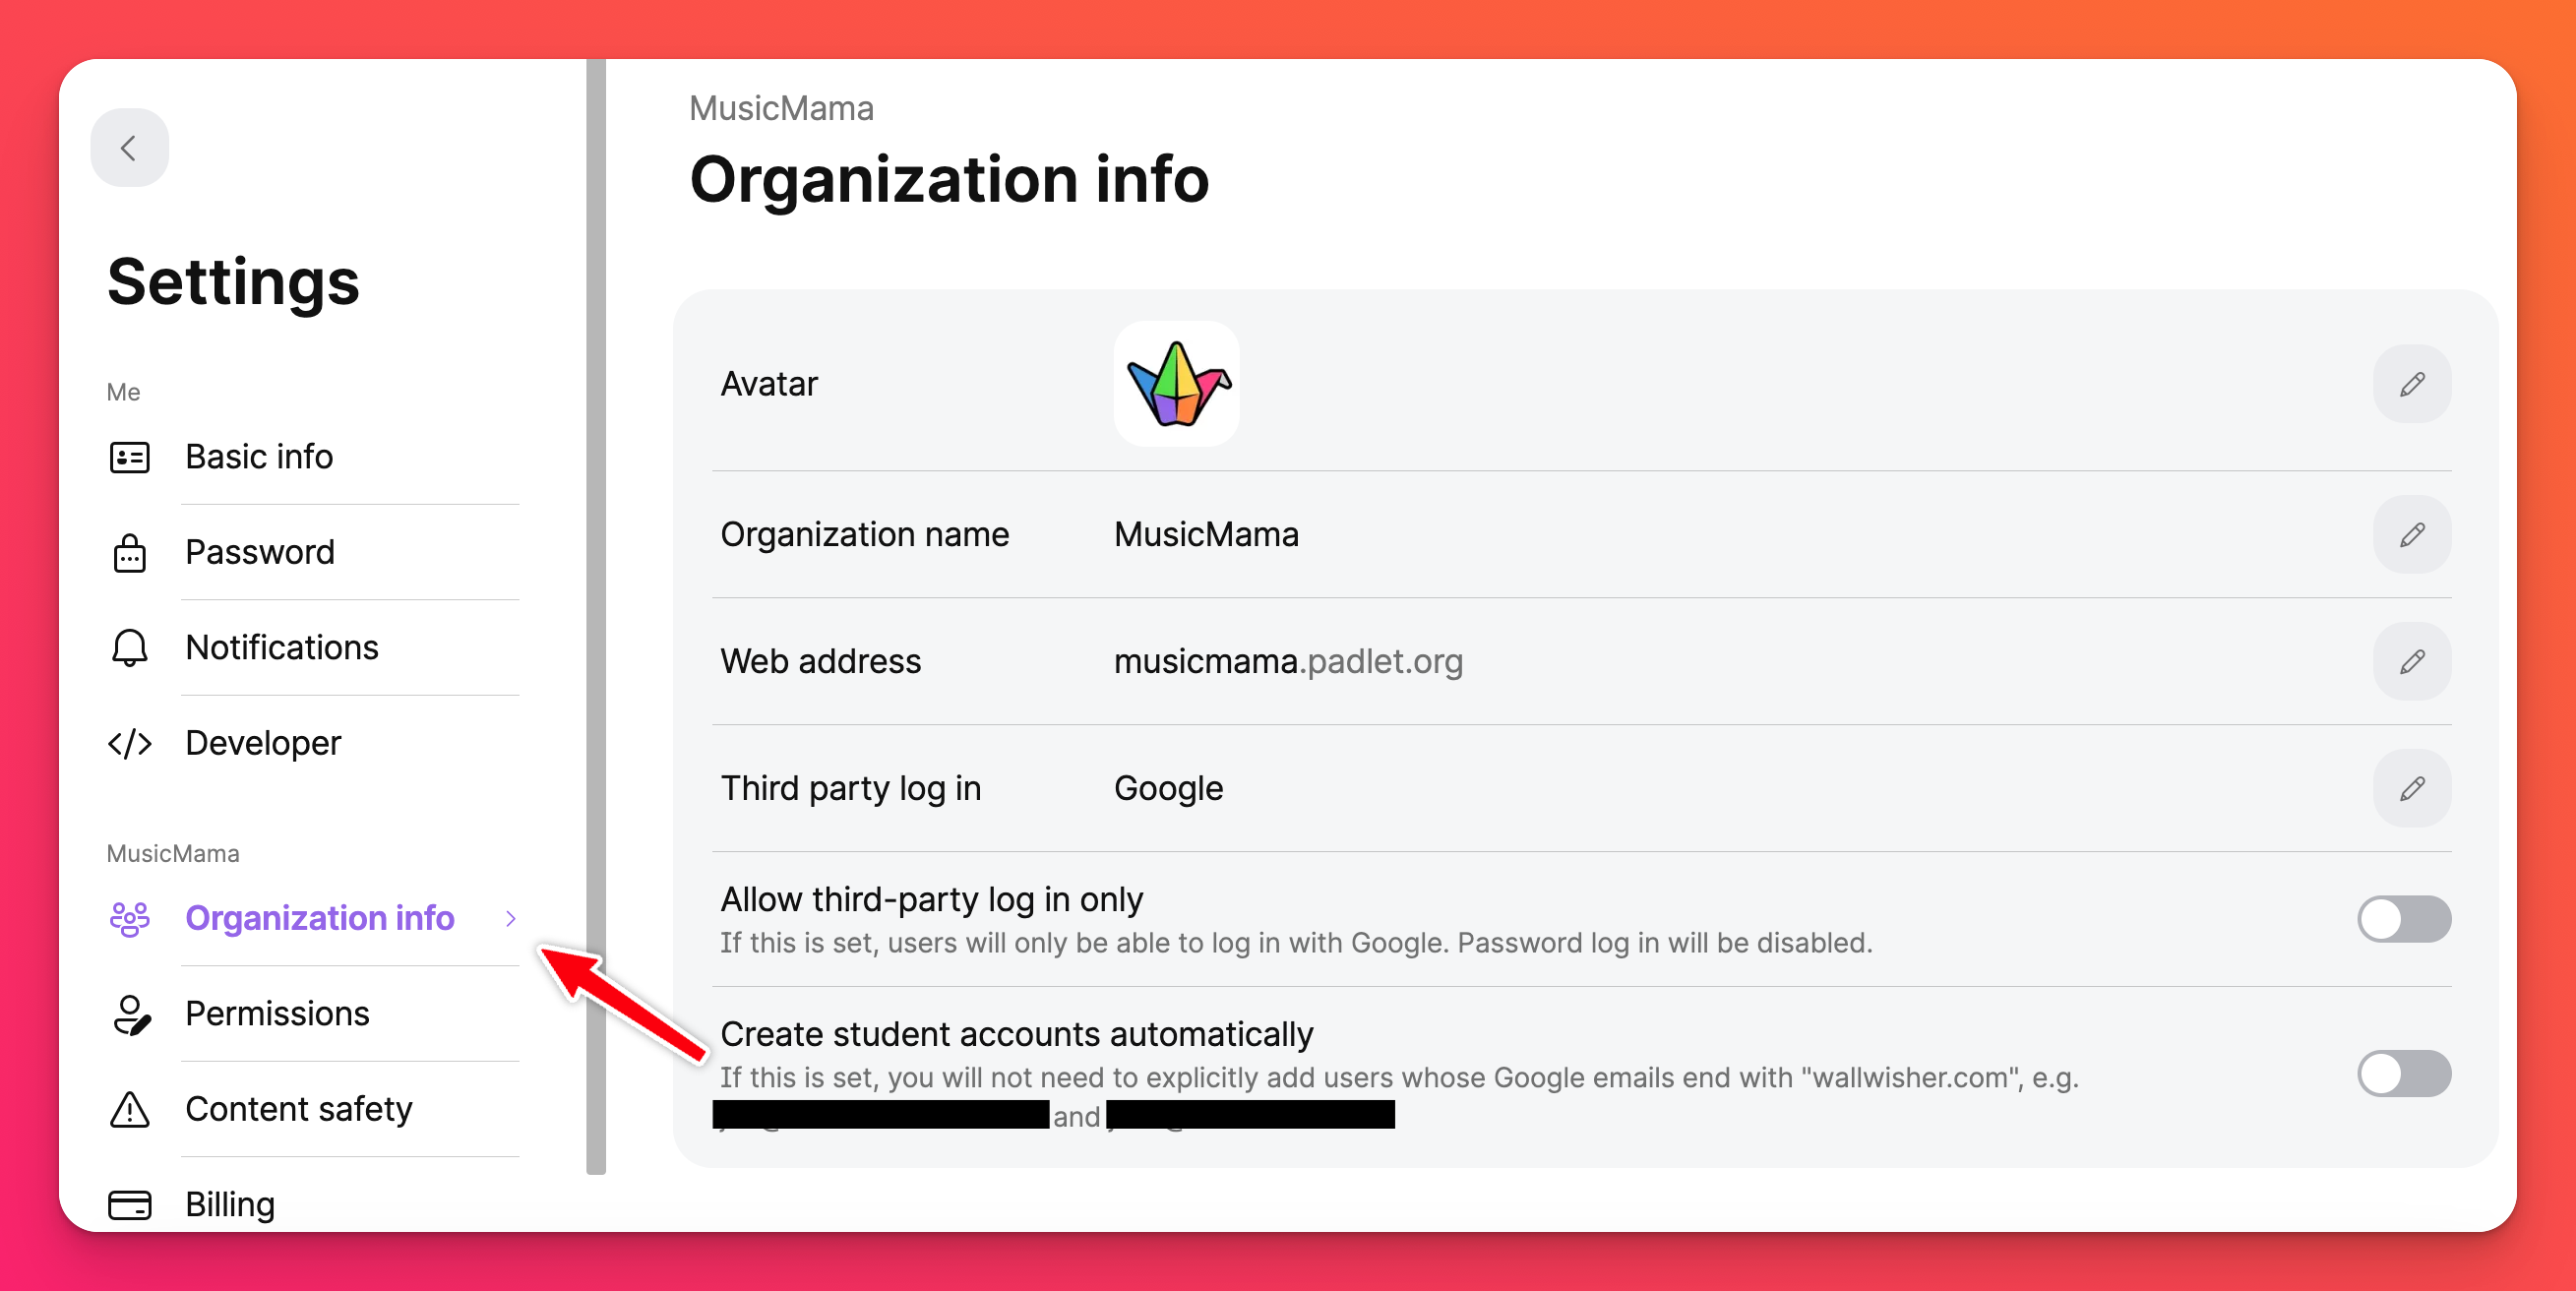 |
We recommend enabling third-party login (aka single sign-on or SSO). Click the pencil icon next to 'Third party log in' to select your provider - either Google, Microsoft or ClassLink. Once you choose your provider, more options will appear below.
We recommend toggling 'Create student accounts automatically' to the ON position if you are adding students to your account. If you enable this feature, when someone with your email domain accesses your Padlet for Schools domain (like fakeschool.padlet.org) and clicks Log in with Google/Microsoft/ClassLink, we will assign them a student account automatically. If your students have a different email domain than your teachers, you can add it to the 'Alternative email domains' field.
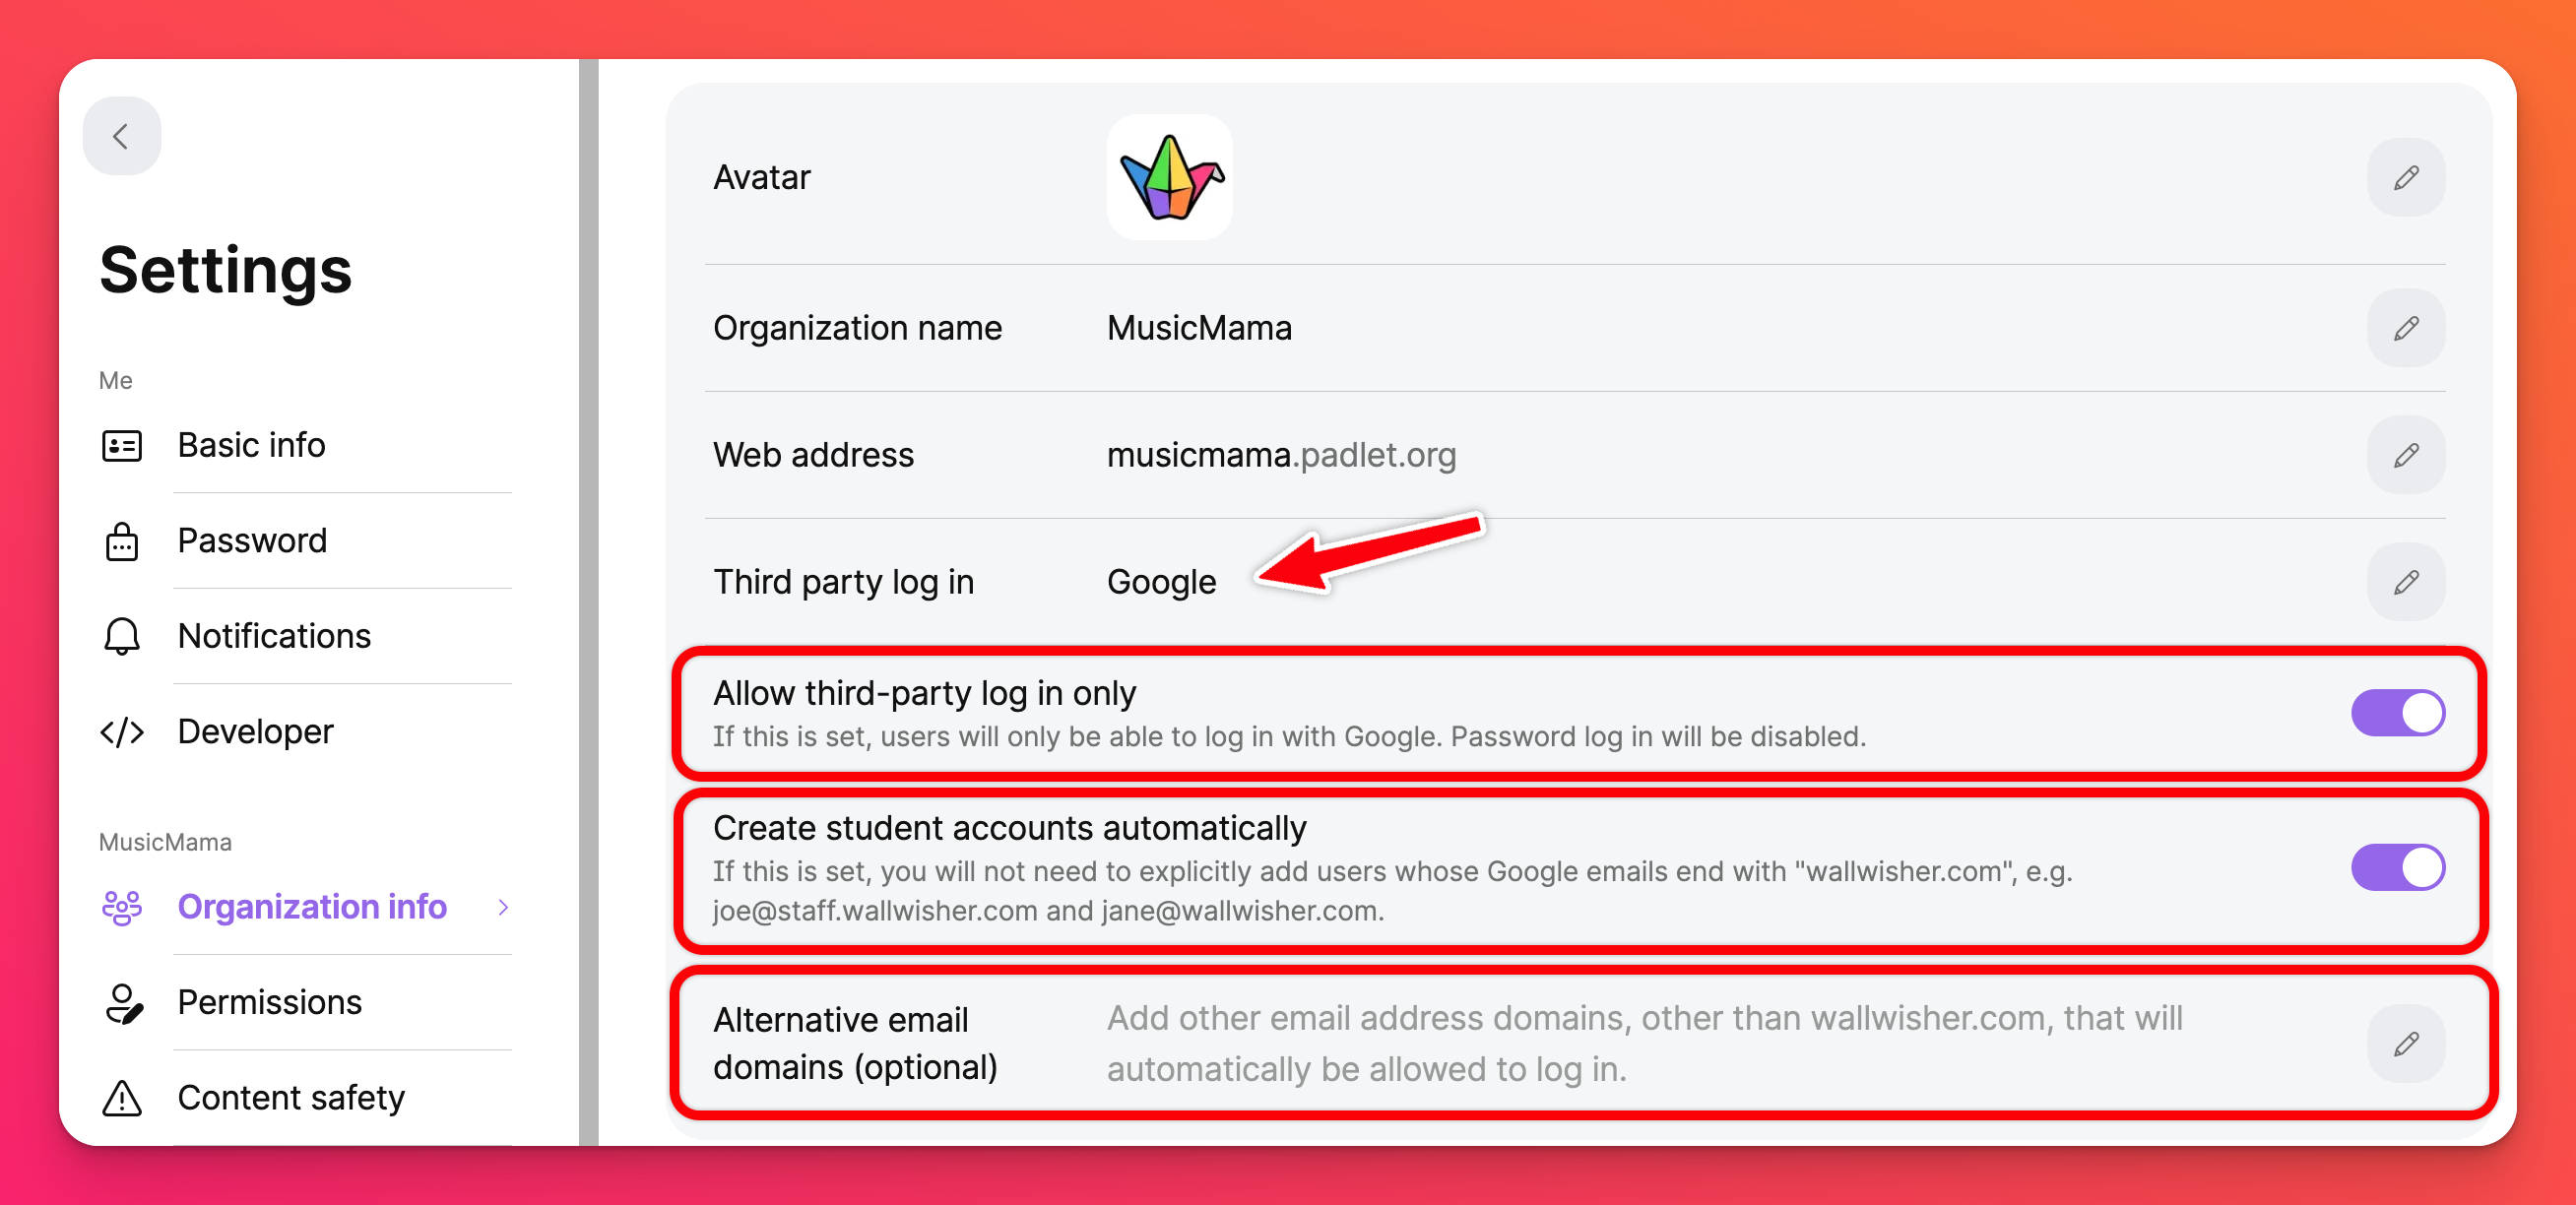
Your changes will save automatically!
For more details on single sign-on, check out this article.
Accounts at padlet.com
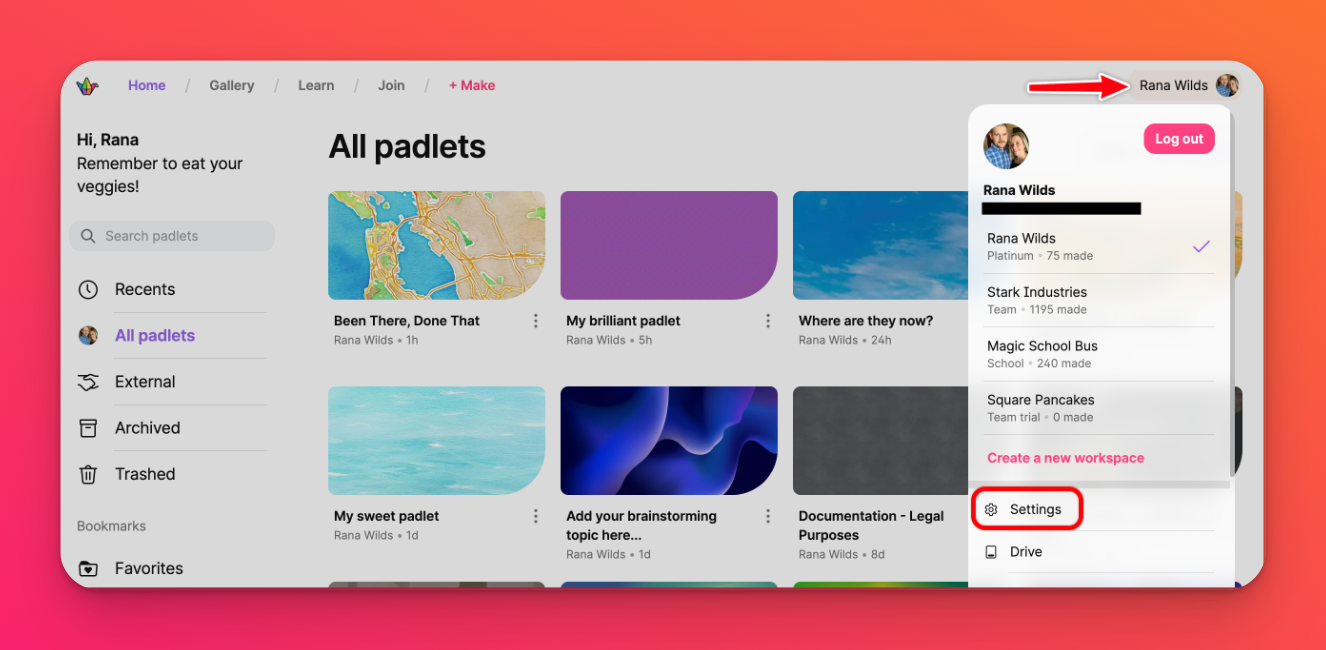
From the dashboard, open your organization settings by clicking on your account name in the top-right corner of the screen > Settings > on the left-hand side of the page, under your school account, click Security.
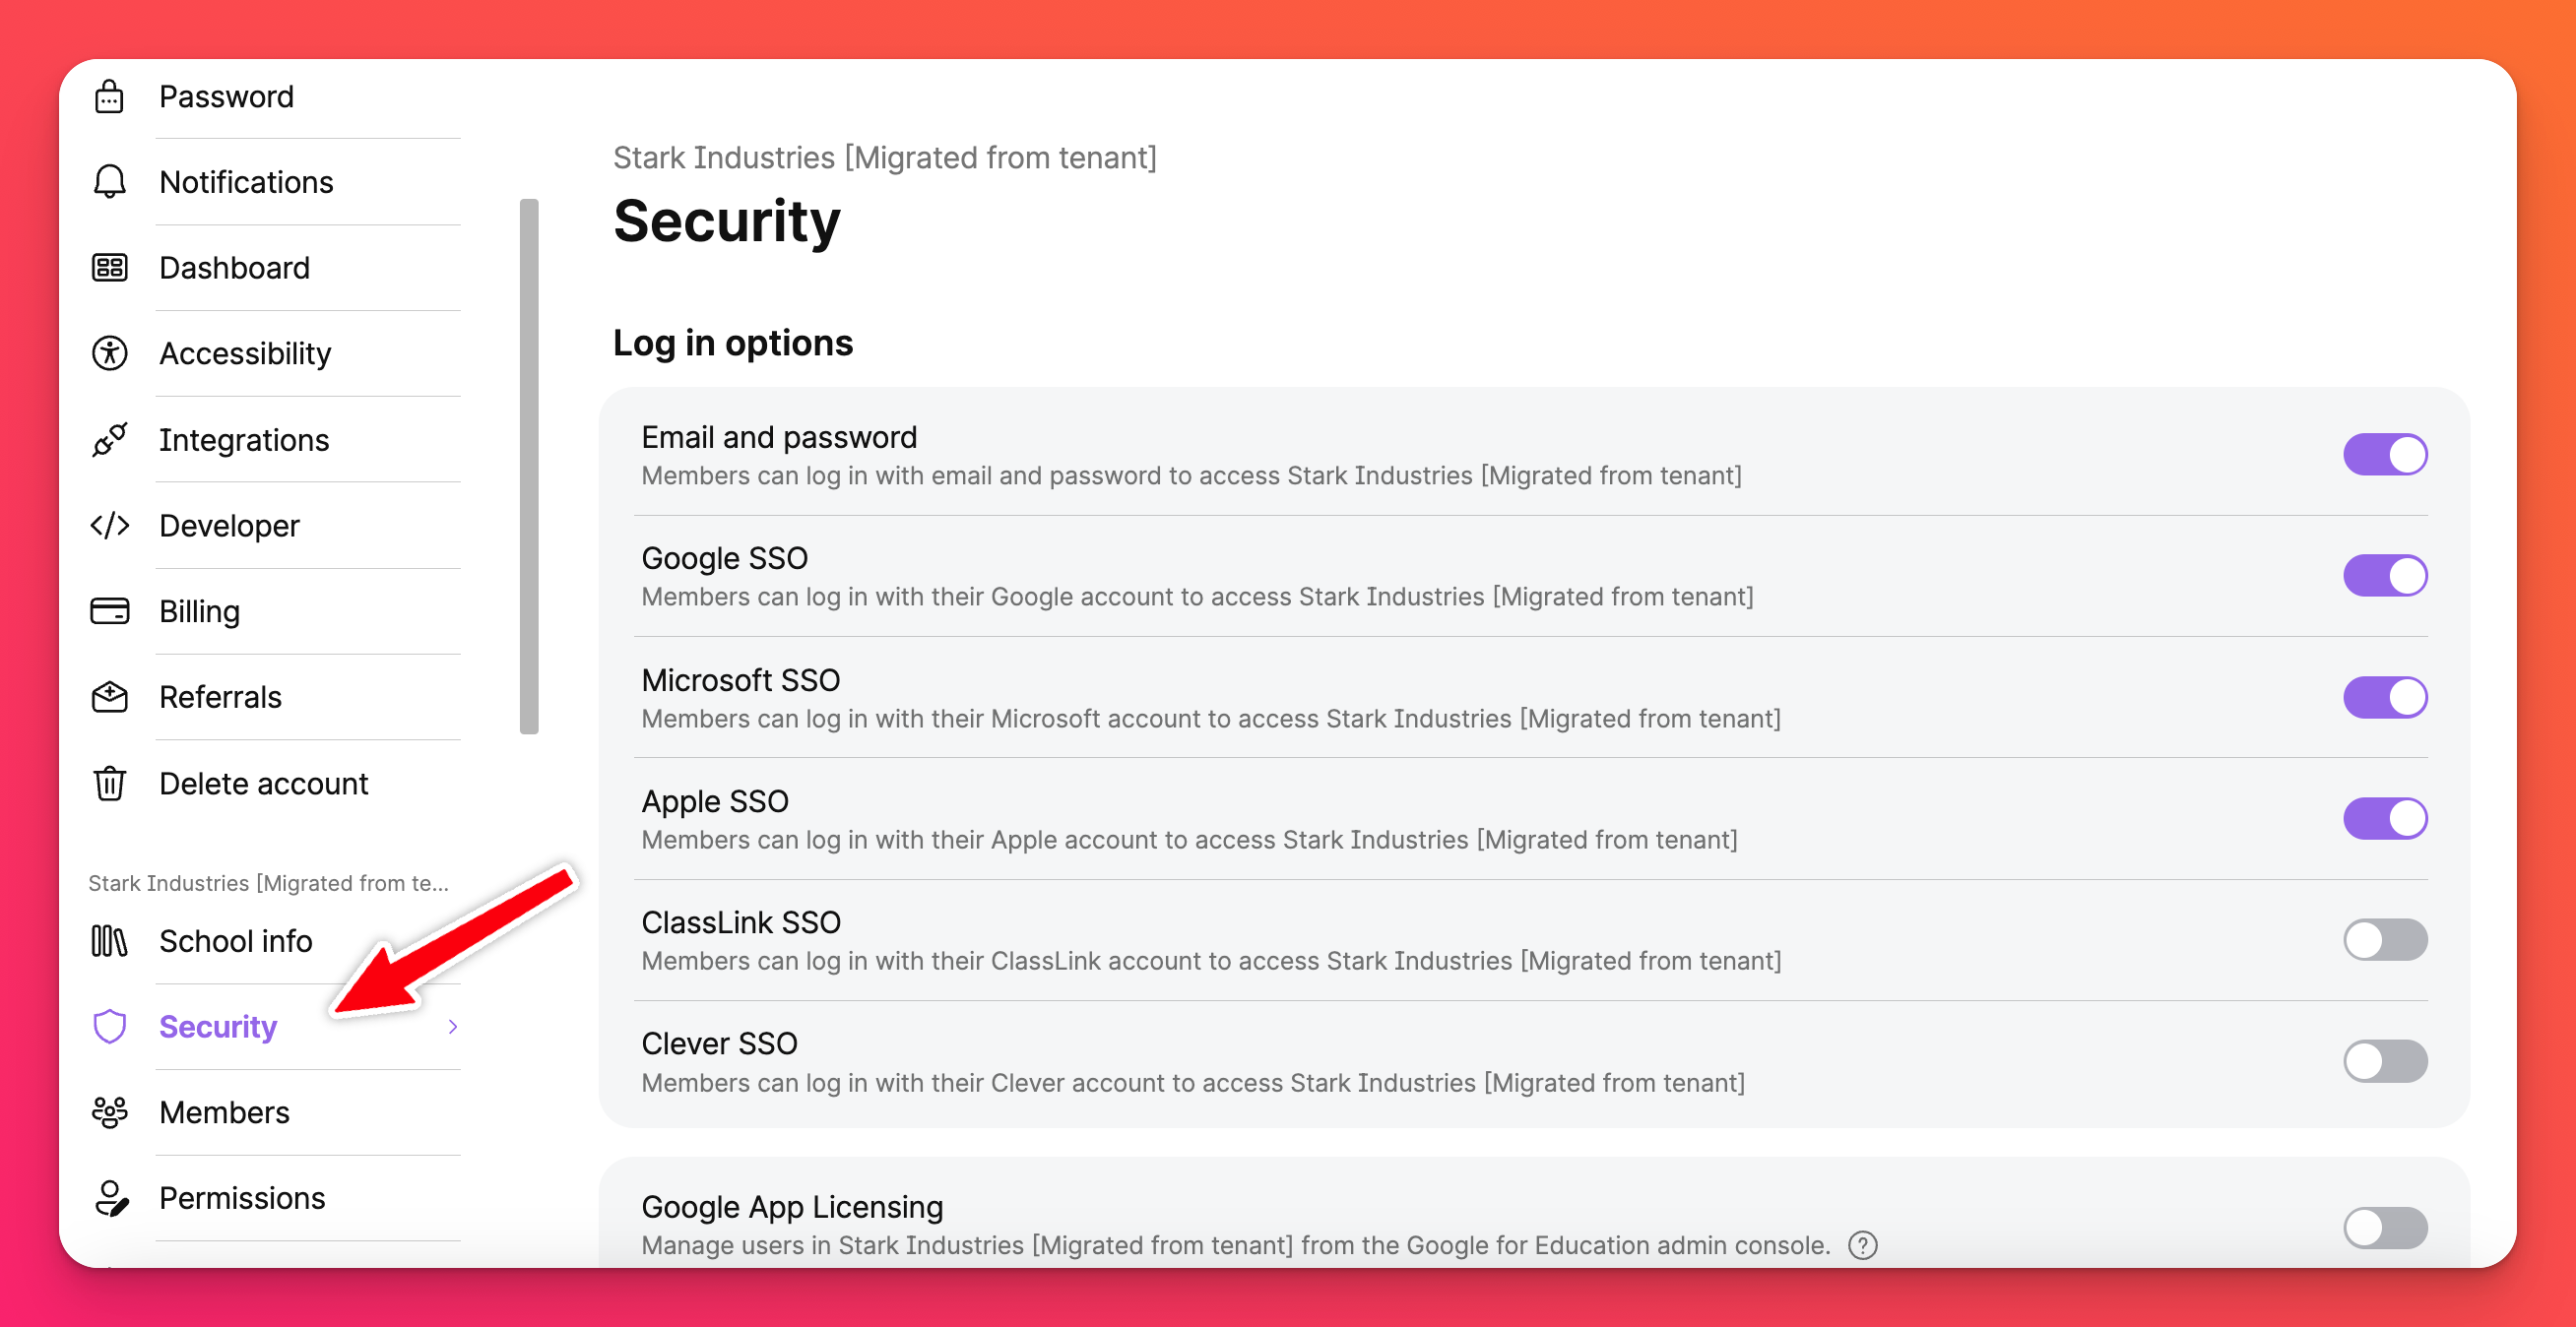
We recommend enabling third-party login (aka single sign-on or SSO). Toggle the button ON next to the SSO option you prefer - either Google, Microsoft, Apple, ClassLink or Clever. Once you choose your provider, more options will appear below.
We recommend having your account set up to add user accounts automatically. Enabling ClassLink or Clever SSO will automatically create accounts for users within the organization. Padlet for Schools Owners can also determine specific email domains to automatically create accounts for. Simply reach out to Customer Support to get your domain approved.
3. Set user permissions
Padlet for Schools accounts have 4 roles: Owner (that’s you!), Admin, Teacher and Student. The owner and all admins (yes, there can be more than one) can adjust the permissions for teachers and students in your account.
Accounts at padlet.org
If you followed step 2, click Permissions to access these settings. If you skipped step 2, open the permissions settings from your dashboard by clicking on your account name in the top-right corner of the page > Settings > Permissions. Toggle between Students and Teachers to set permissions for each role.
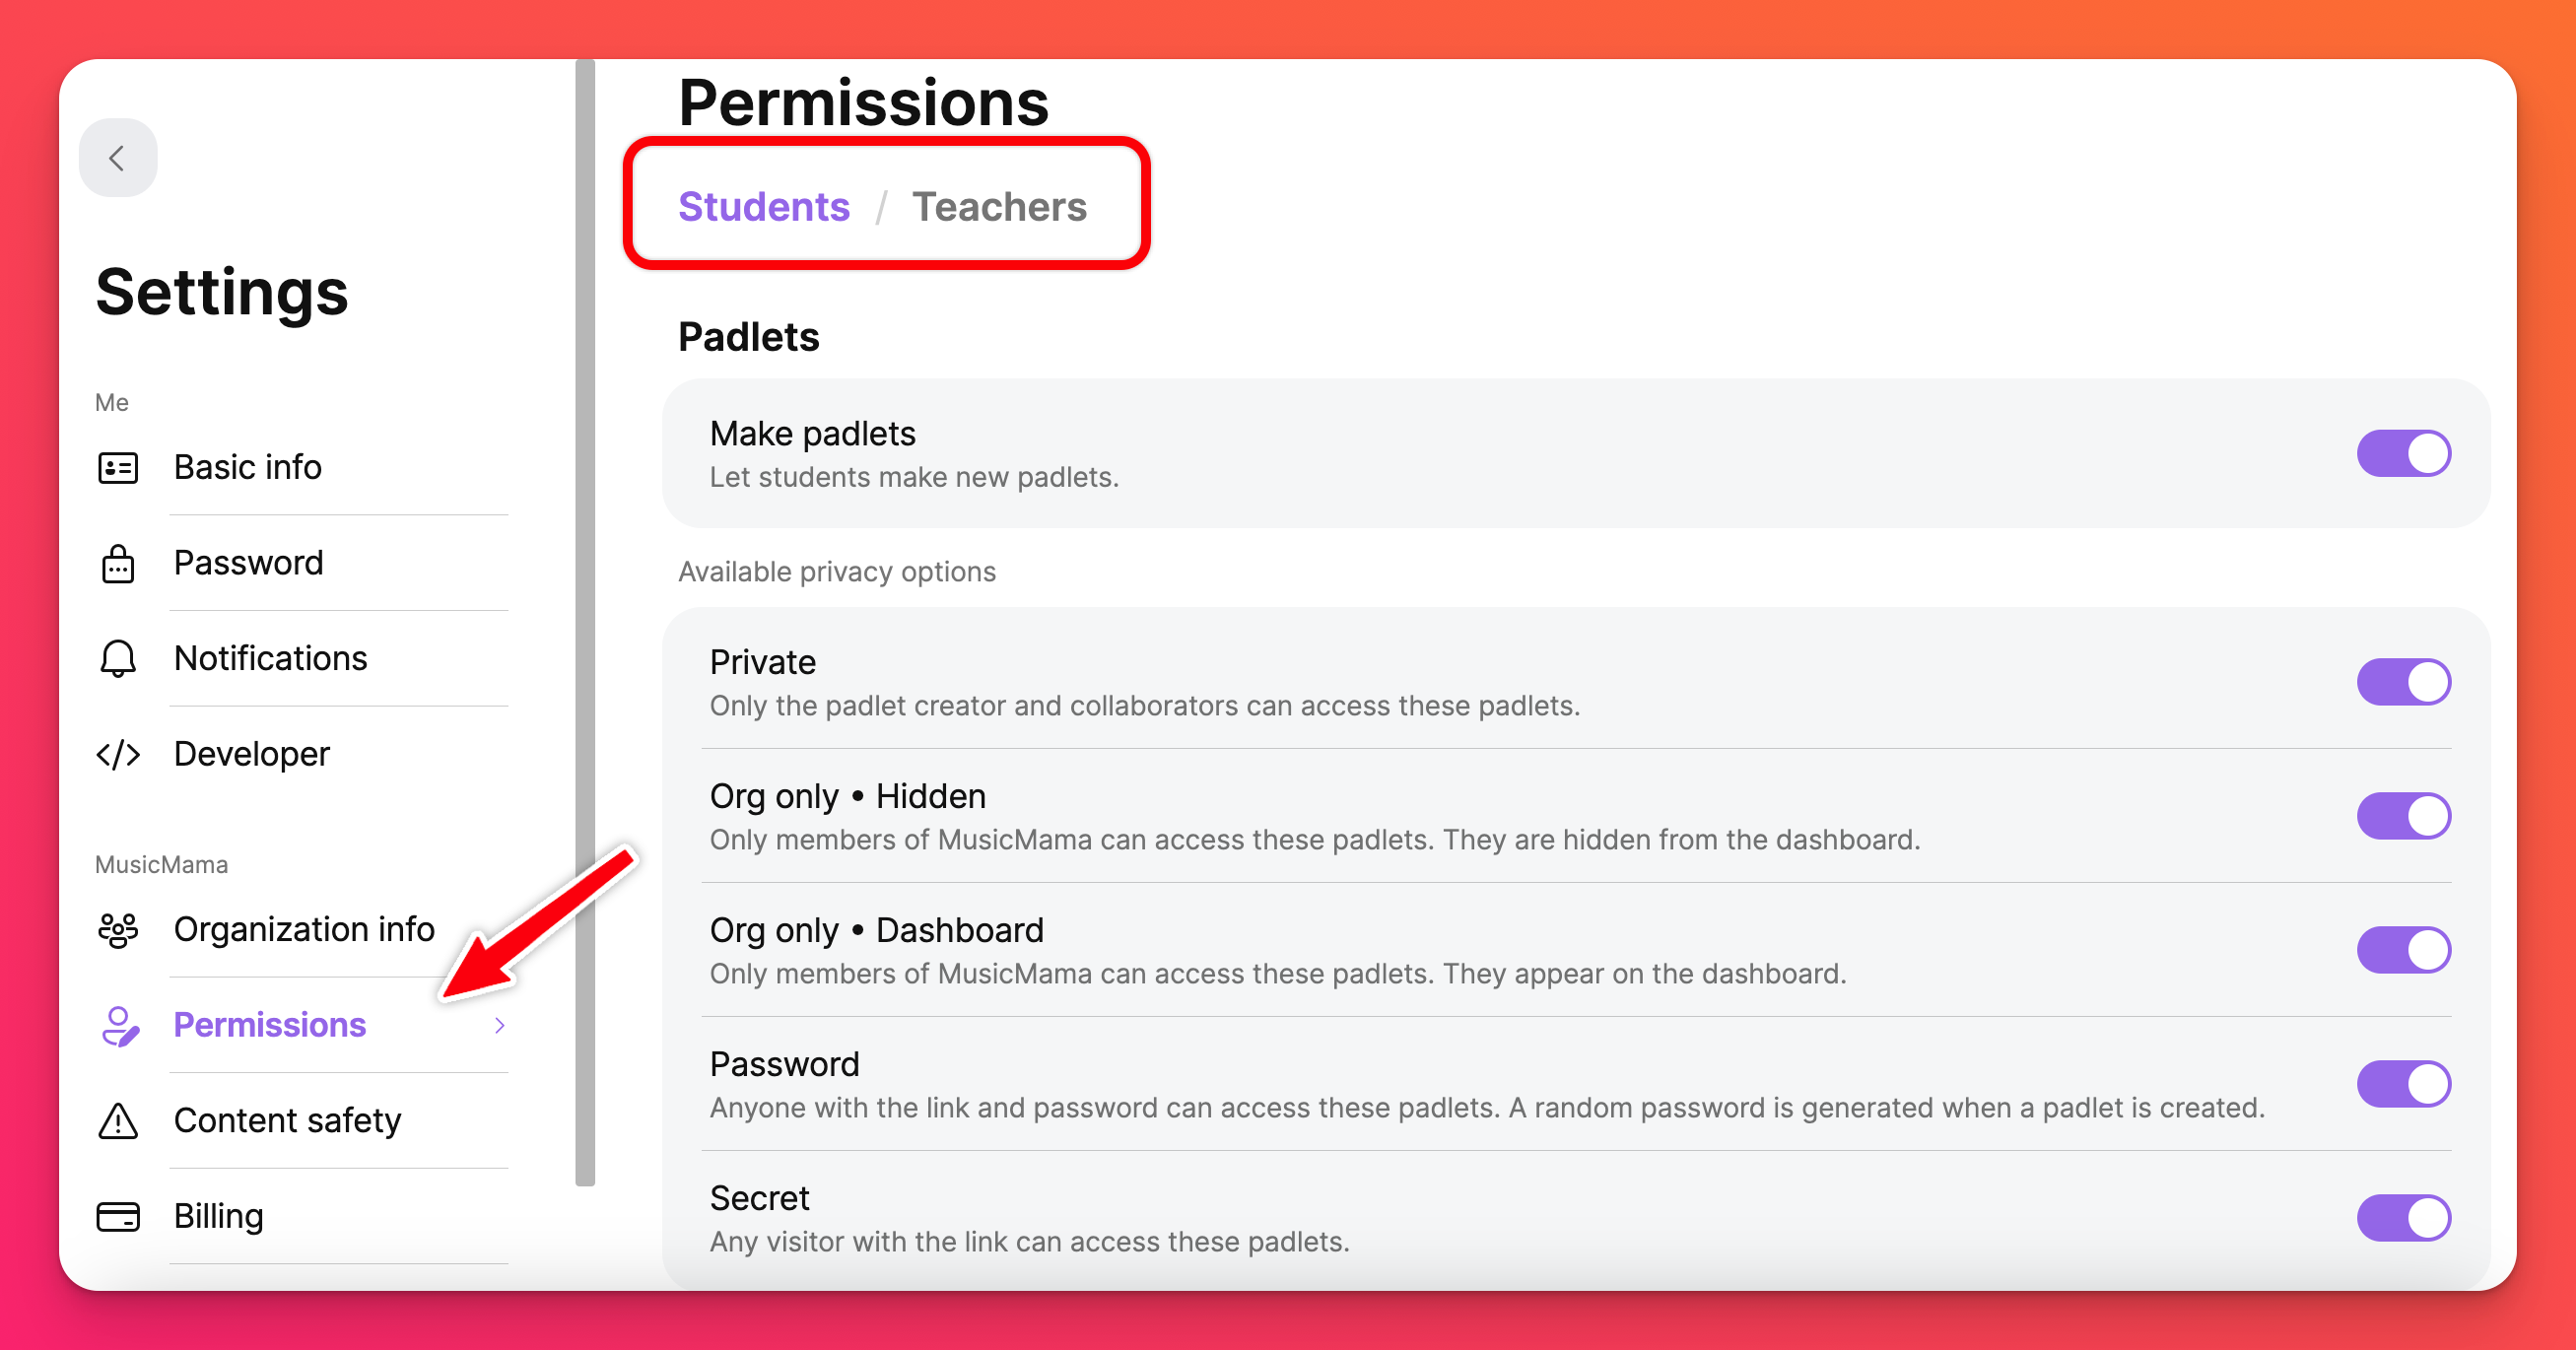
We recommend adjusting the 'Default privacy' setting for teachers to:
- Org only - Hidden if your students will be licensed (required to log in).
- Secret if your students will not be licensed (not required to log in).
We recommend changing the 'Default visitor permission' to:
- Writer if students typically post on teachers' padlets.
- Reader if students typically read but don’t post on teachers' padlets.
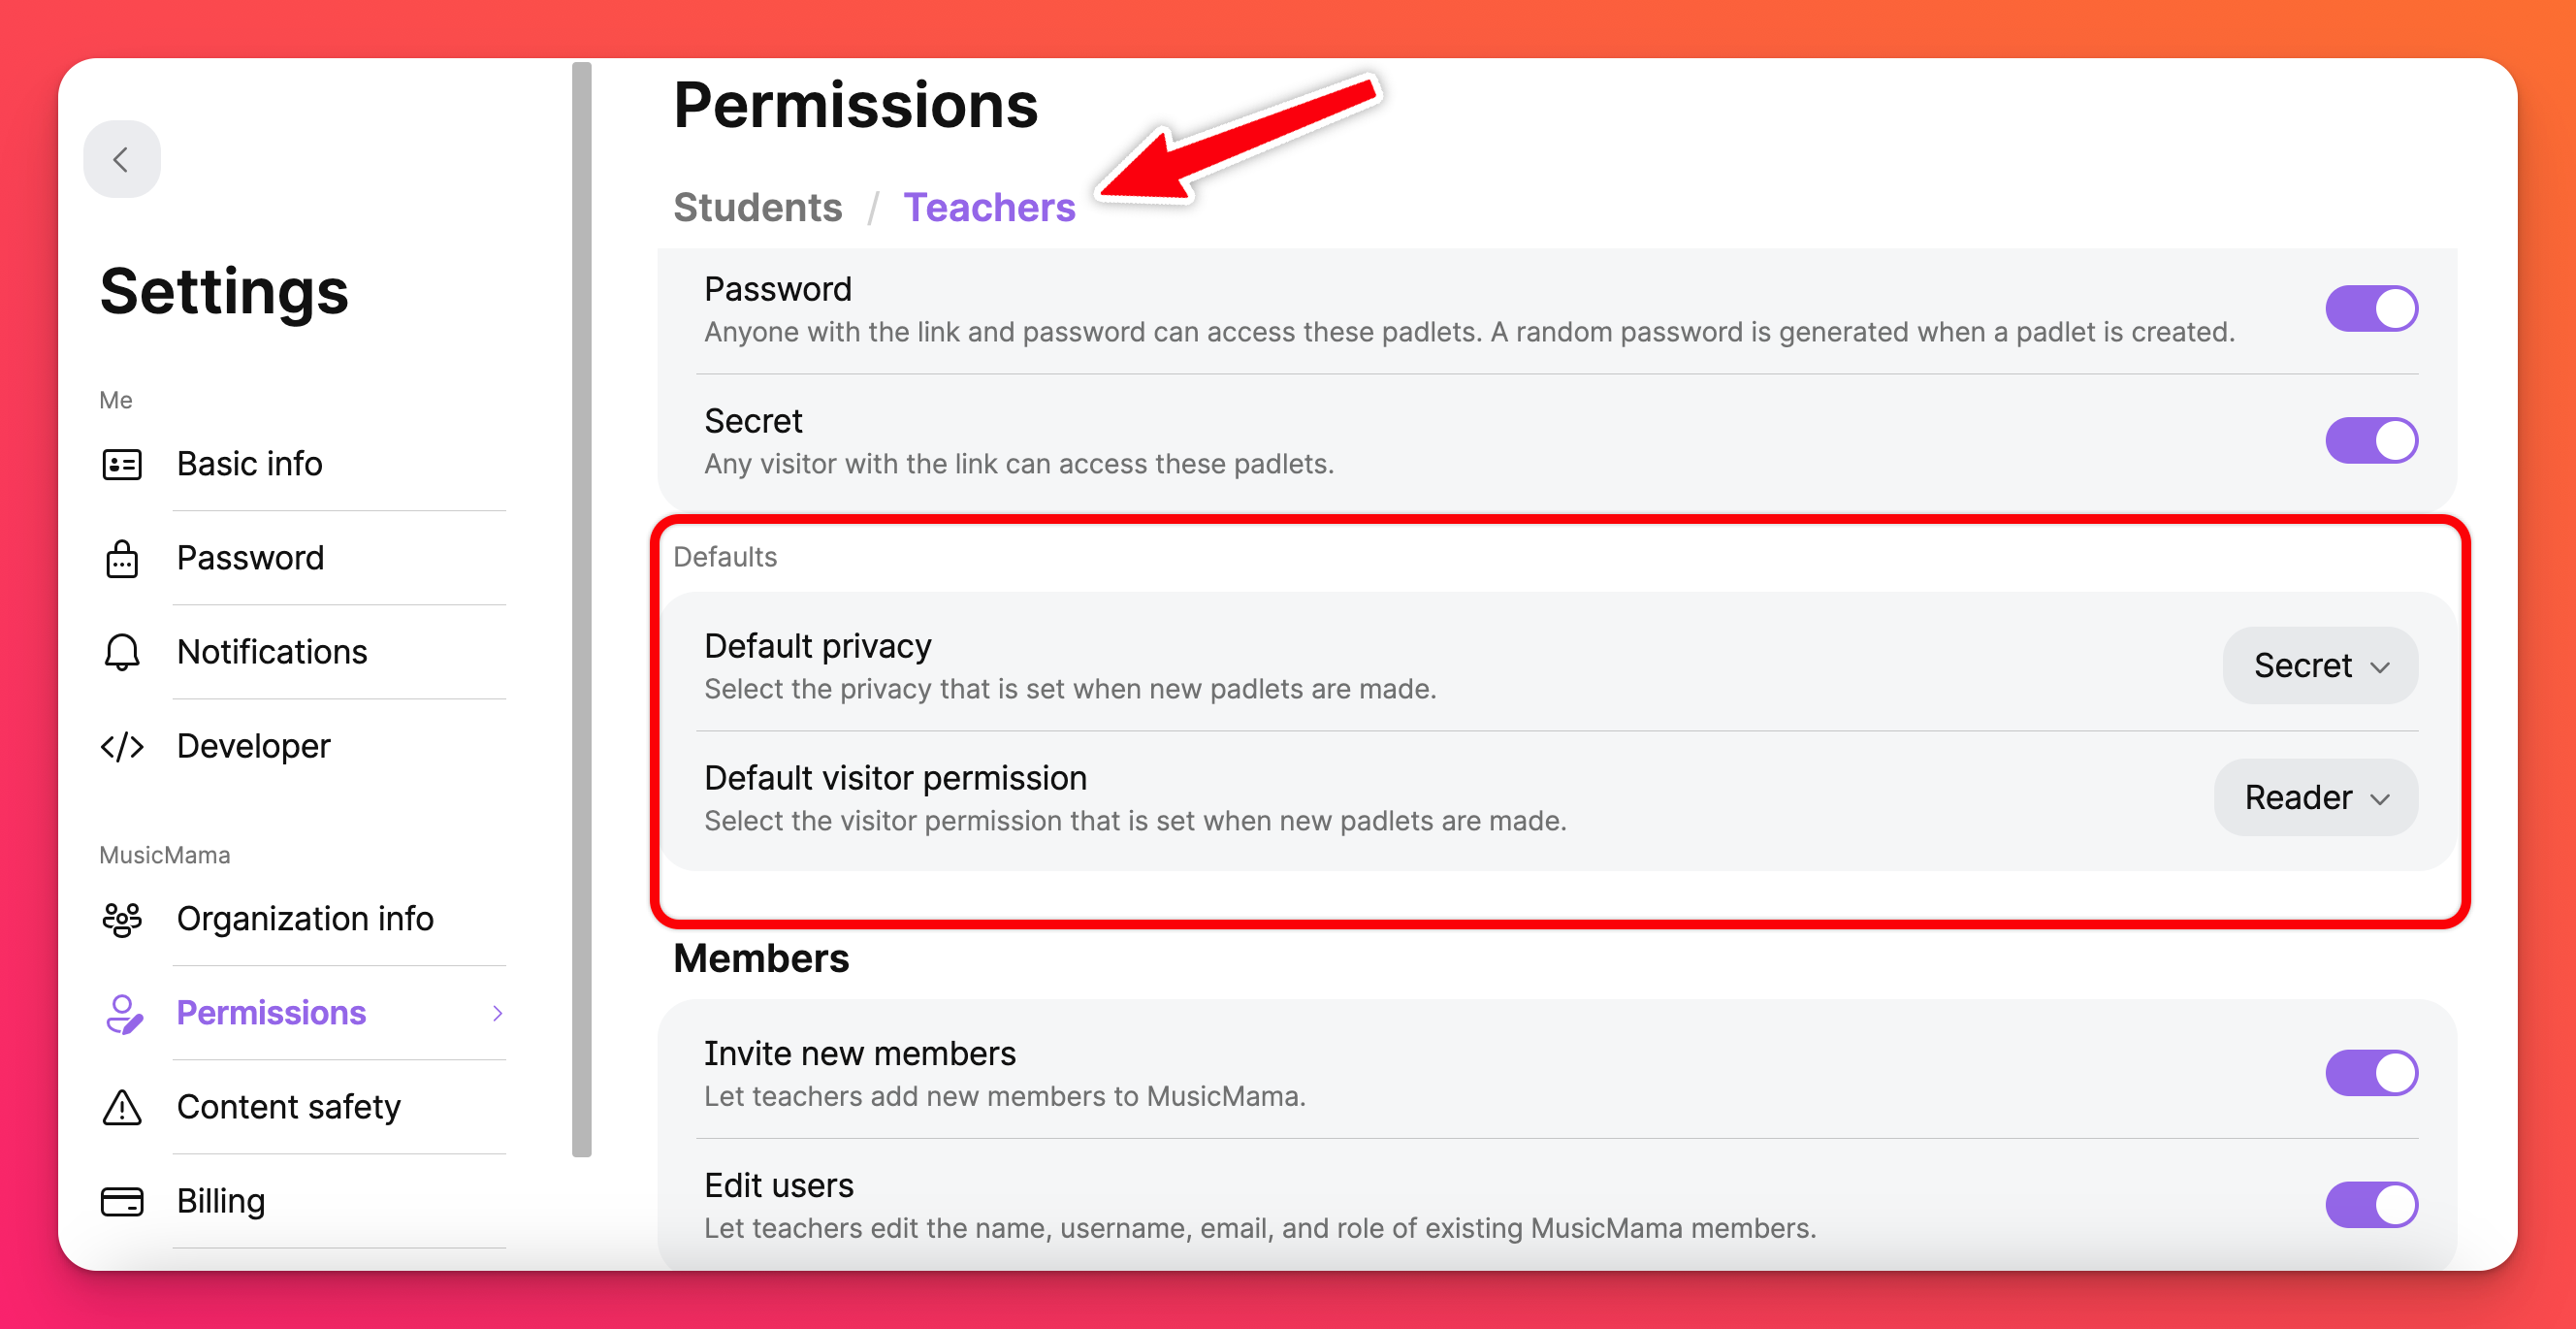
For more on recommended permissions, check out these FAQs.
Accounts at padlet.com
If you followed step 2, click Permissions to access these settings. If you skipped step 2, from the dashboard, open your organization settings by clicking on your account name in the top-right corner of the screen > Settings > on the left-hand side of the page, under your school account, click Permissions. Toggle between Students and Teachers to set permissions for each role.

We recommend adjusting the 'Default privacy' setting for teachers to:
- School wide - Hidden if your students will be licensed (required to log in).
- Secret if your students will not be licensed (not required to log in).
We recommend changing the 'Default visitor permission' to:
- Writer if students typically post on teachers' padlets.
- Reader if students typically read but don’t post on teachers' padlets.
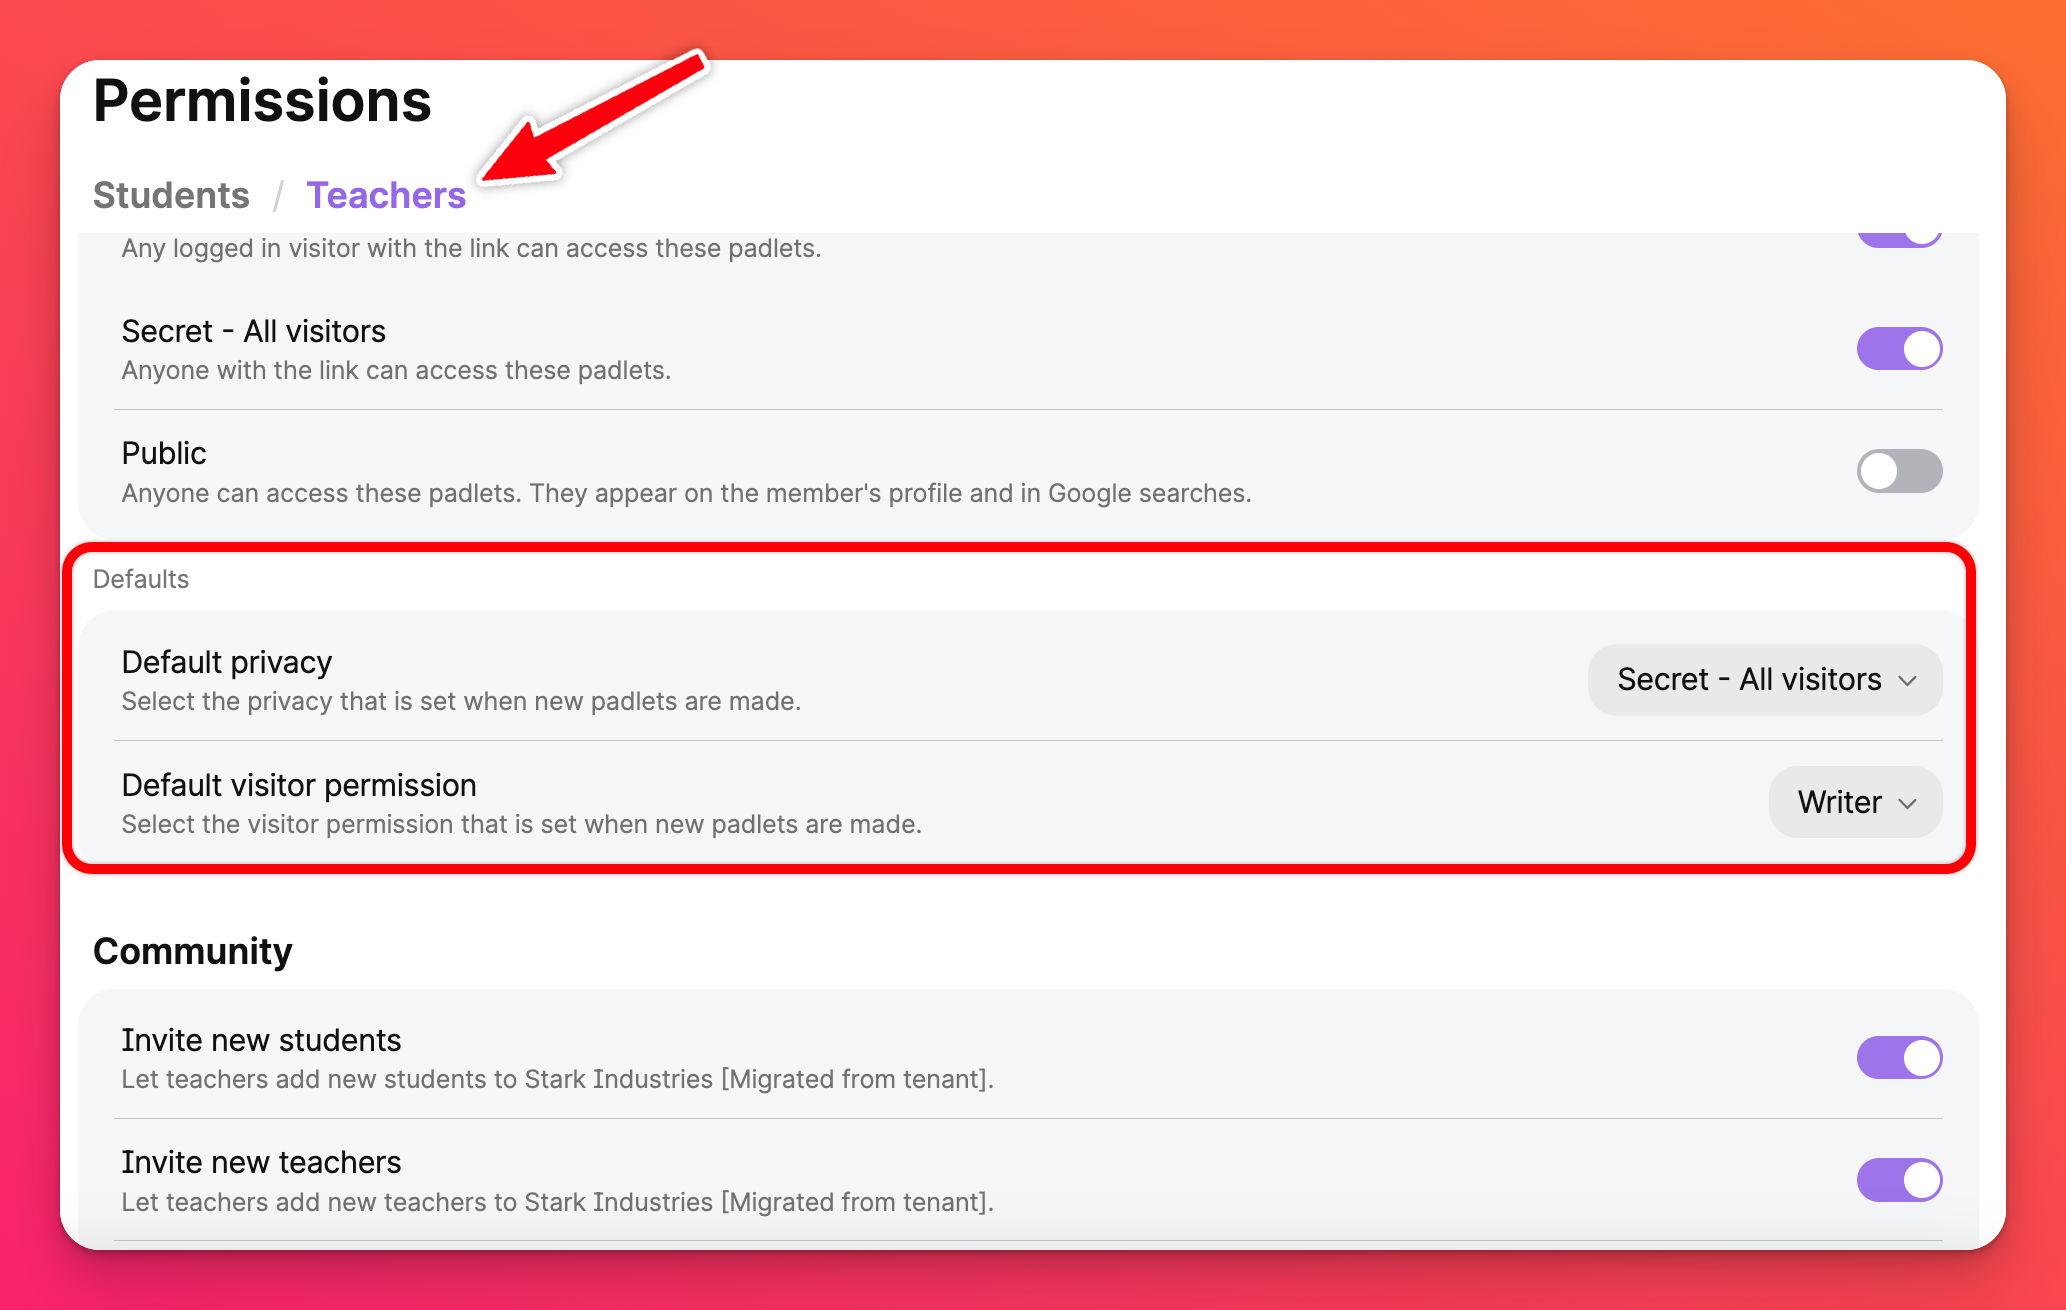
For more on recommended permissions, check out these FAQs.
4. Customize your Content safety settings
Another very important feature for Padlet for Schools admins is having the ability to customize which categories of content are moderated by Safety Net. Safety Net is the program we use to filter between safe and unsafe context on a padlet.
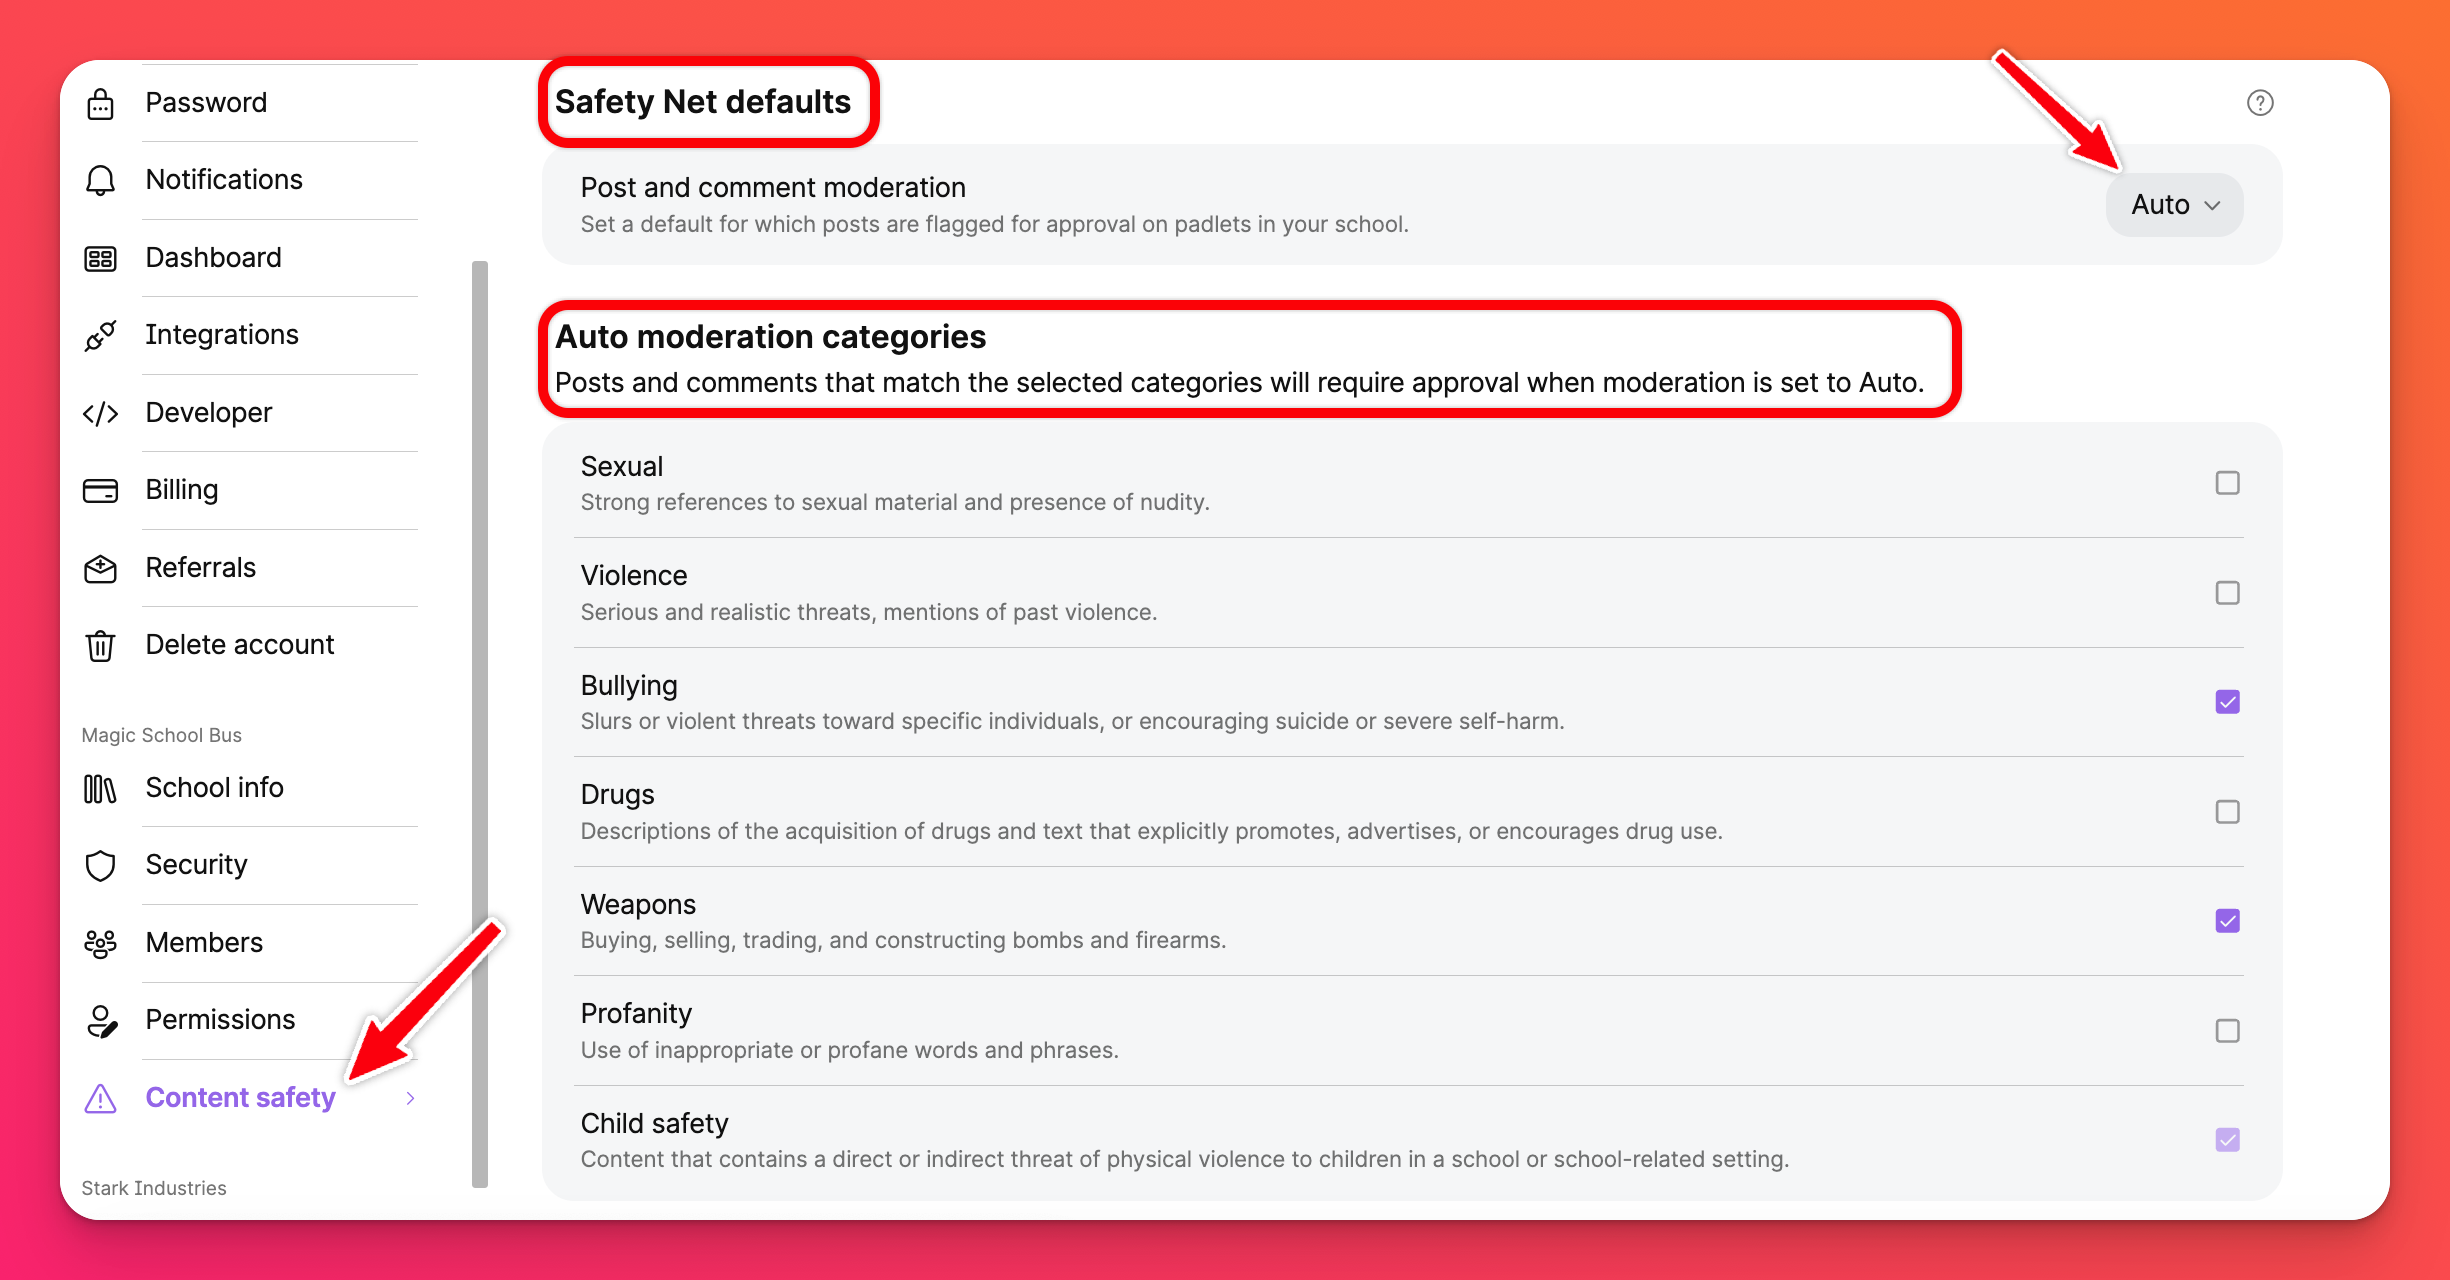
Read how to customize your Content safety settings here!
5. Add users
Accounts at padlet.org
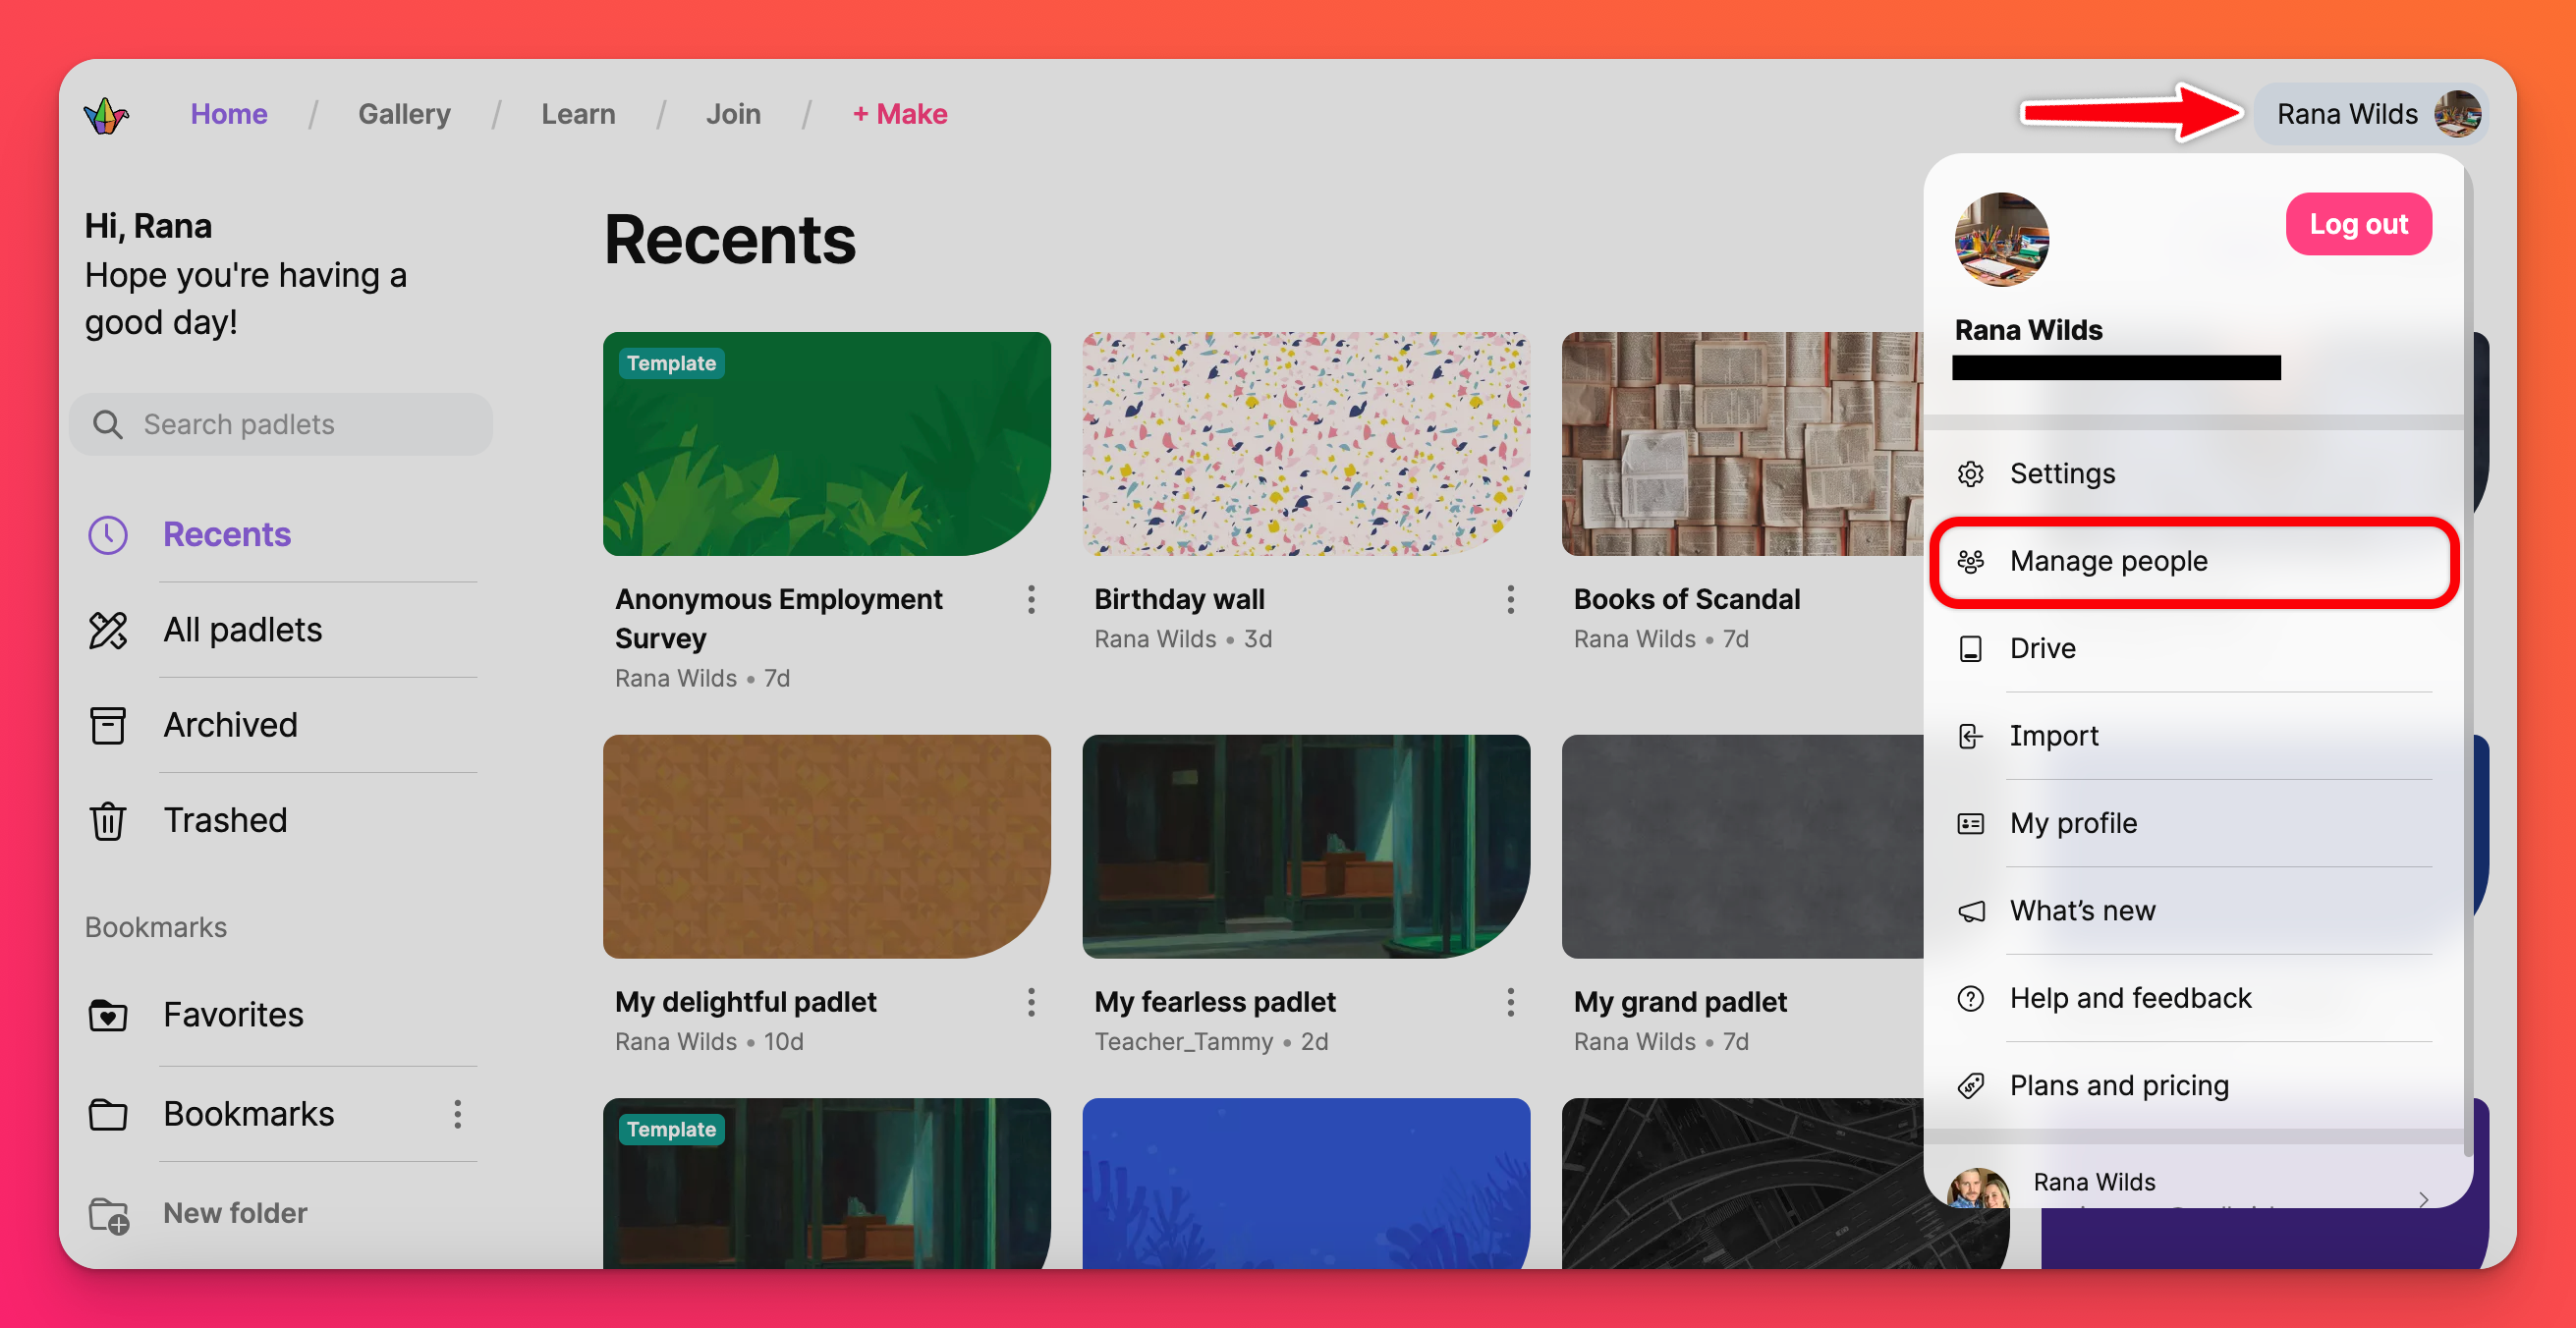
The final step is to add your users. From the dashboard, access the user management page by clicking your account name in the top-right corner of your dashboard > Manage people.
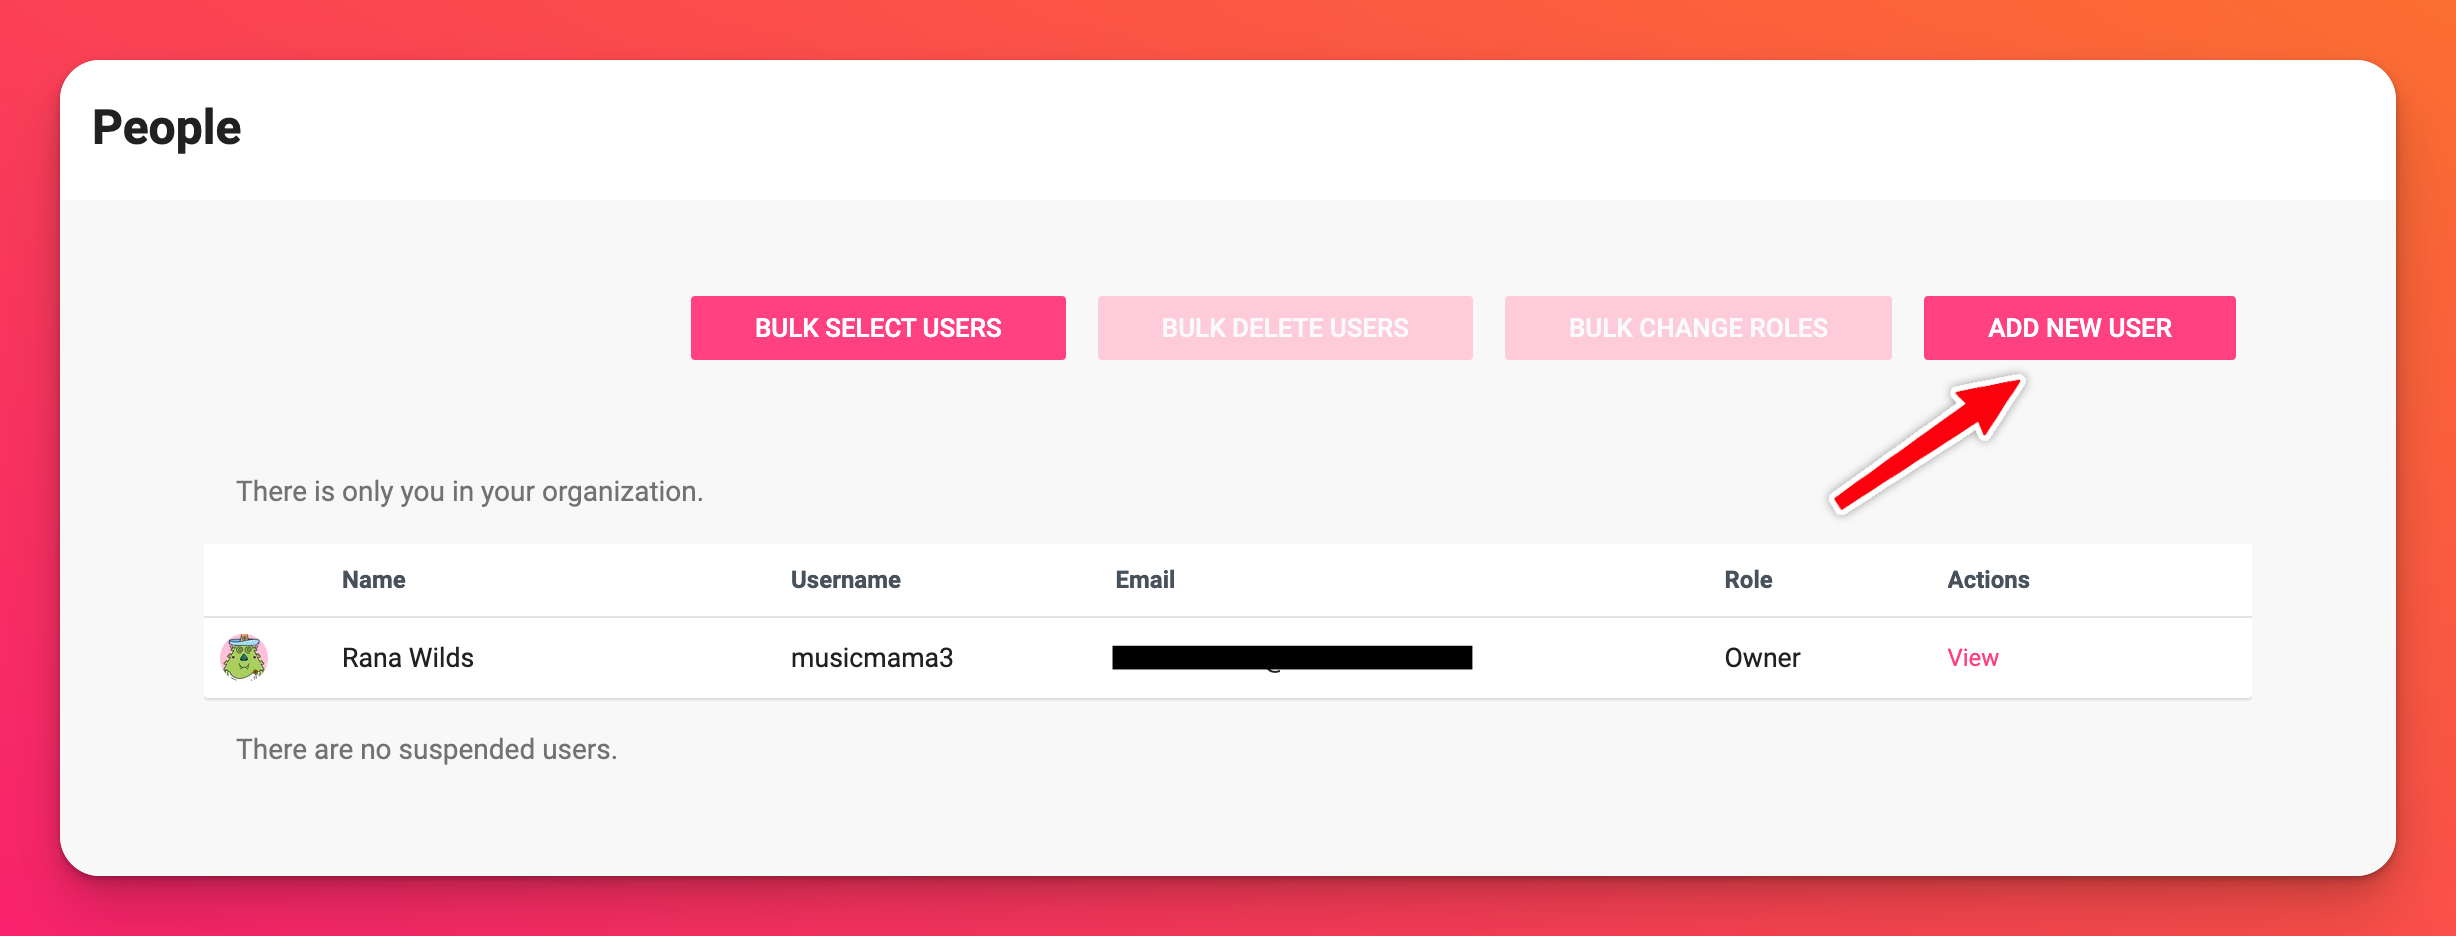
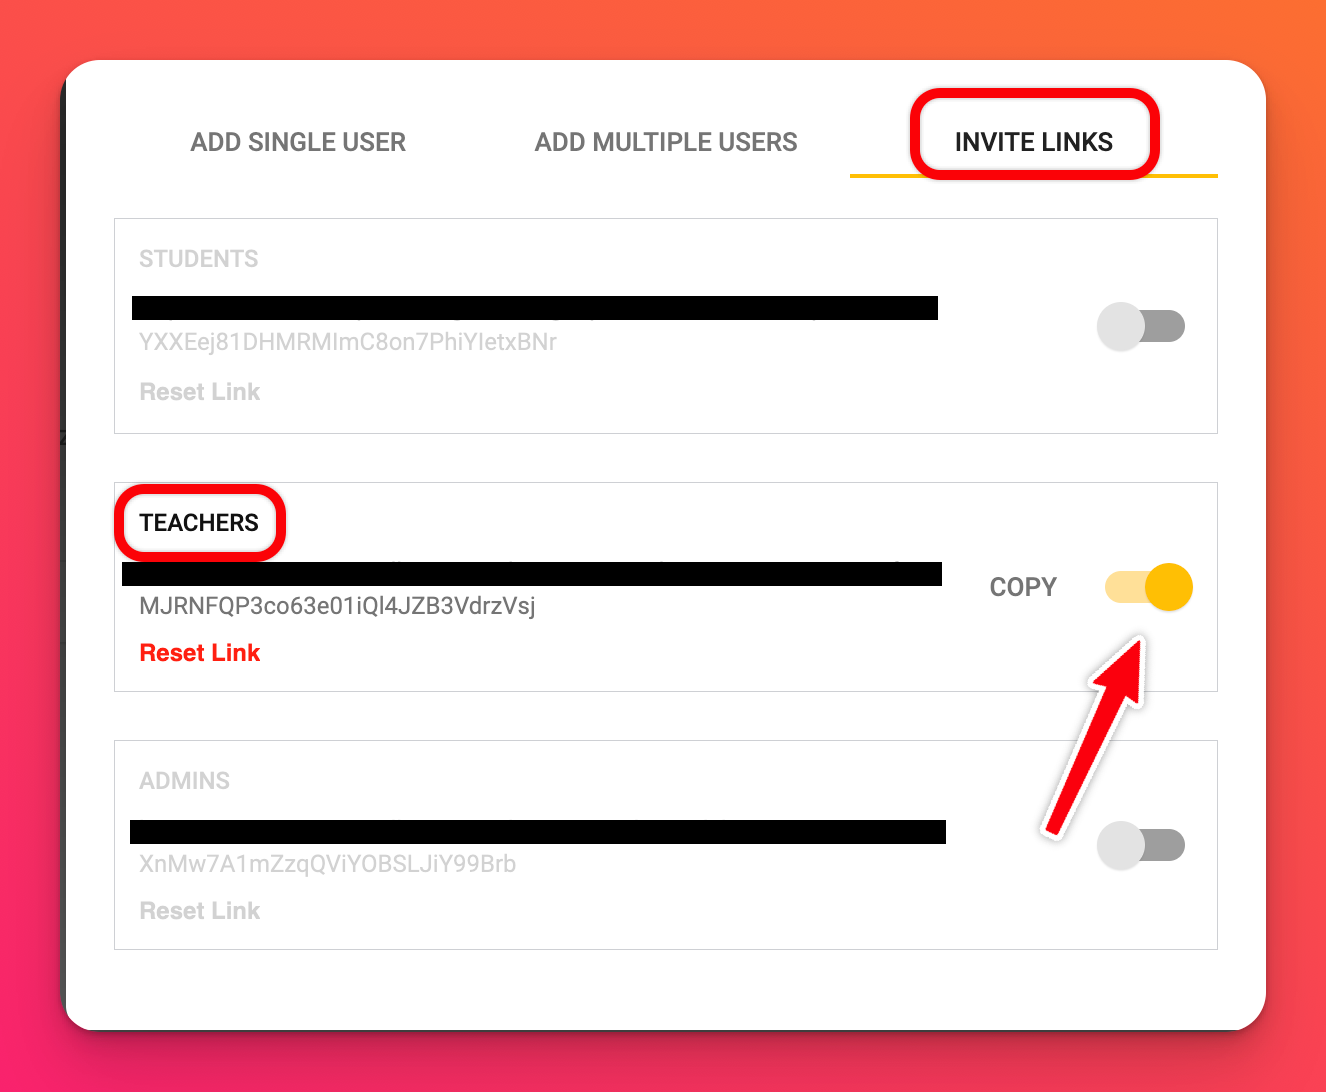
We recommend using invite links to add teachers. To access invite links, click Add new user > Invite links and toggle the teacher link to the ON position. Copy the link and distribute it to the teachers who will be using Padlet for Schools. When a user clicks this link, they will be assigned a teacher license.
 |
 |
We recommend using automatic account creation through SSO to add students (see step 2 above).
For more methods to add users, check out this article.
Accounts at padlet.com
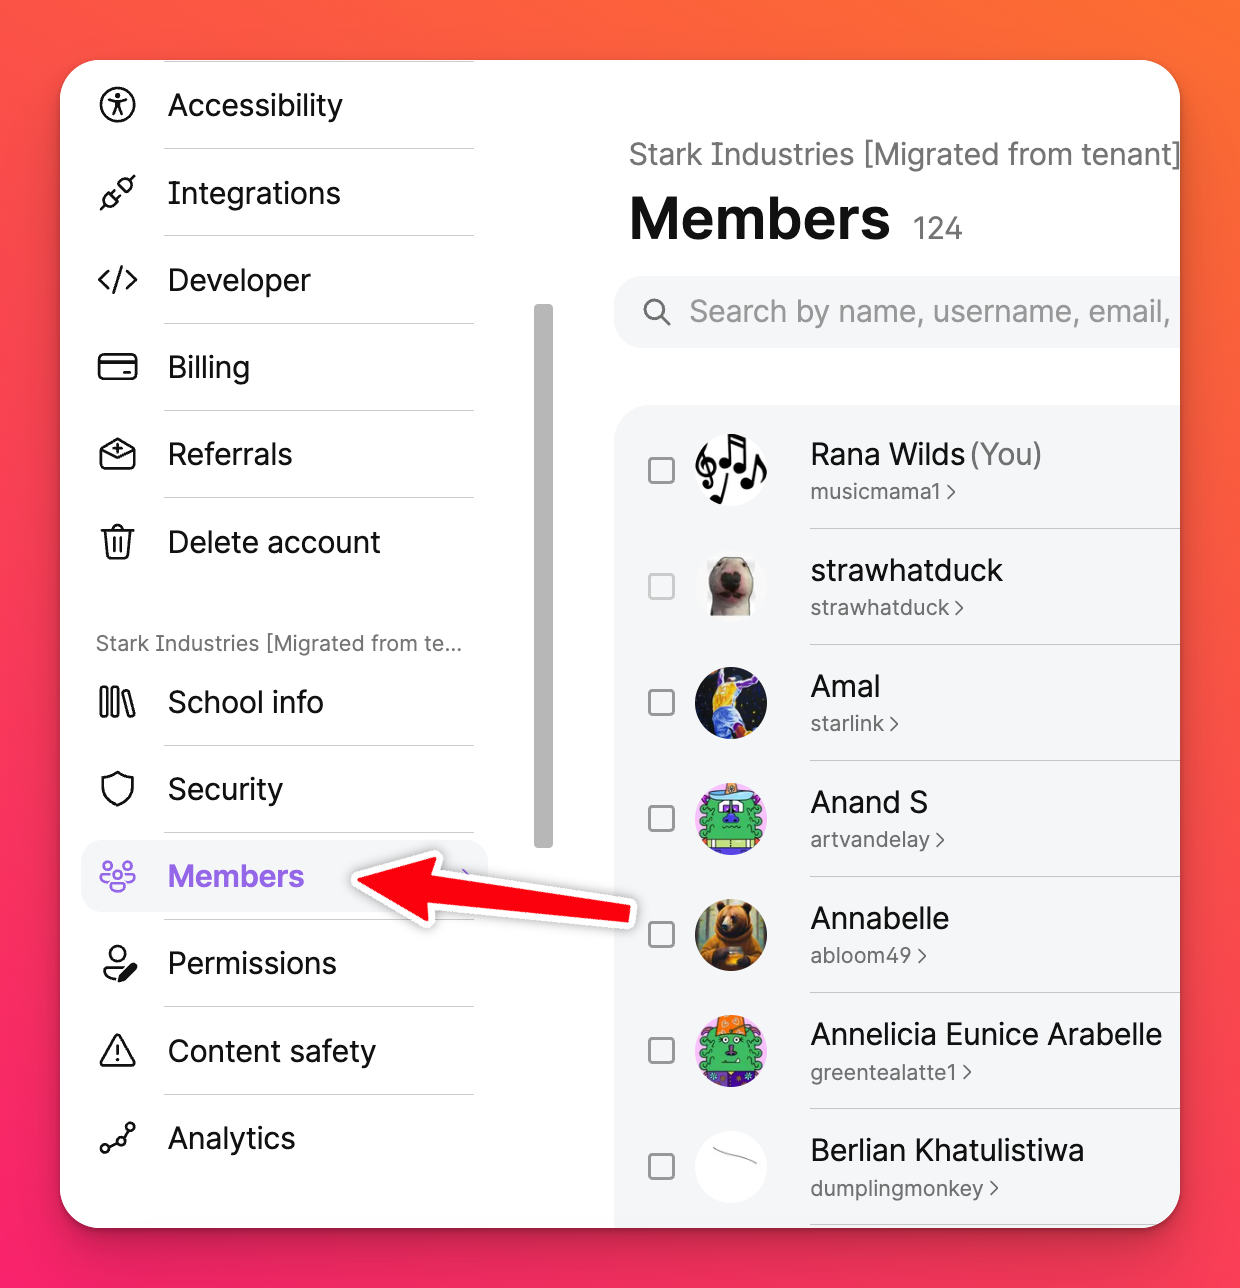
The final step is to add your users. From the dashboard, access the user management page by clicking your account name in the top-right corner of your dashboard > Settings > on the left-hand side of the page under your school account, click Members.
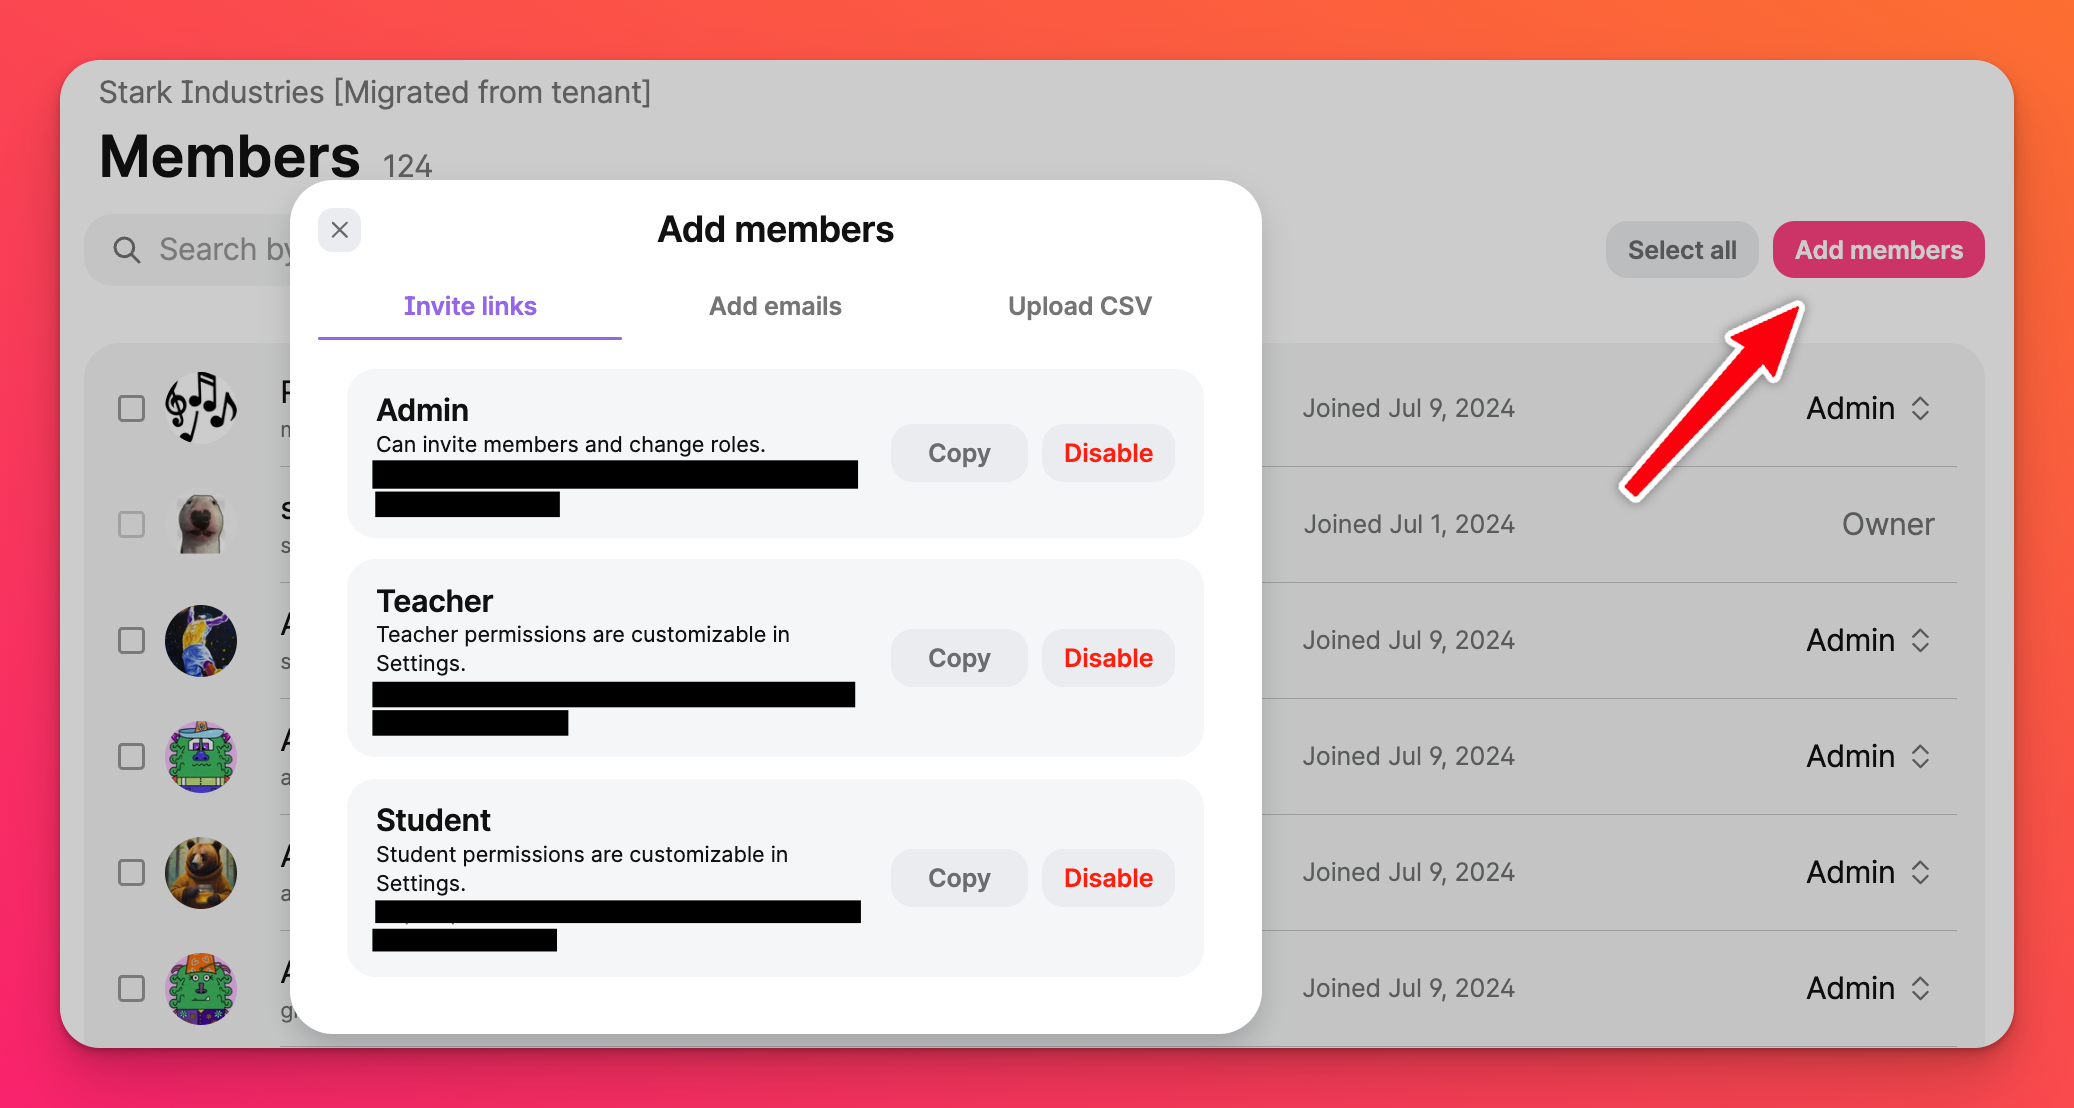
We recommend using invite links to add teachers. To access invite links, click Add members > Invite links. Copy the link next to the role you're inviting to and distribute it to the users who will be using Padlet for Schools. When a user clicks this link, they will be assigned the corresponding role for that license.
Example: Click the Copy button next to 'Teacher' and share with all of your Teachers who will be a part of your Padlet for Schools account. When they click on the link, they will automatically be assigned a Teacher role within the account.
We recommend using automatic account creation through SSO to add students (see step 2 above).
For more methods to add users, check out this article.
You’re done!
Once your users are added, your work is done! Licensed users can import their existing padlets and start creating padlets in your new school account immediately.
Please contact us if you have any questions about setting up your Padlet for Schools account.

