Add Padlet to Schoology LMS using LTI 1.0
Adding Padlet to Schoology LMS using LTI 1.0
There are two different types of integrations for LMS available in Padlet, namely LTI 1.0 and LTI 1.3. For the LTI 1.0 tool, each padlet has to be added individually as an external tool in each individual assignment using ALL the steps below.
What you need
- Access to the school's Teacher account on Schoology
- Access to the Teacher account on Padlet for Schools
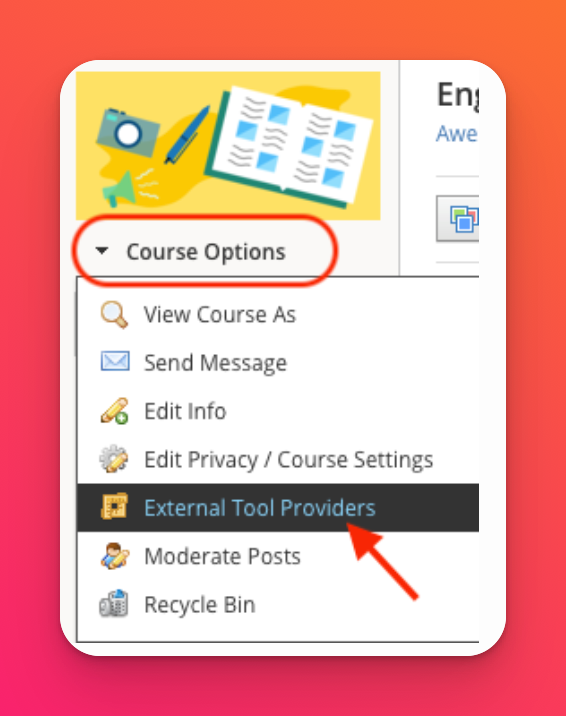
- Click Courses and select your course and head to Course Options.
- Select External Tool Providers.
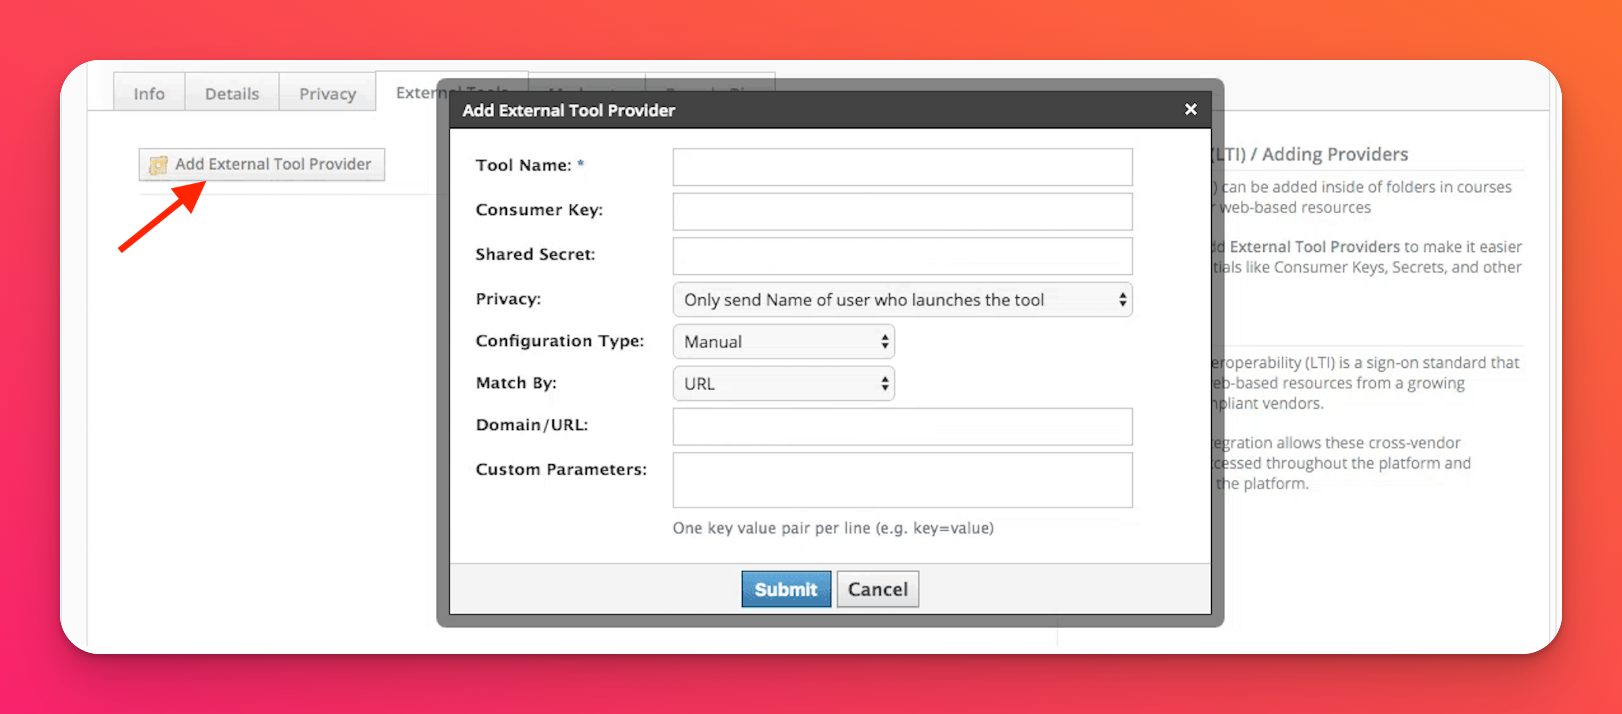
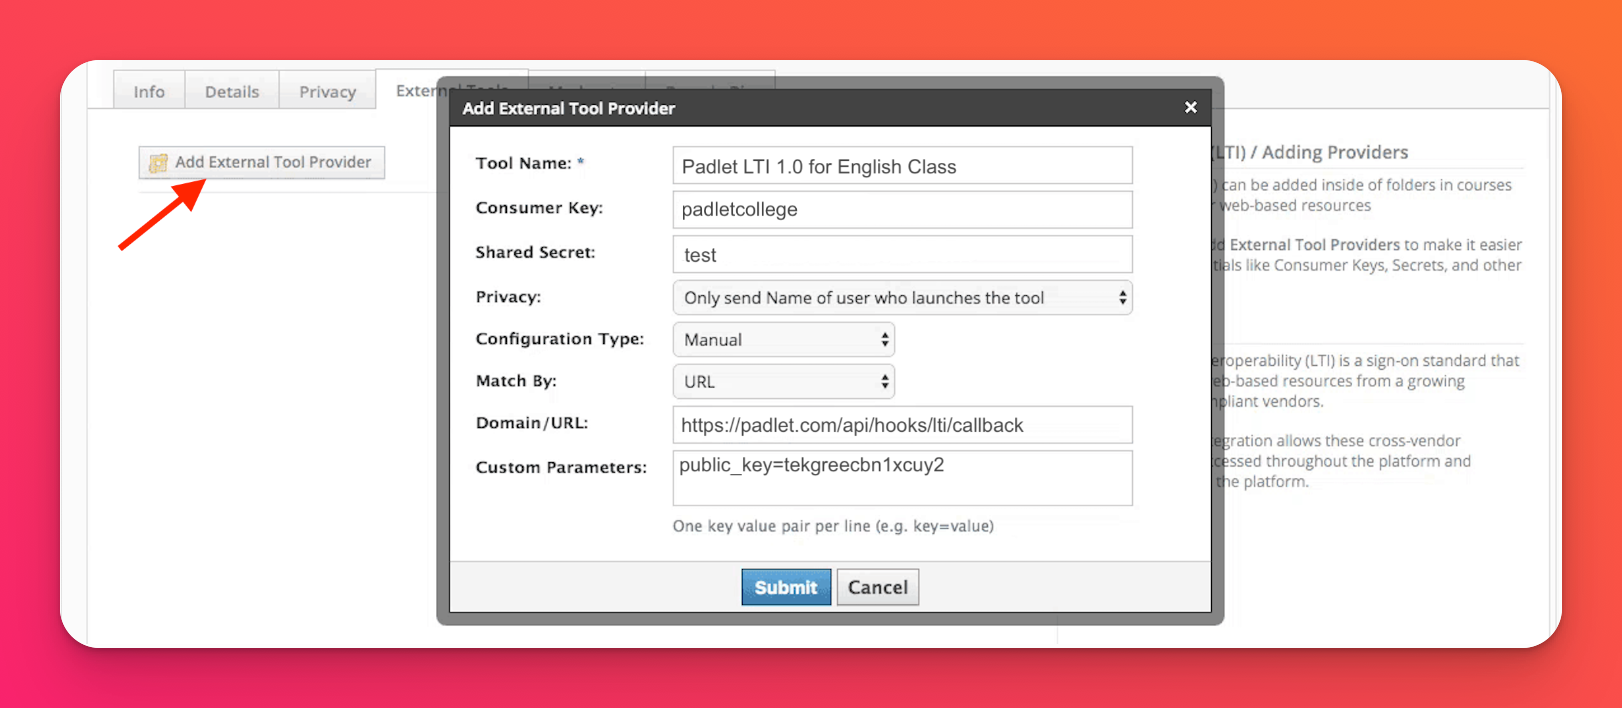
- Click Add External Tool Provider.
A form that looks something like the below, should pop up. Keep 'Configuration Type' as Manual and 'Match By' URL.
We'll head back to Padlet and copy some details into this form.
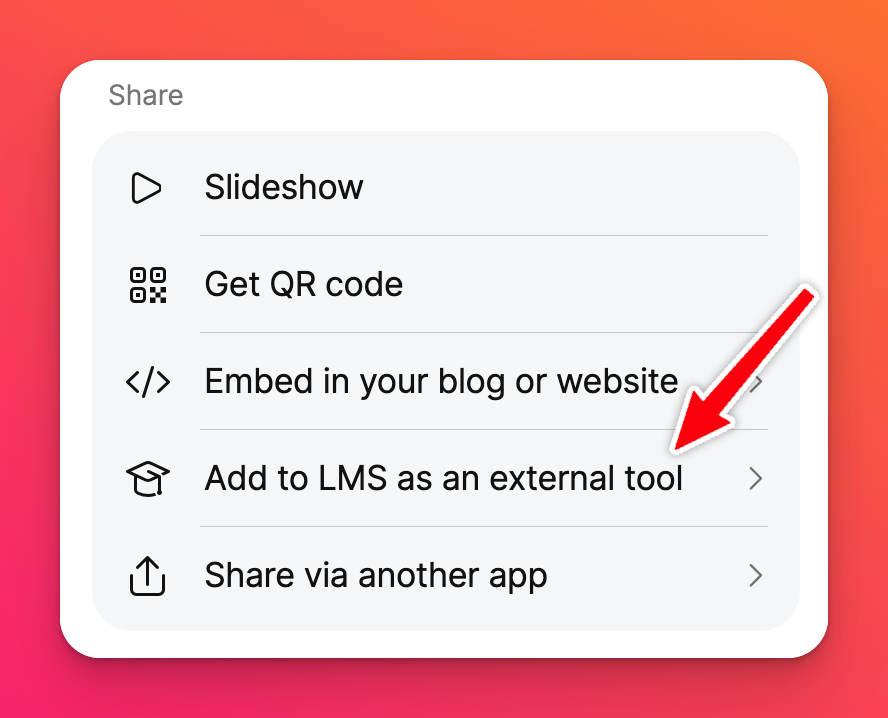
- Add to LMS as an external tool
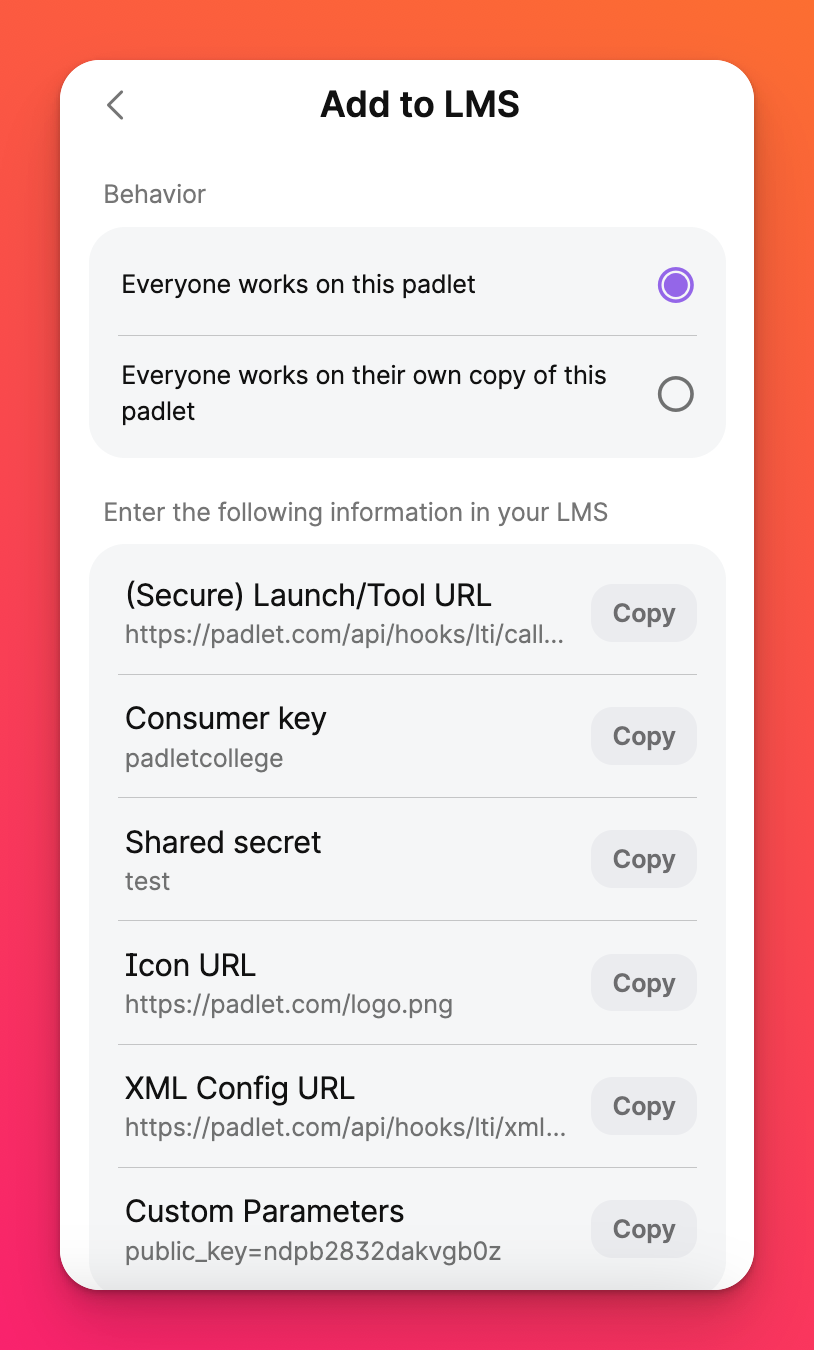
Open the specific padlet you want to add on Schoology and click on the Share arrow in the top-right corner. You should see the option to Add to LMS as an external tool. Go ahead and click on that. You'll be presented with some information that you'll need to copy and paste into Schoology.
 |  |
- Fill in the form on Schoology
Field | Entry |
Tool Name | Padlet 1.0 (use a name that will help you easily identify it later) |
Consumer Key | Listed on Padlet as Consumer key |
Shared Secret | Listed on Padlet as Shared secret |
Privacy | Send Name and Email/Username of user who launches the tool |
Domain/URL | https://padlet.com/api/hooks/lti/callback |
Custom Parameters | Listed on Padlet as Custom parameters |
- Once done, click on Submit.
Here is a sample screenshot with the fields filled out.
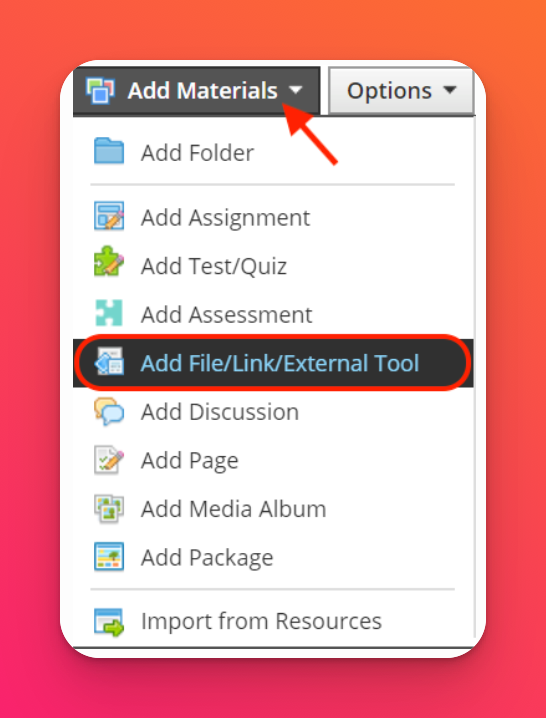
- Return to your Materials page. Then, click on Add Materials and Add File/Link/External Tool.
- Select External Tool and pick Padlet from the list based on what you named it in Step 5.
The Padlet link should show up like this on Schoology! If you want to add more padlets to different assignments, just run through the steps again.


