How do I create a team and add members?
Creating a team
Padlet is all about bringing people together for fun and easy collaboration. There's no better way to do that than by creating a Team.
By default, you become the account Owner when you create a Team. After adding Team members, you can designate another member as the Administrator to help with account management.
Do note: All Admins, Makers and the Owner of the Team are PAID roles. The Owner of the Team will be charged for these users. Contributors are free of charge.
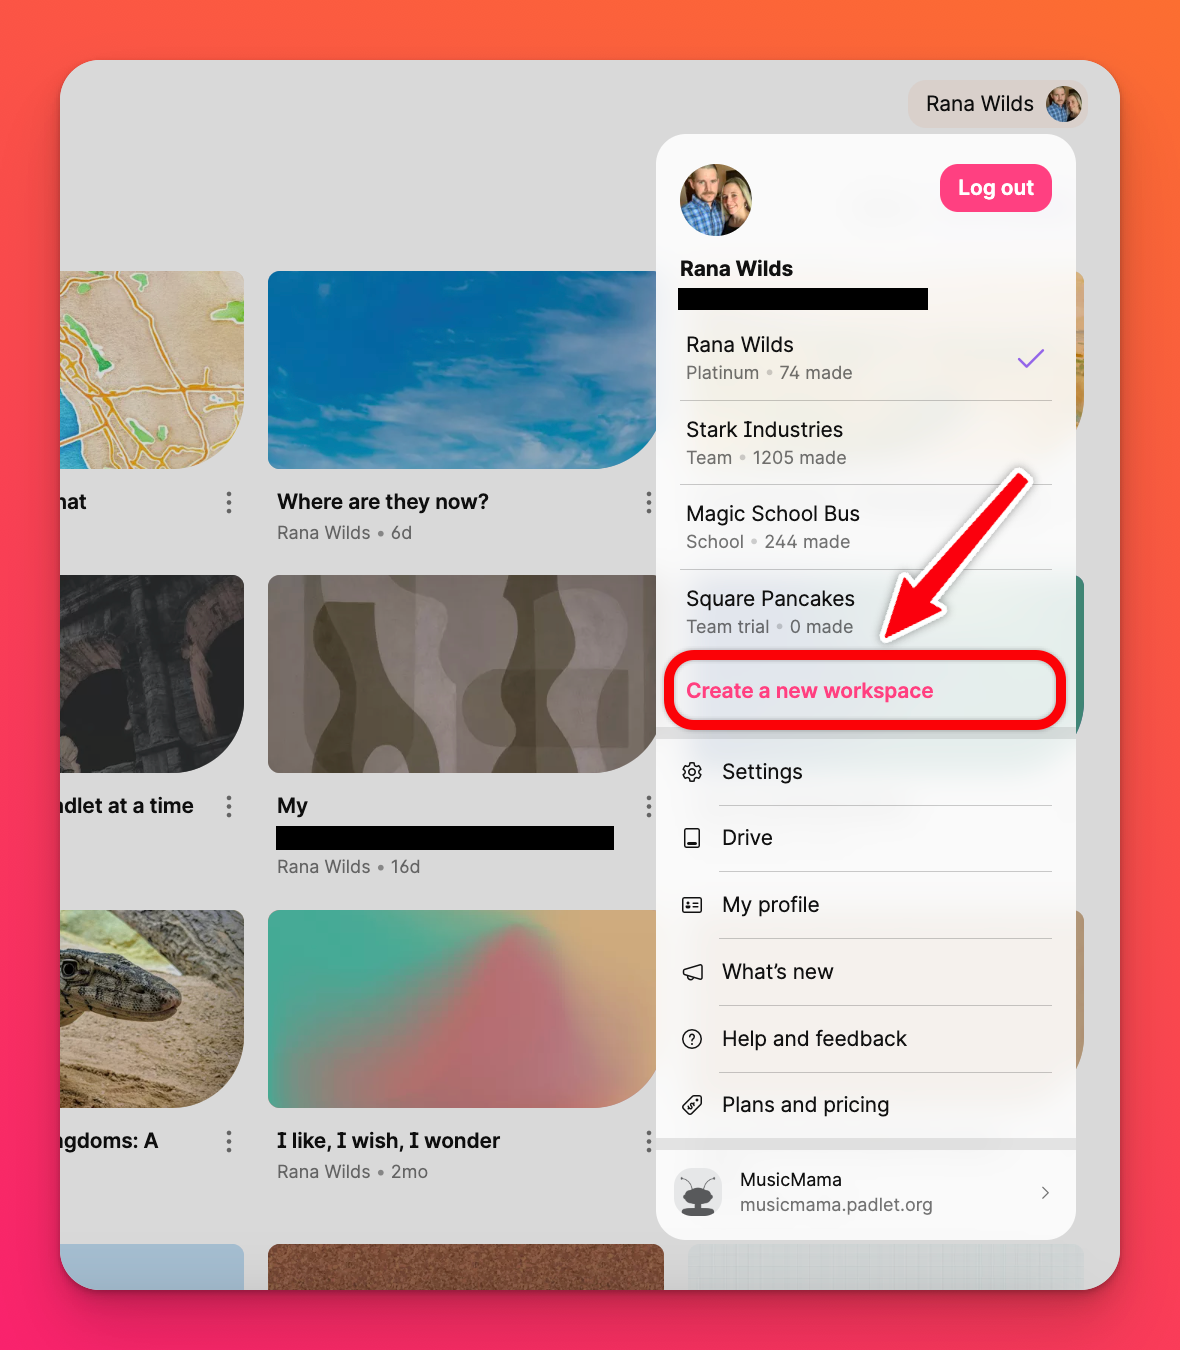
- At the top of your dashboard, click on your account name and select Create a new workspace.

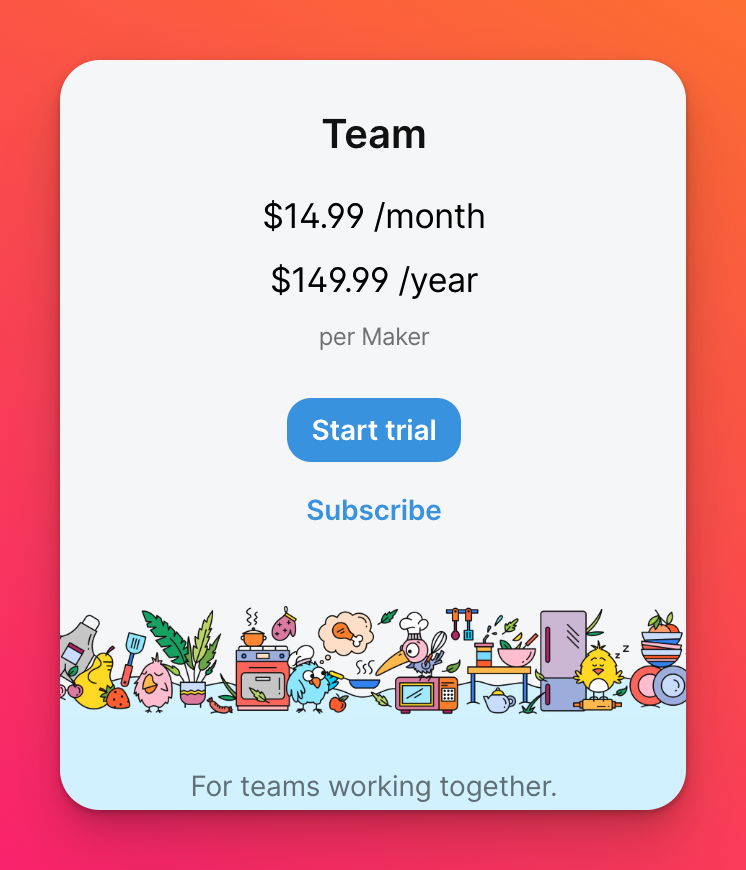
- When you select this button you'll be prompted to choose Start Trial (for a 30-day free version) or Subscribe (to start your subscription right away).

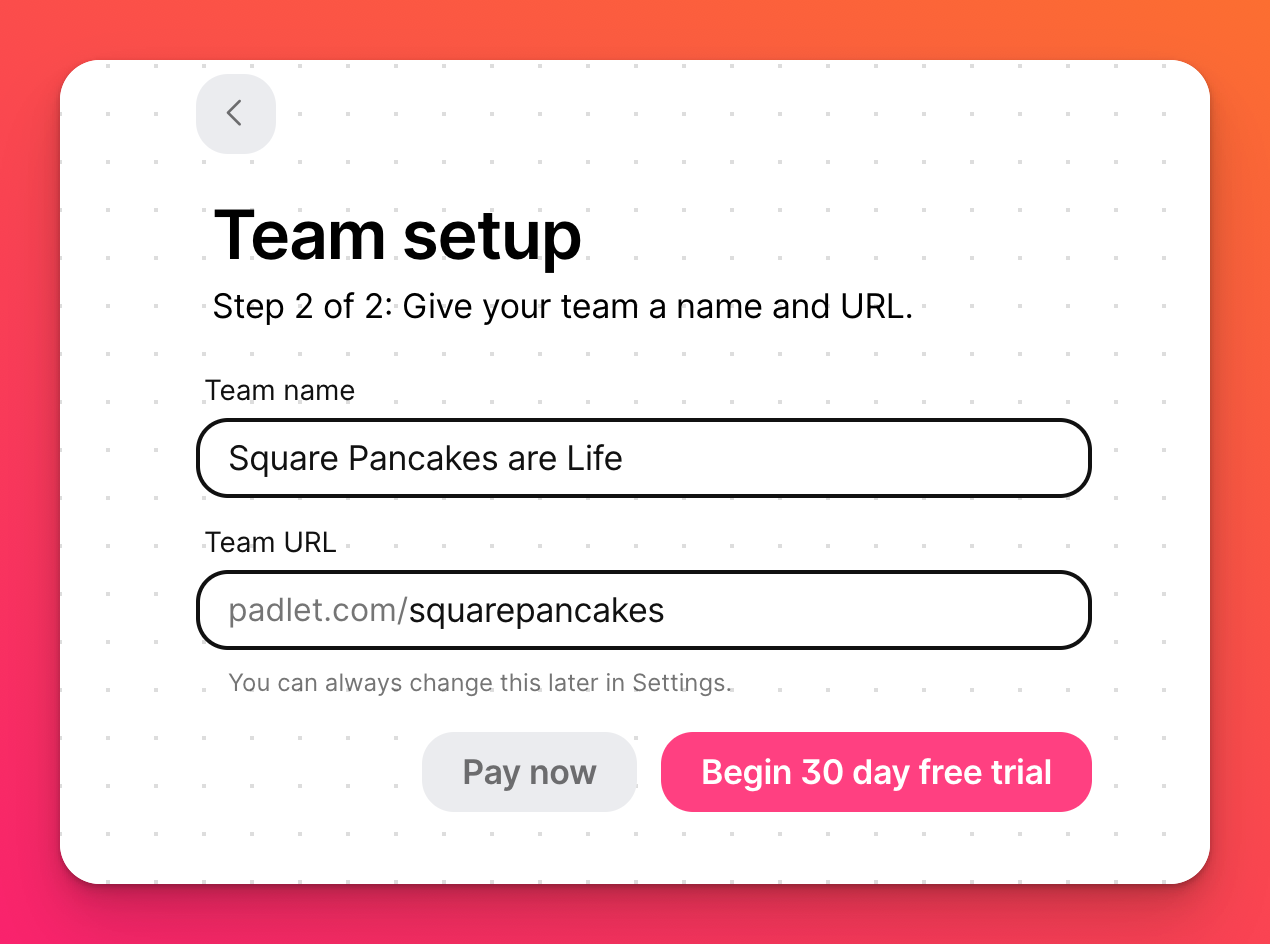
- Once you make your selection, enter a name and URL for your Team. You can choose your own or stick with the Padlet provided name.
- Next, click Pay now or Begin 30 day free trial. Either way, you can get to work on your Team immediately.

Adding members to a team
- From the homepage, click on your account name at the top-right corner of the page > Settings.
- Select Members.
- Click the Invite button on the right side of the page.
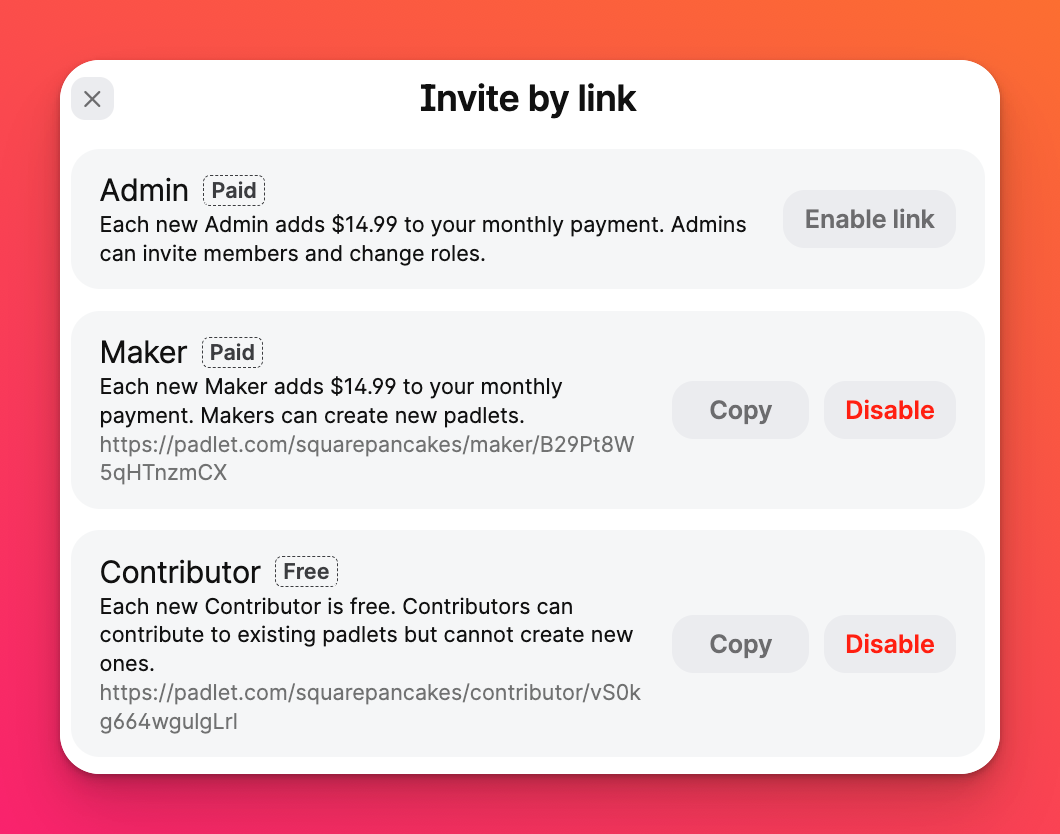
- Enable the invite link for the role(s) you want to add.

- Copy the link and share them with members you wish to add to the Team.
Use the Disable button to revoke an invite link. Create a new link by clicking Enable link after disabling the old one. It's a good idea to Disable the invite links after inviting the intended users to avoid unintended charges to the account.
Here's what the invitees will see when they click the invite link:

Once the member clicks Accept invite, they can access all padlets shared as Team only in the Share panel.
The account Owner and all Administrators can also add more members to a Team at any time. Learn more about Team roles and permissions.

