Schedule a post
Schedule posts to publish themselves at a specific time in the future.
Schedule a post
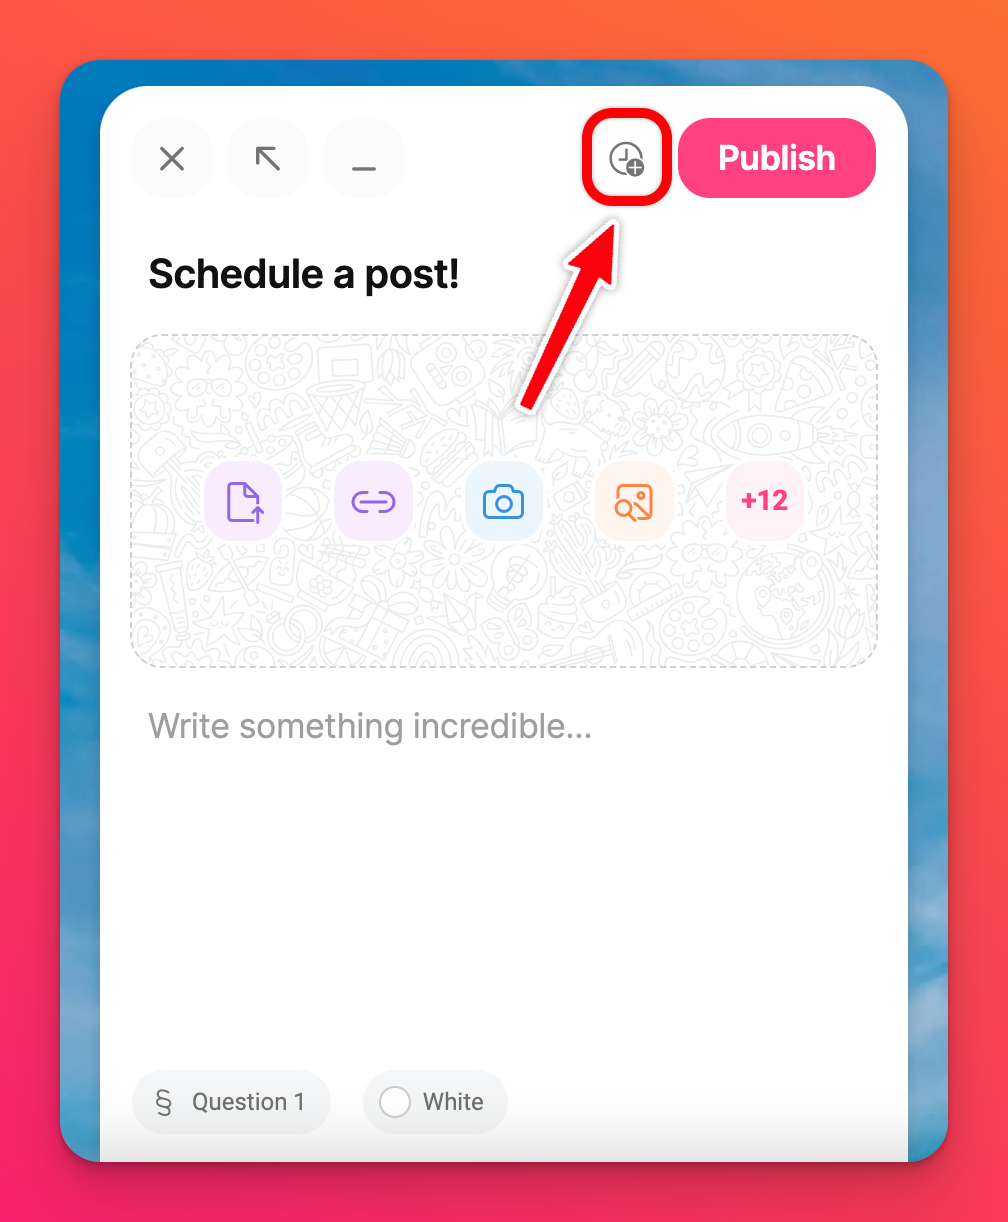
- To schedule a post, select the clock icon in the post composer.
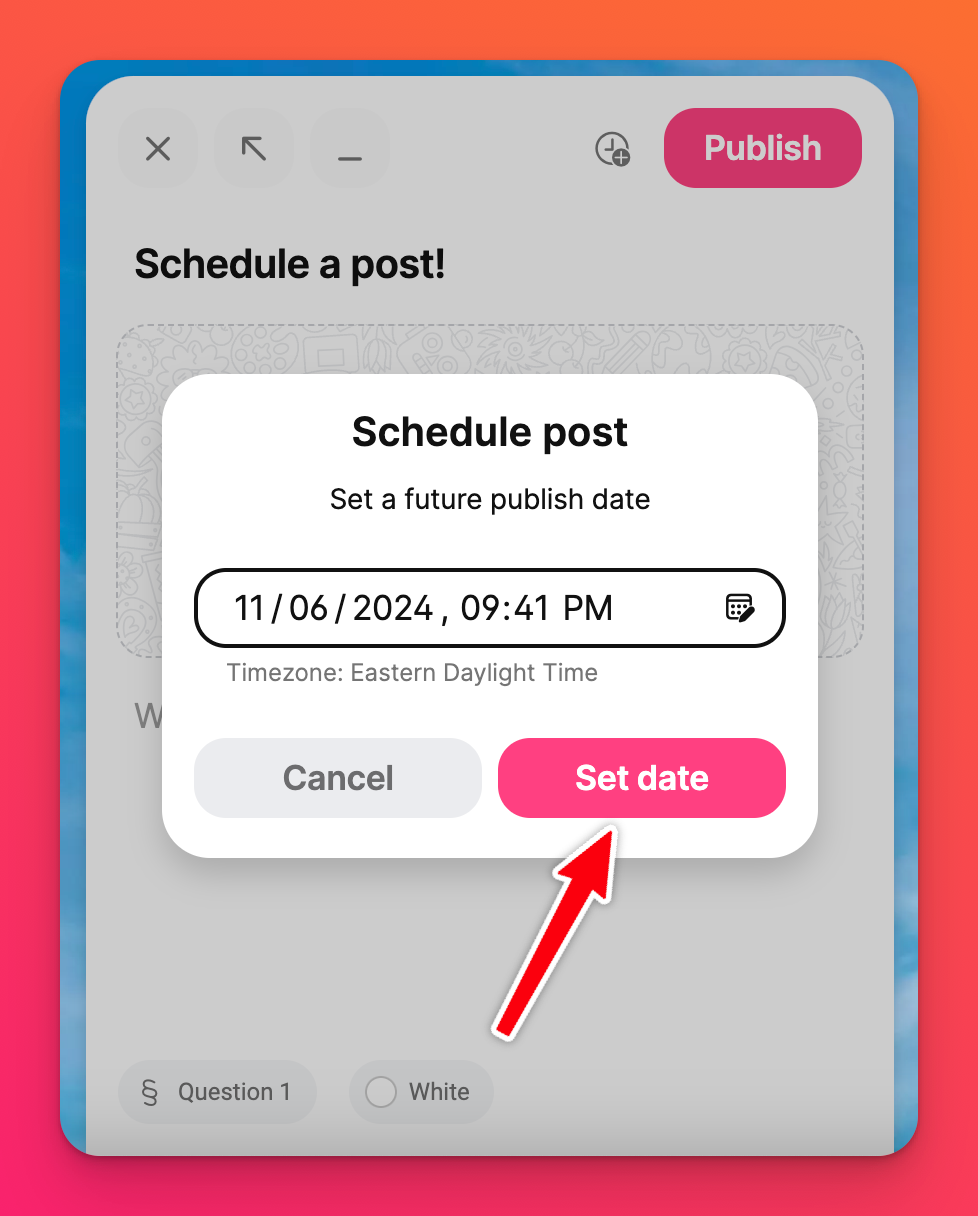
- Set your desired posting time. This can be any time in the next year. Select Set date.
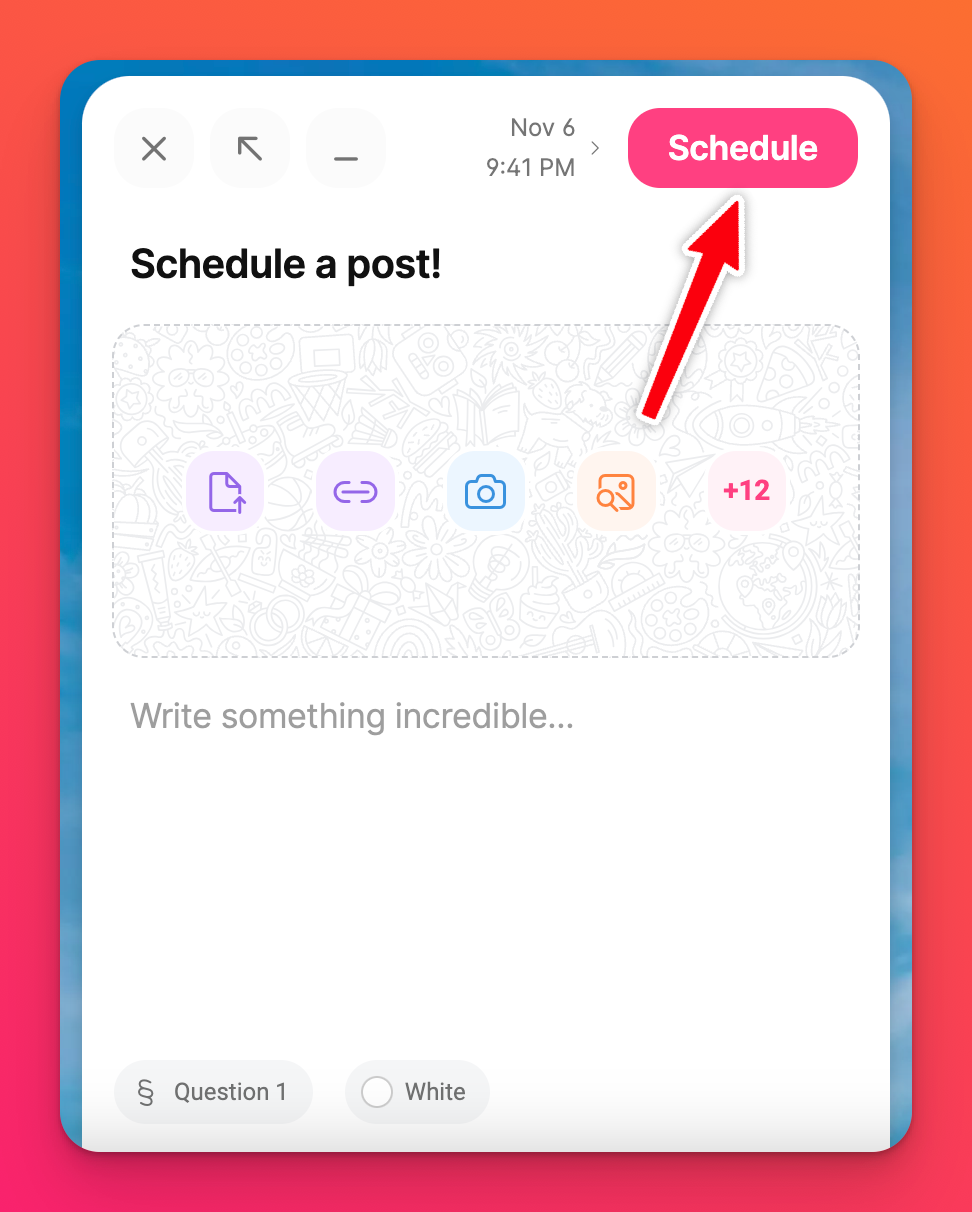
- Select Schedule.
Only registered users with an account can utilize the Schedule posts feature.
You can schedule a post up to one year in the future.
To be sure your posts are scheduled, check to see that they have a clock icon in the header, along with the set date and time. Only the creator and admins of the padlet can see scheduled posts.

Edit a scheduled post
To change the date/time of a scheduled post, follow these steps:
- Click on the vertical three-dot ellipsis button (...) on the right side of the post
- Click Edit post
- Click on the scheduled date and time
- Change the date and time
- Click Update
You can also update the post itself after clicking Edit post.
Cancel a scheduled post
To cancel a scheduled post and post to your padlet now, follow these steps:
- Click on the vertical three-dot ellipsis button (...) on the right side of the post
- Click Edit post
- Click on the scheduled date and time
- Click on the red clock icon
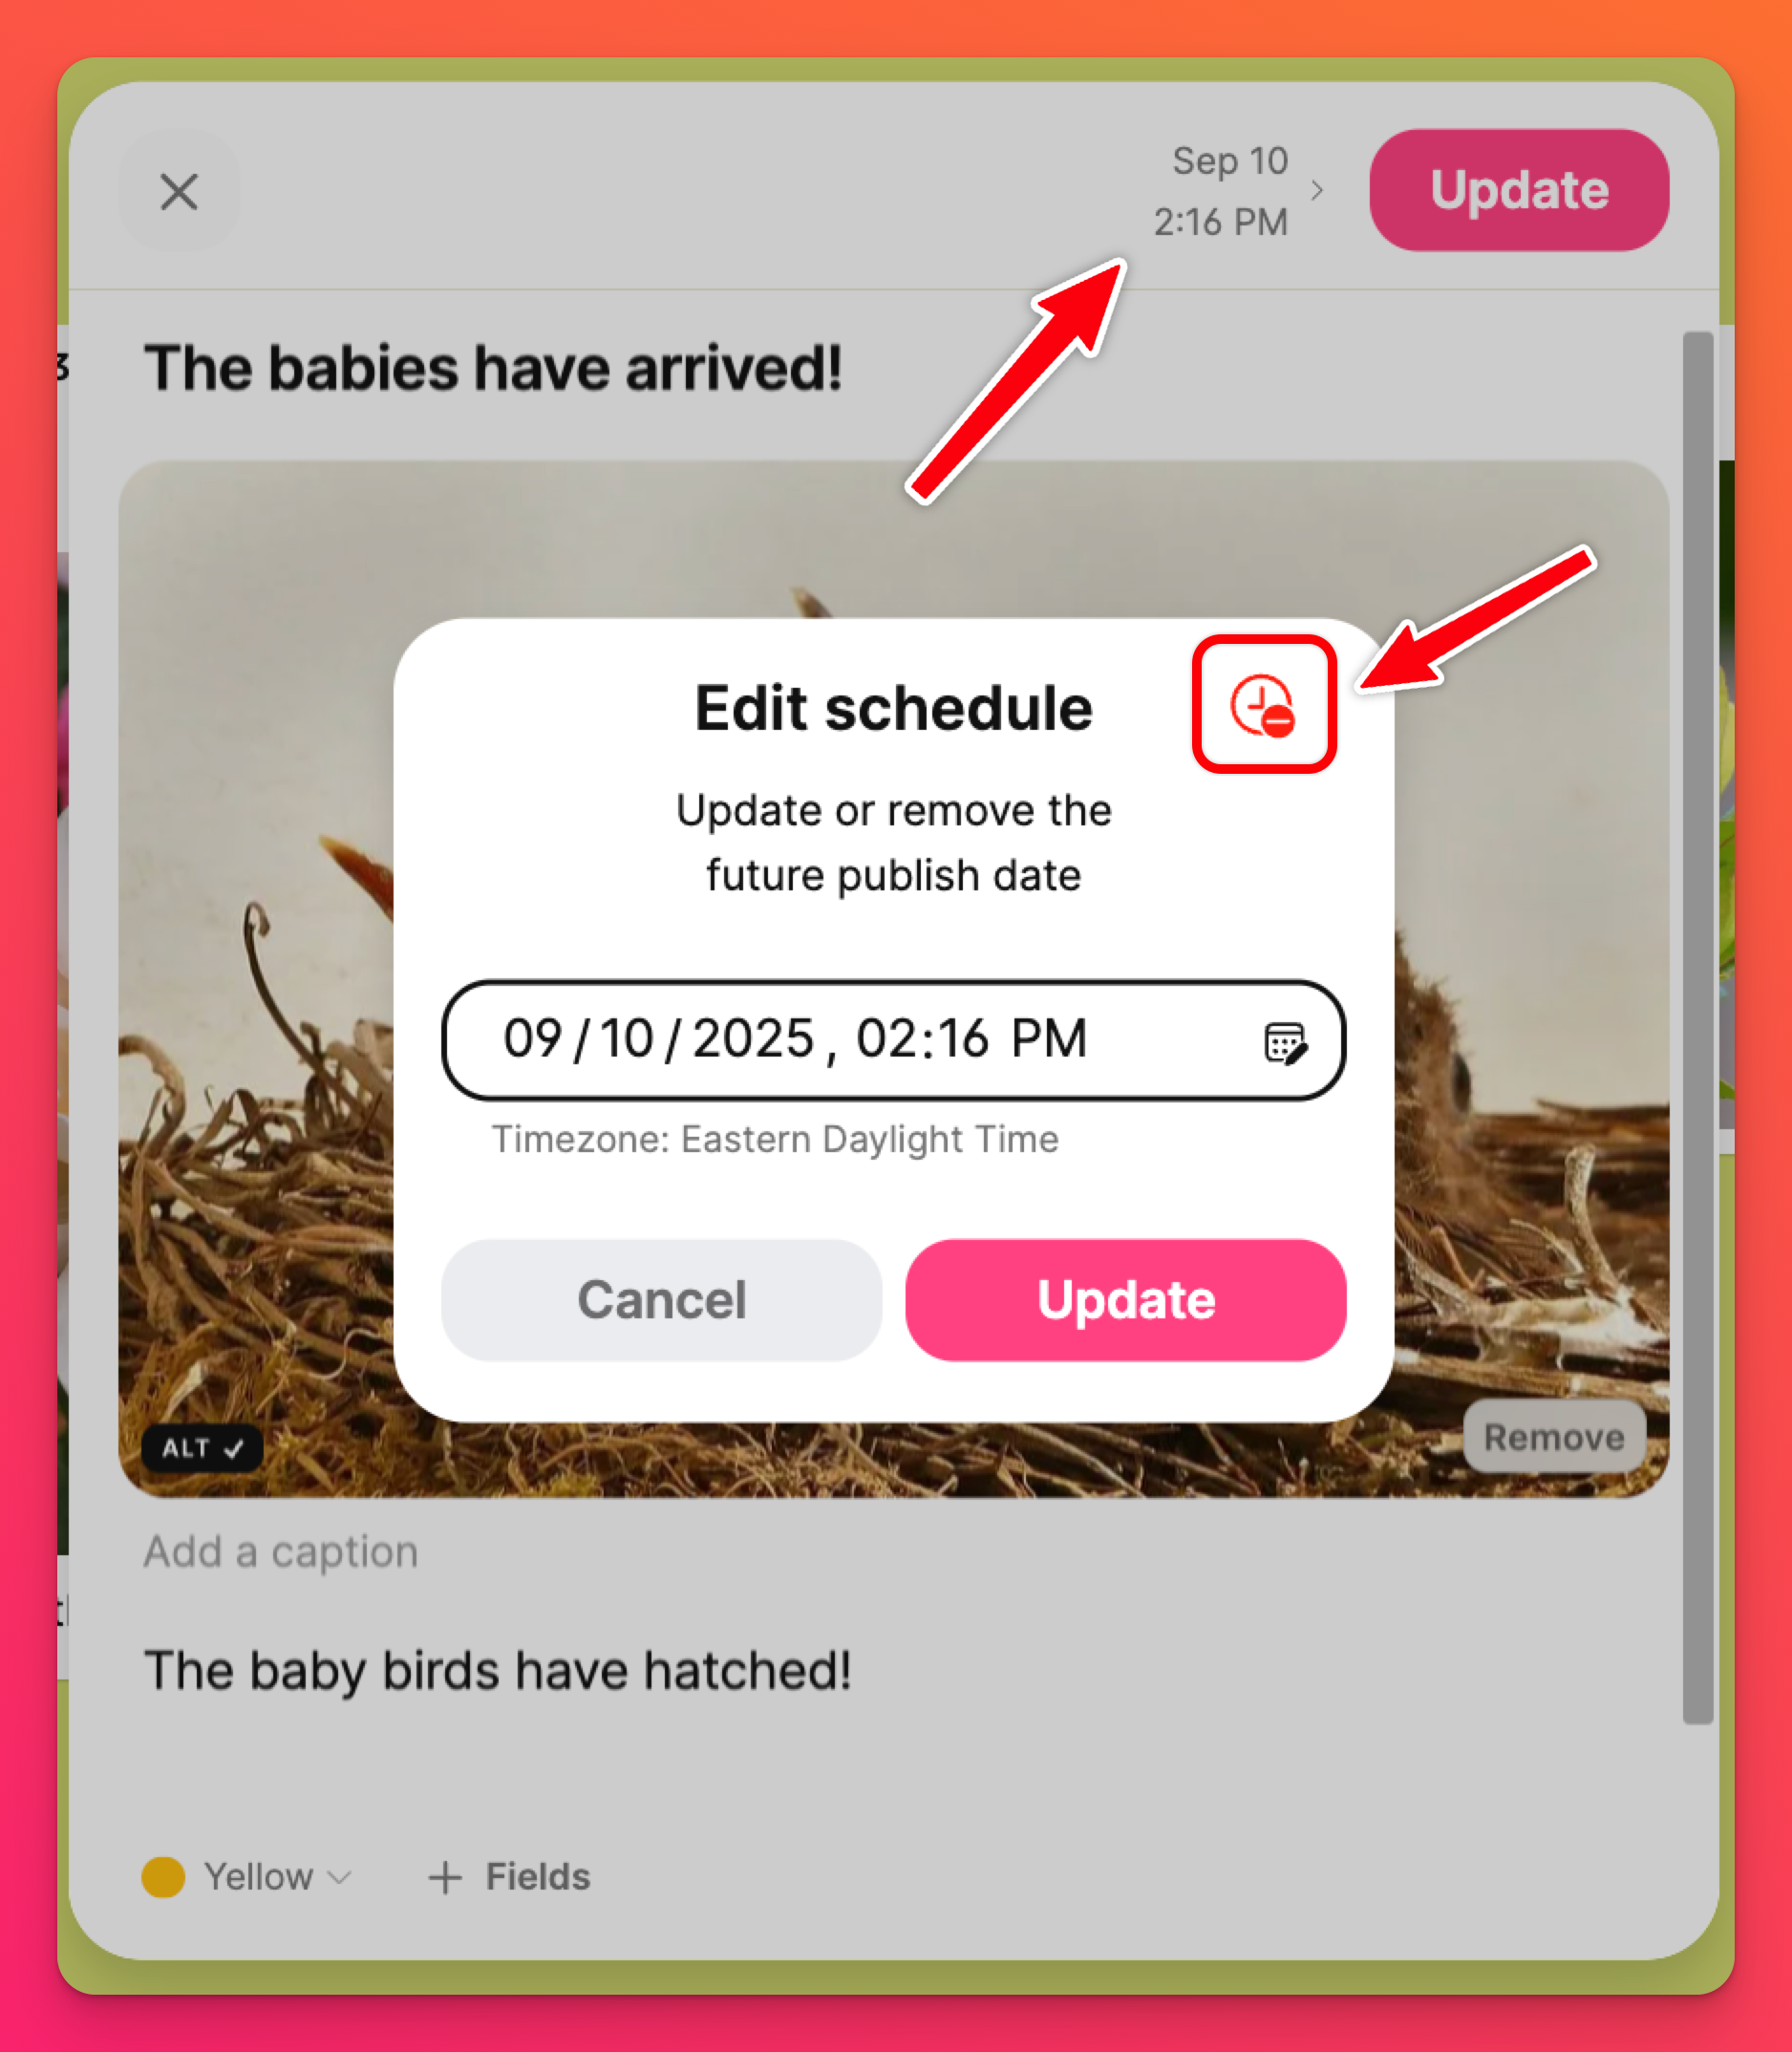
- Click Publish
To complete remove the post before it is scheduled to be published, click the vertical three-dot ellipsis button (...) and select Delete post.

