Connect Padlet to Blackboard LMS (for padlet.com accounts)
 Updated 4 days ago
by
Rana Wilds
Updated 4 days ago
by
Rana Wilds
Setting up LMS integration for Blackboard
This article applies only to accounts that end in padlet.com.
Before you begin
For this integration, different steps apply depending on your role. Admins will complete a one-time setup to connect Padlet and Blackboard, while Teachers will add padlets to their courses once the connection is active.
What you need
Before setting up Padlet with Blackboard, make sure you have the right account type and permissions. These requirements ensure the integration works smoothly from the start.
Role | Requirements |
Admin | - Administrator access in Blackboard - A Padlet for Schools Owner or Teacher account - The Blackboard Admin account must use the same email as the Padlet Owner account |
Teacher | - Access to a course within Blackboard - Access to your school's Padlet for Schools domain (padlet.com) - Admins must have completed setup before you begin |
Once you have the correct access, follow the steps below for your role.
For Admins
Admins handle the one-time setup that connects Padlet to Blackboard through LTI. After this setup, Padlet will appear seamlessly in Blackboard, making it simple for teachers and students to collaborate without leaving the LMS.
- Log into Blackboard as an Admin
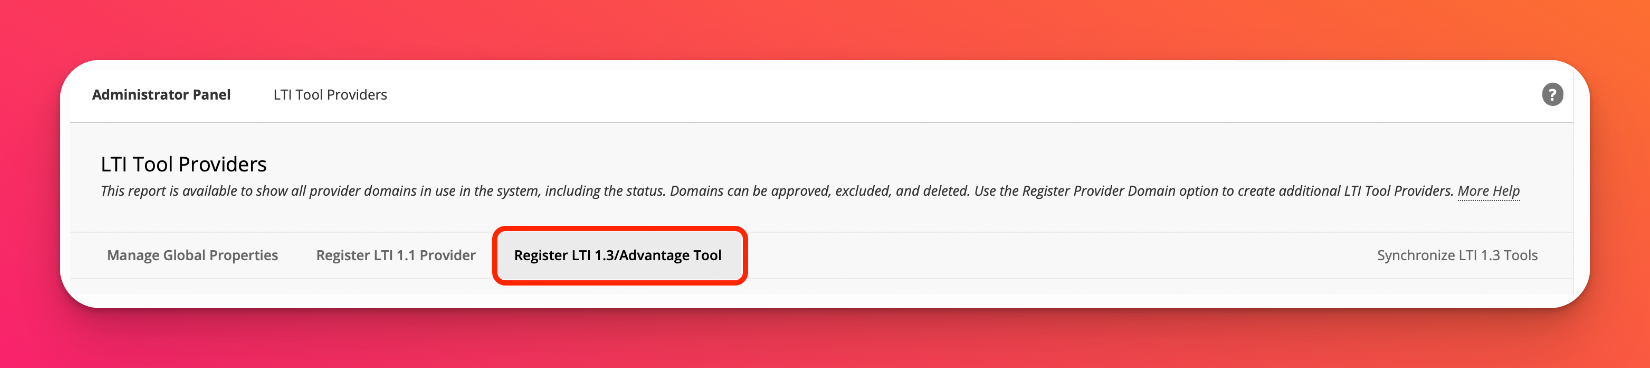
Go to System Admin > Under 'Integrations,' select LTI Tool Providers > choose Register LTI 1.3 / Advantage Tool.
- Register the Padlet LTI Tool
Fill in 49389ab1-7837-4686-ab54-b253f240ca2c as your client ID and click Submit.
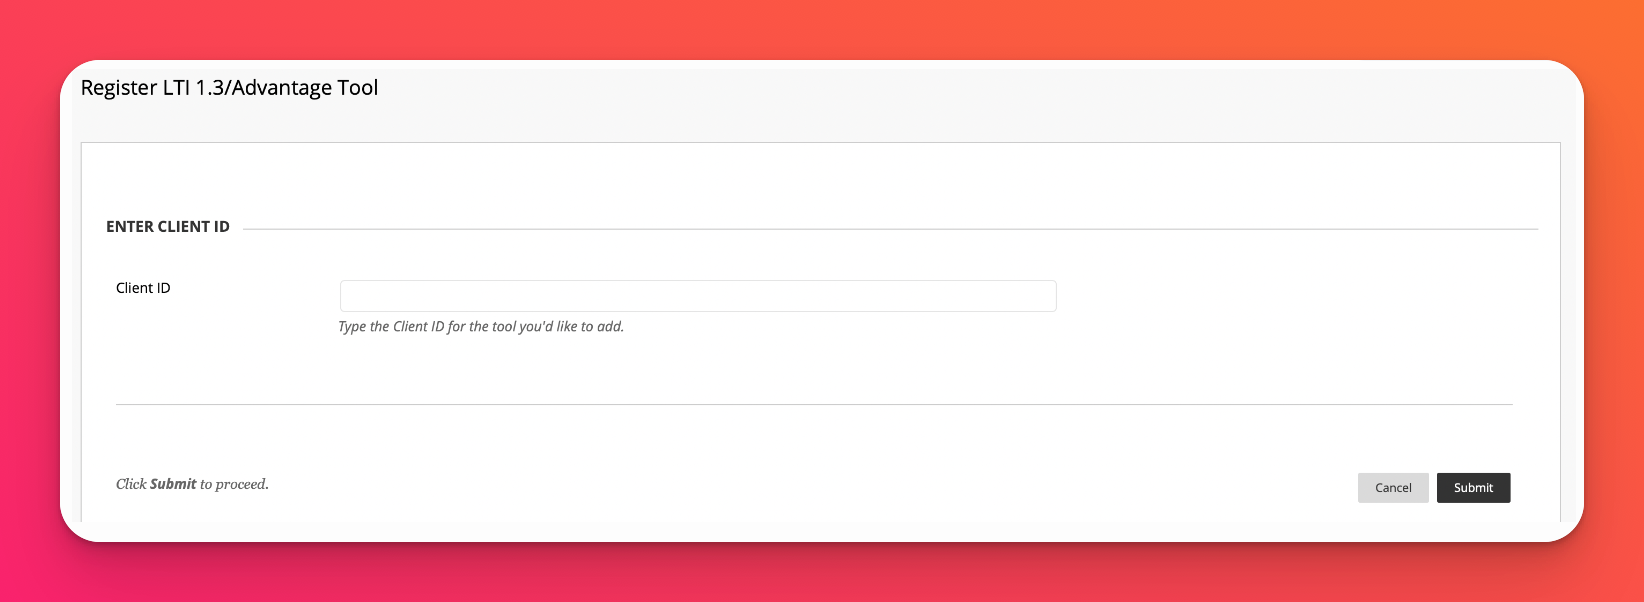
Blackboard will automatically populate the required fields.
Click Submit again to confirm.
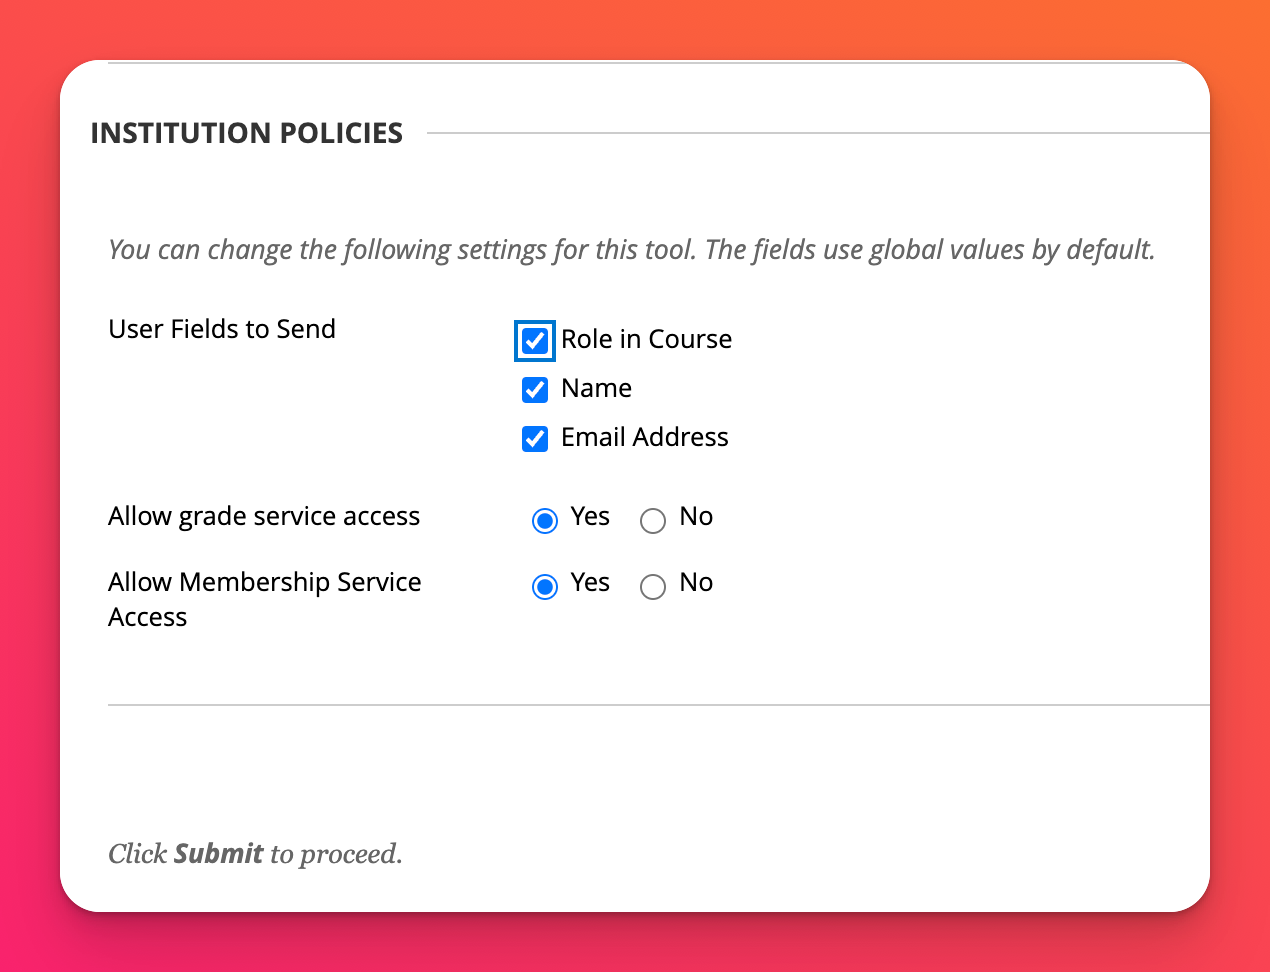
- Configure tool permissions
Check ✔️ Name and Email Address
Grade passback: Select Yes for 'Allow grade service access.'
Role provisioning: Check Role in Course along with Name and Email Address.
User group provisioning: Select Yes for 'Allow membership service access.'
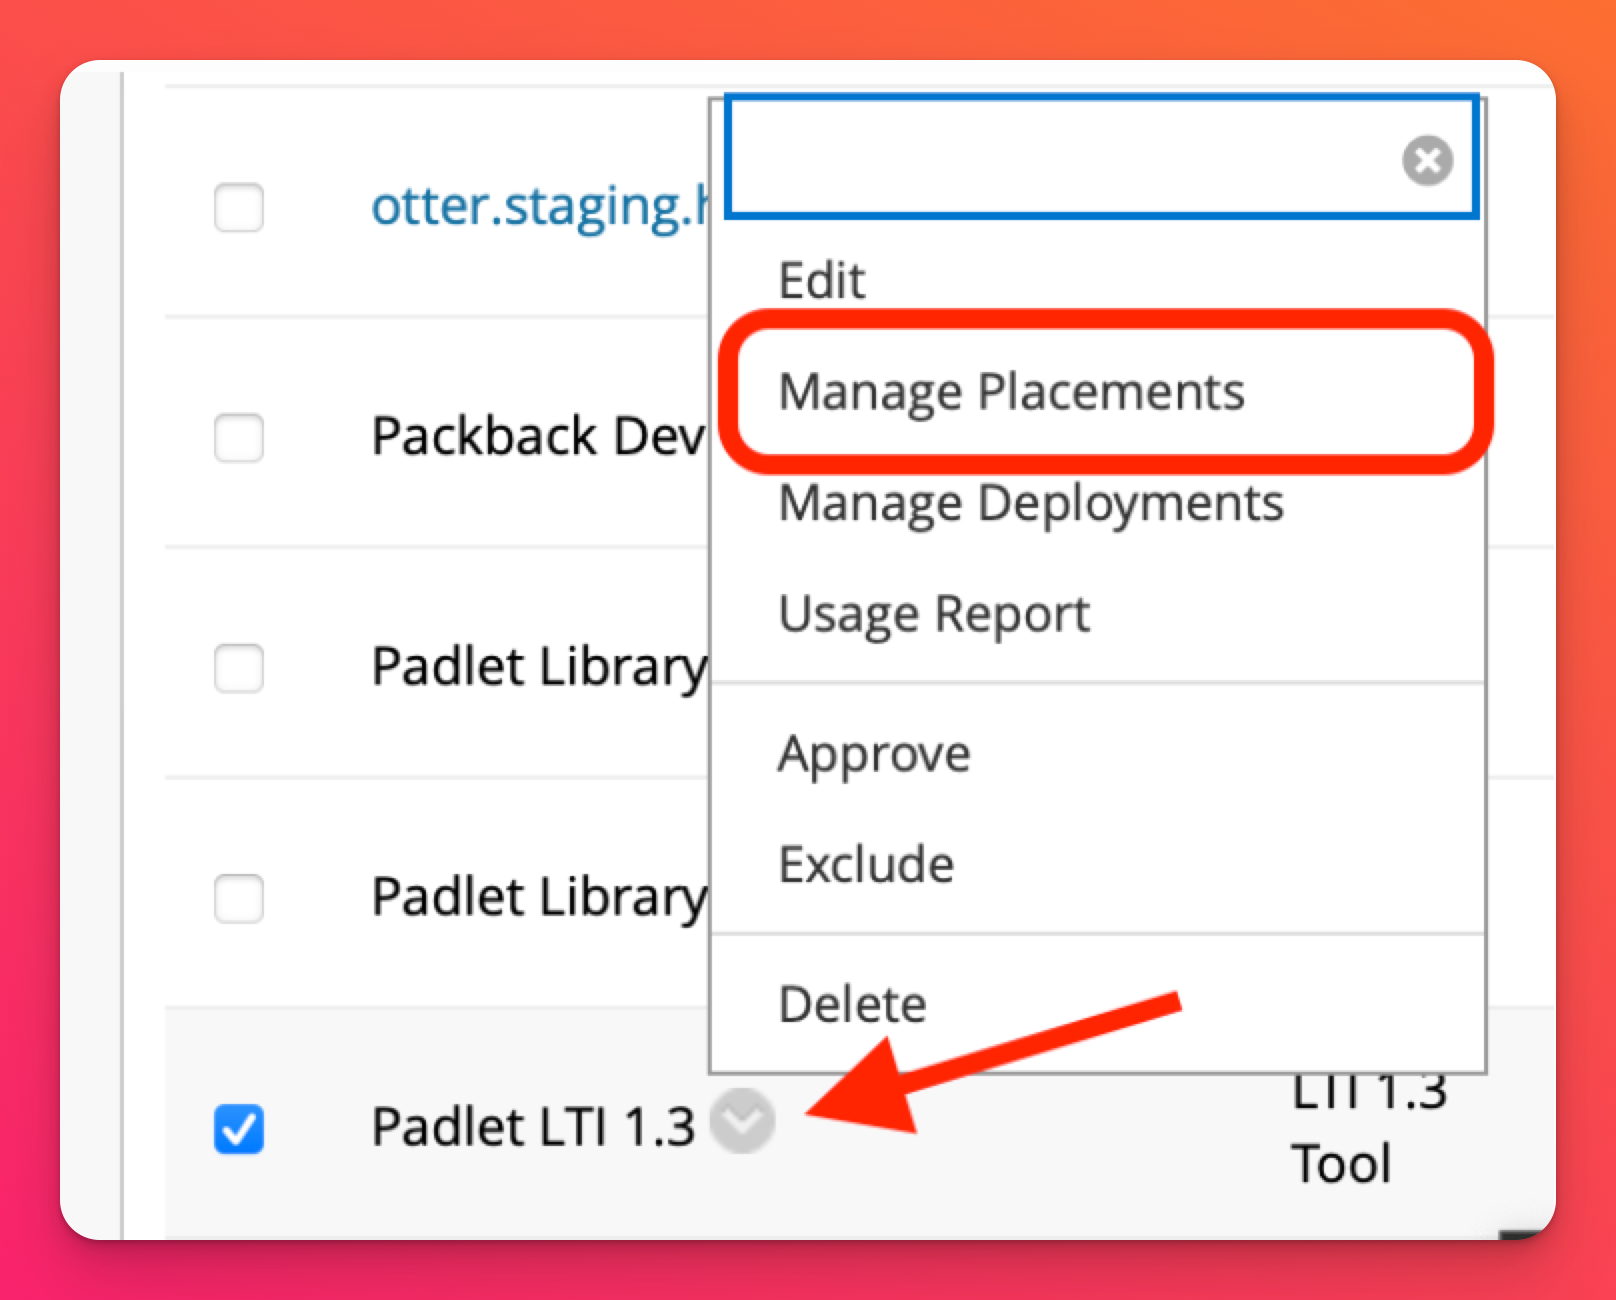
- Manage and Edit Placements
Return to LTI Tool Providers and find Padlet LTI 1.3. Click on the drop-down arrow and select Manage Placements, then Edit.
- Create or Edit a Placement
If not already present, create a new placement with the following details:
Field | What to enter |
Label | Padlet LTI (For user identification purposes) |
Handle | padlet-lti-1p3-tool (For user identification purposes) |
Availability | Yes |
Type | Deep Linking content tool |
Target Link URL | https://padlet.com/api/hooks/library-lti/launch |

Click Submit.
- Generate the Deployment Token
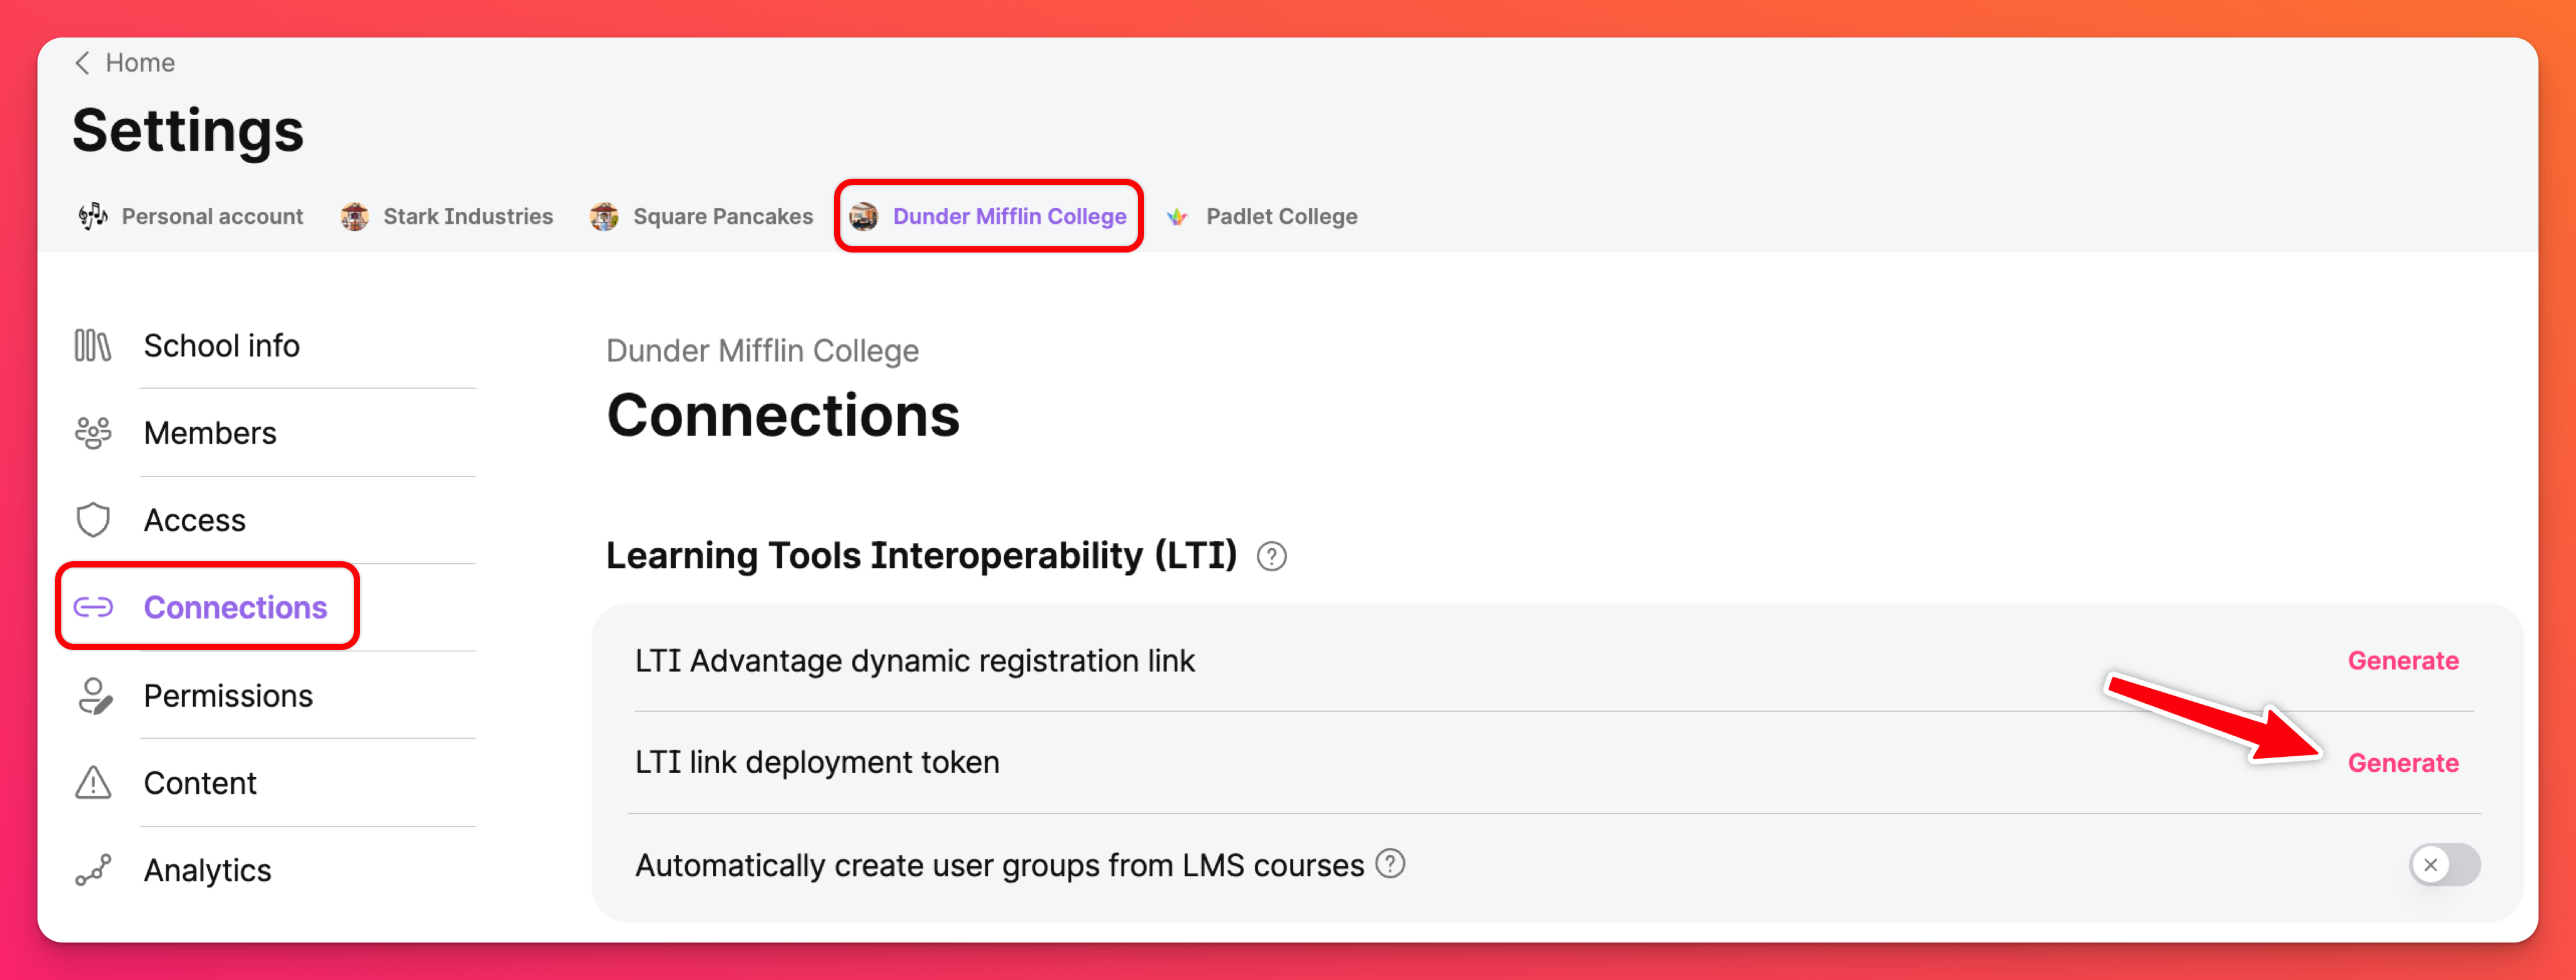
In your Padlet for Schools account, click on the Settings cog icon (in the top-right of the dashboard). Then, click the school account (from the top) > Connections.
Next to 'LTI link deployment token,' click Generate. Copy and paste the token into the 'Token' field in Blackboard when prompted.
Note: This step is only required during the initial setup.
- Verify the integration
Once registered, the Padlet LTI tool will appear in Blackboard's Build Content menu. An automatic email notification is sent to all Admins and Teachers informing them of the new LTI connection.
Teachers can now add padlets directly into their Blackboard courses!
For Teachers
Once your admin has completed the setup, teachers can begin using Padlet directly in Blackboard.
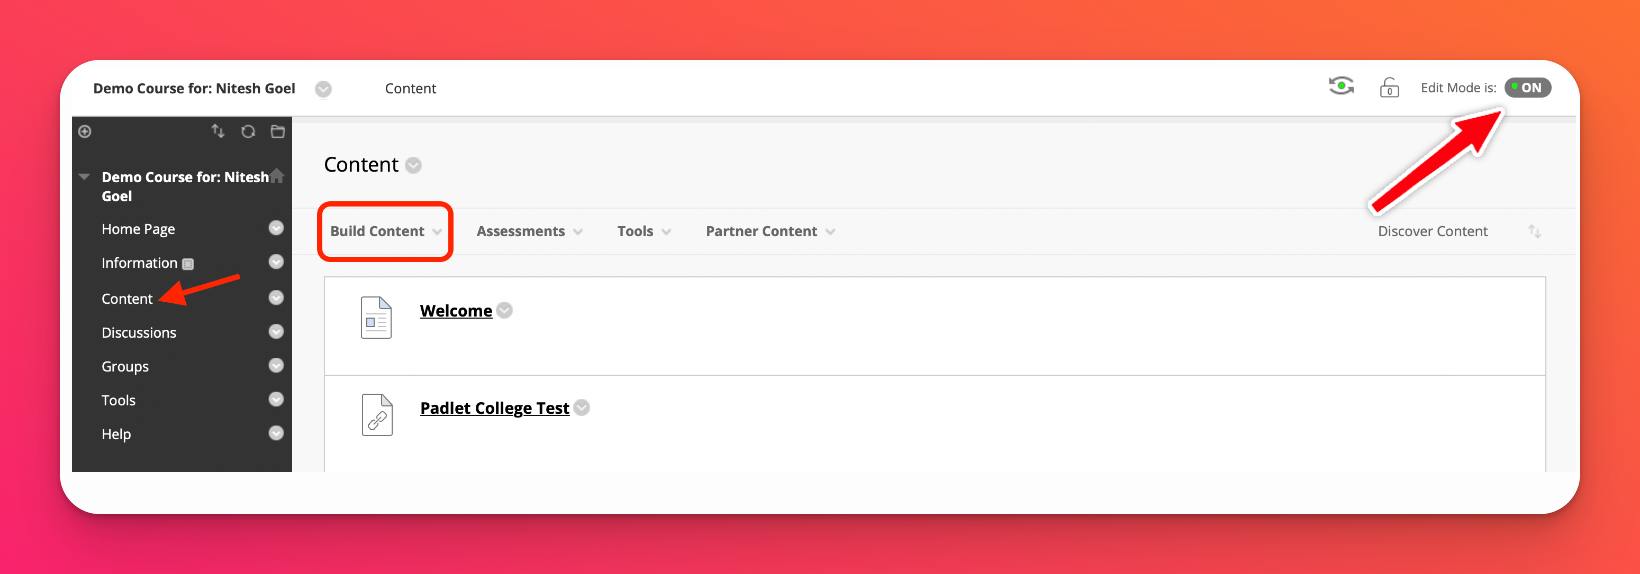
- Open your course
Go to your desired course in Blackboard. Ensure 'Edit Mode' (top-right) is turned ON.
- Add the Padlet Tool
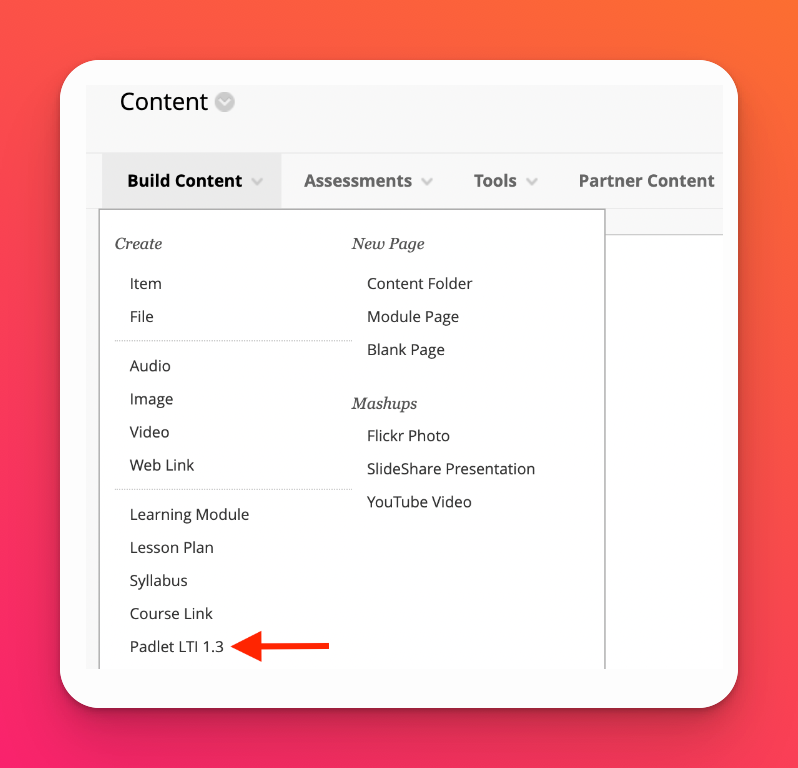
In the menu on the left, select Content > Build Content.
Choose Padlet LTI (or the custom label your admin has set up) and log in with your Padlet for Schools account when prompted.
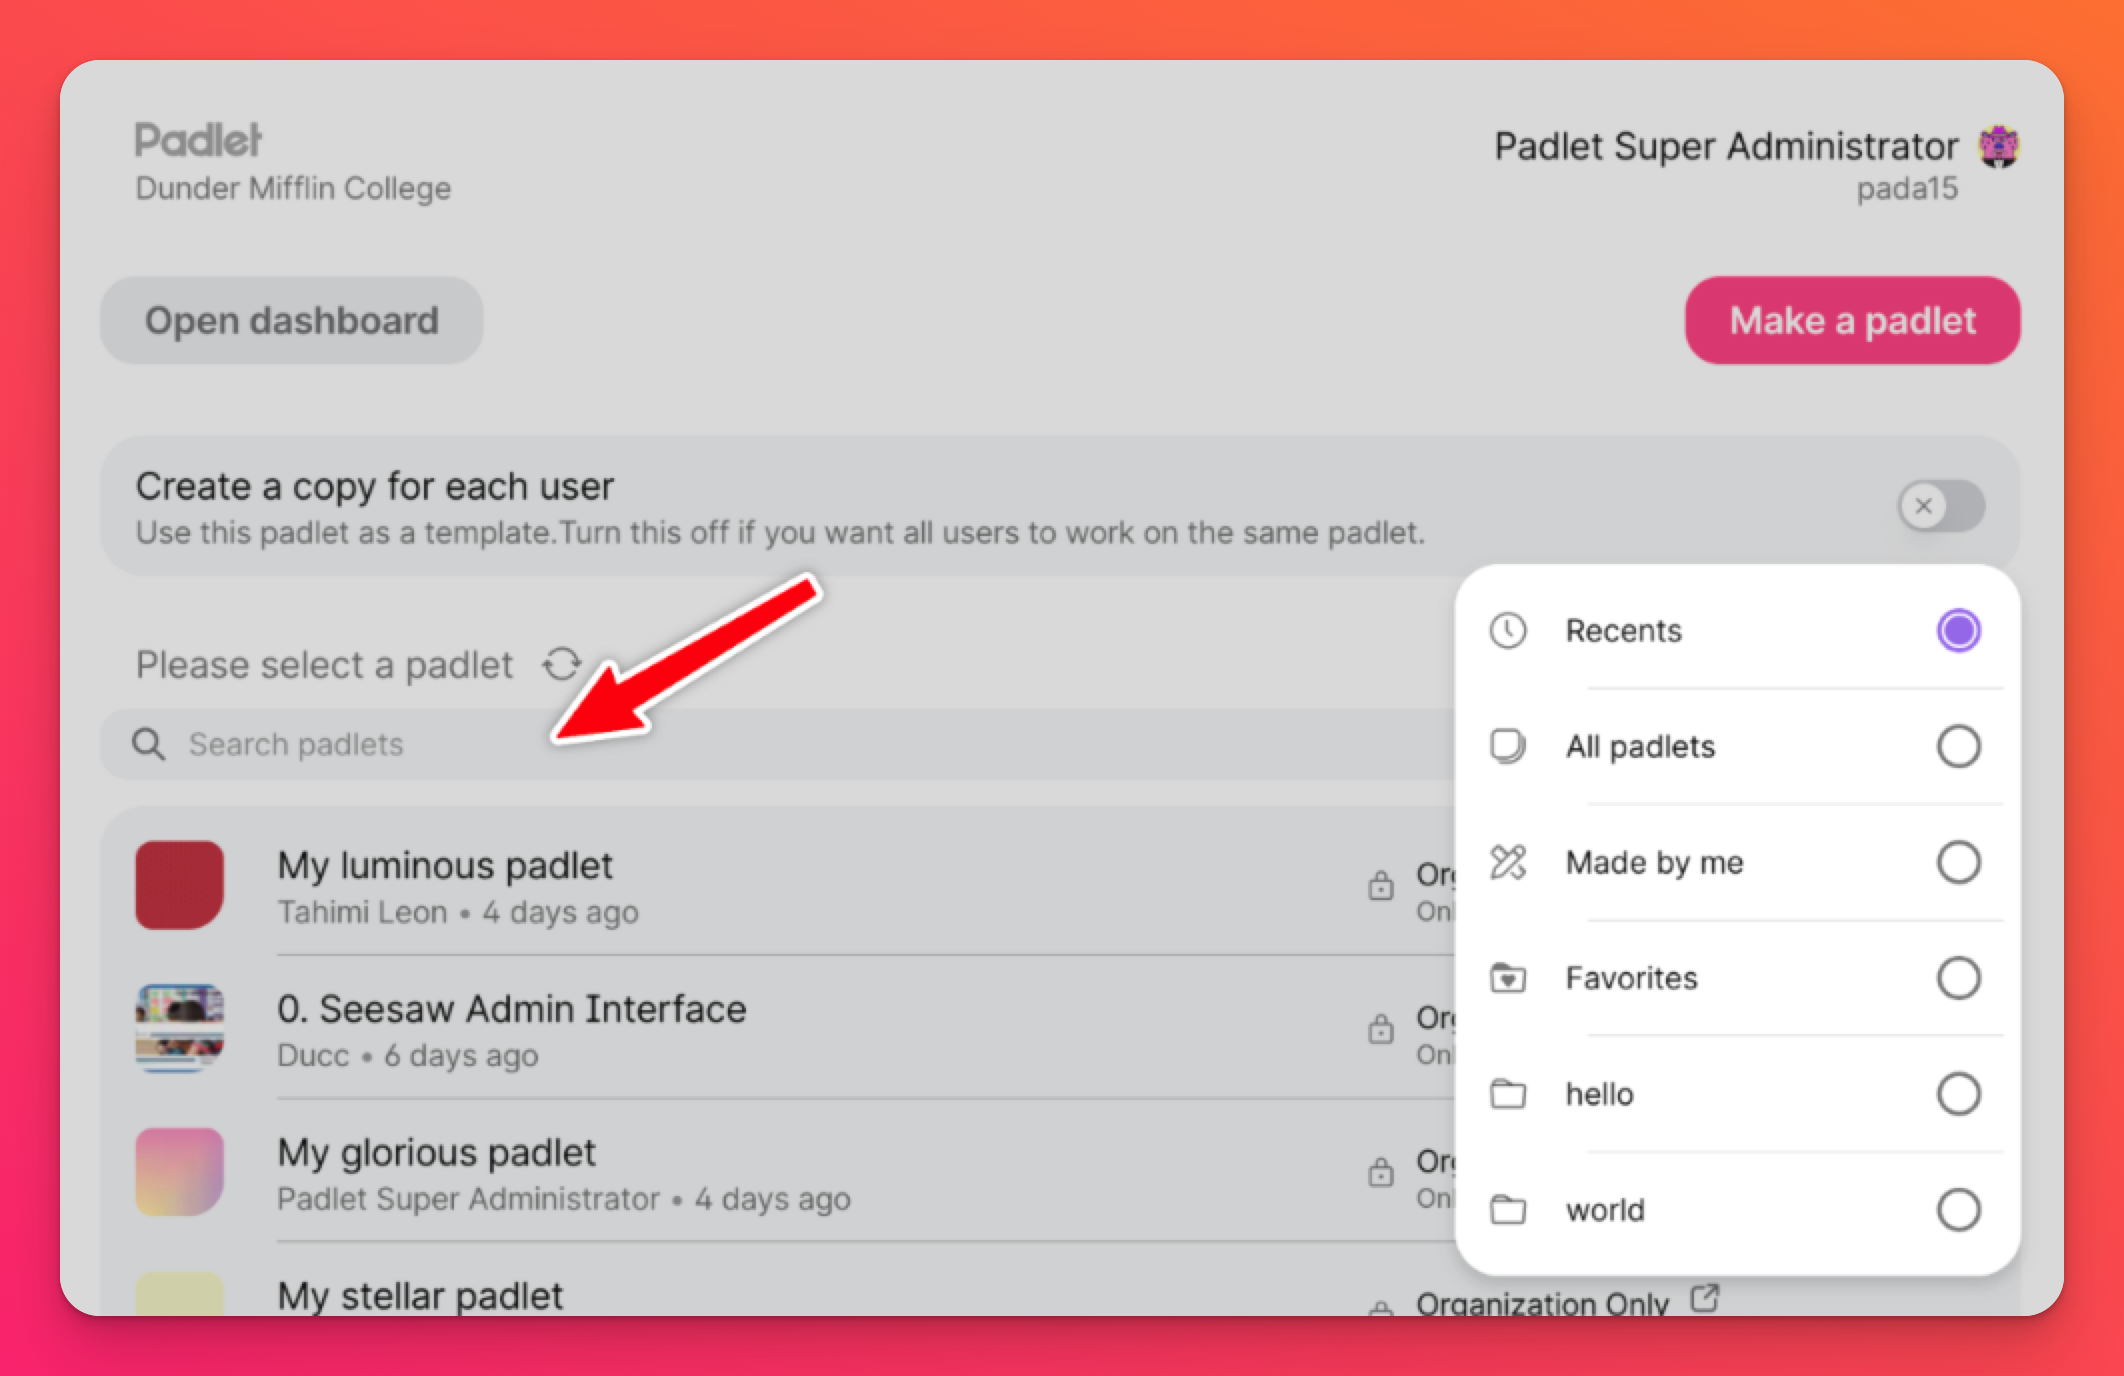
- Choose a padlet
Add a padlet to a course assignment by selecting it from your available padlets. You can use the search bar or filter by folder to find the one you need.
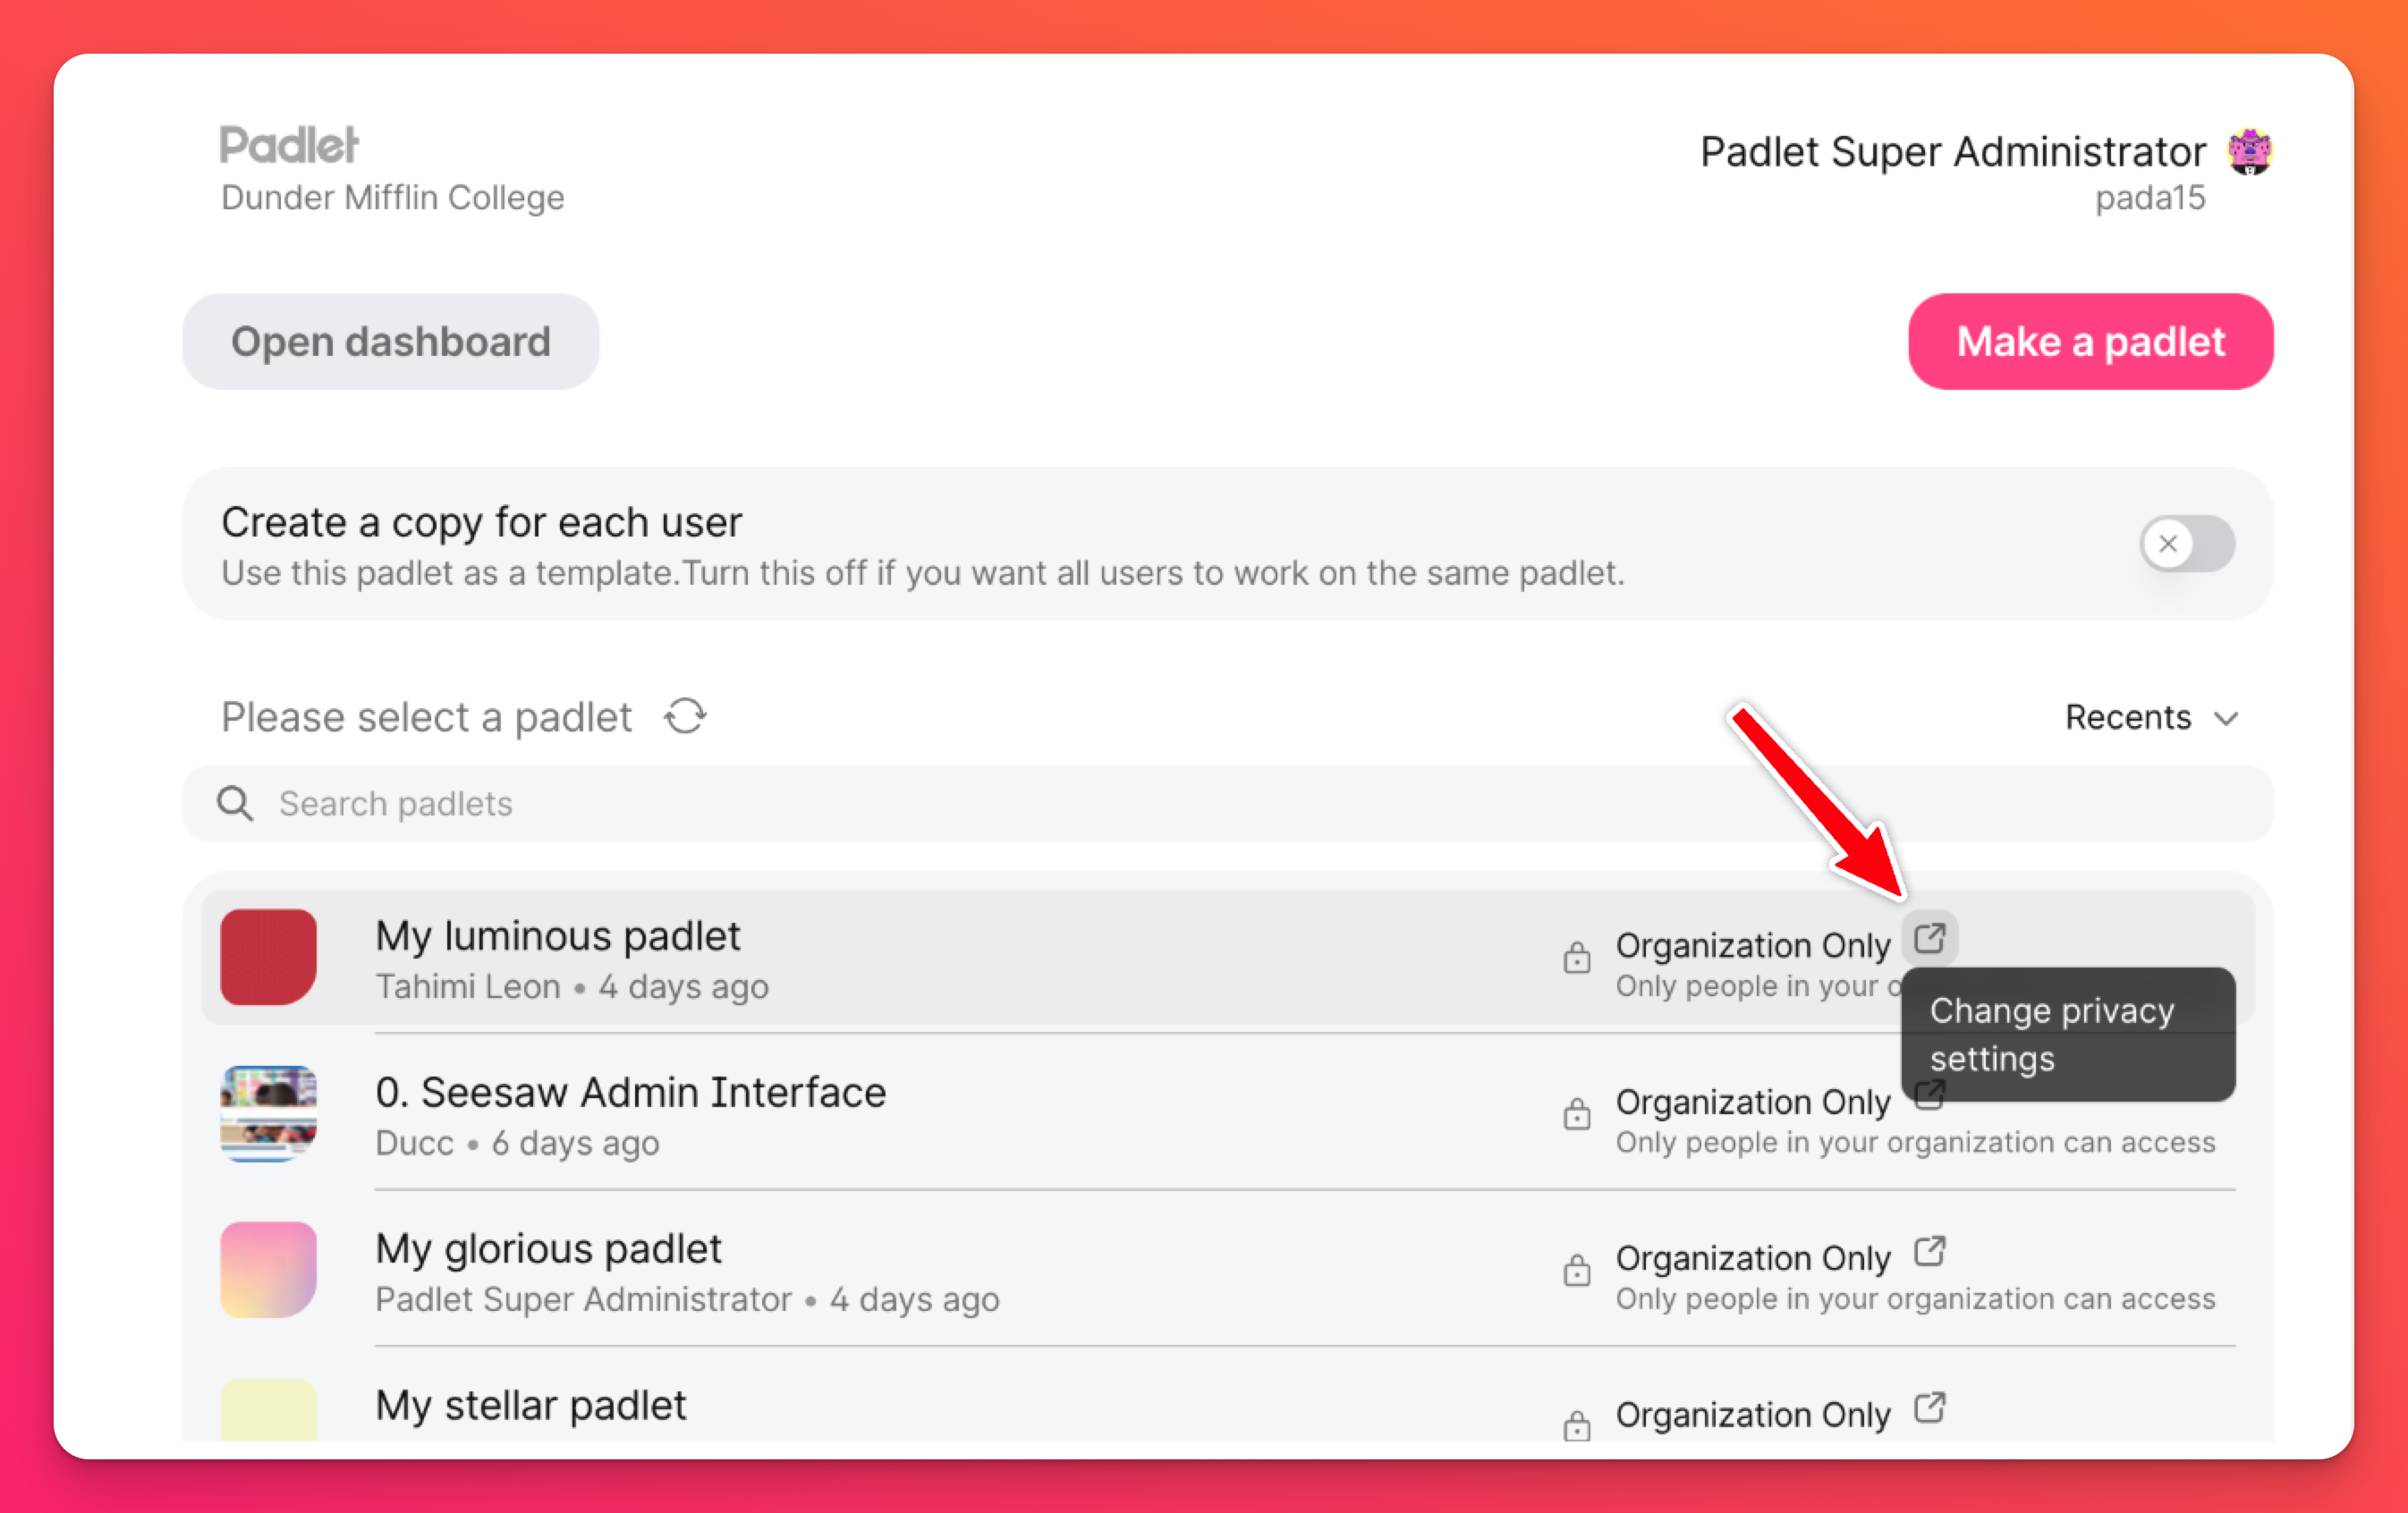
Adjust privacy or sharing options (if needed), by clicking the arrow button to navigate to the padlet, open the Share panel and make your updates.
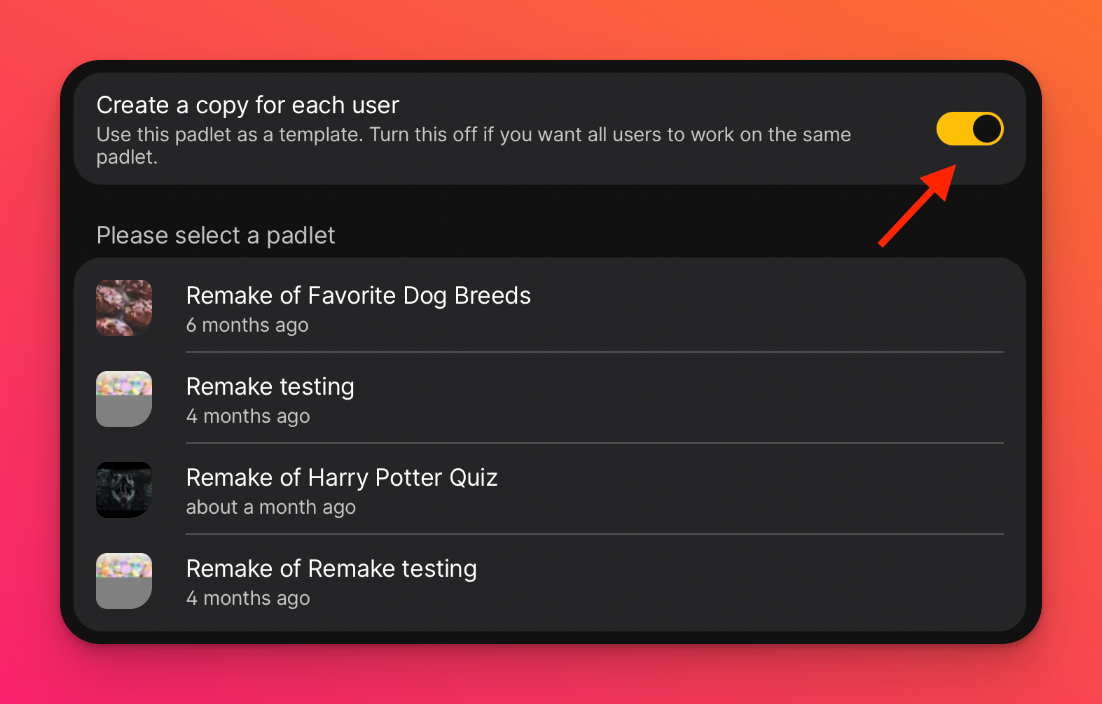
- Configure student copy options (optional)
If you want each student to have their own version of a padlet, toggle 'Create a copy for each user' ON. Each student will get an individual padlet linked to the assignment, and you'll automatically be added as a collaborator.
Save your work. Your padlet is now embedded in Blackboard! Students can access it directly from their course page.
Teachers only need to follow these steps once the admin setup has been completed. If Padlet does not appear as an external tool, contact your Blackboard admin to confirm that the LTI setup and access permissions were completed.
Quick summary
In short:
- Admins (steps 1-7) connect and authorize Padlet in Blackboard (system-level setup)
- Teachers (steps 8-11) use Padlet within courses (course-level usage)
FAQs
Can I add someone else's padlet as an assignment?
How do I troubleshoot if Padlet isn't appearing in the "Build Content" menu?
1. The Admin completed steps 1-7 under 'For Admins'
2. The Placement for Padlet is marked as Available = Yes
3. You're using the correct course view (not a preview mode)
4. Clear your browser cache or switch to Chrome
If the tool still doesn't appear, your Blackboard admin can go to System Admin -> LTI Tool Providers -> Manage Placements to verify.